Tinting on windows can improve privacy and reduce glare, but removing leftover adhesive or residue can be tricky. This guide provides a practical, step-by-step approach to clean tint residue off glass safely using common tools and products. The methods are suitable for vehicles and home windows alike, and emphasize careful scraping, proper solvents, and safe handling.
Readers will find a concise Quick Answer, a complete list of tools, step-by-step instructions, troubleshooting tips, and a buying guide to help select the right supplies for future jobs.
Quick Answer
Start with a gentle solvent to soften residue, then use a plastic or metal scraper to lift it. For stubborn spots, switch to a specialized adhesive remover or window tint remover blade scraper set. Always test a small area first and work slowly to avoid scratching the glass.
What You’ll Need
- Window tint removal blade scraper set
- Glass scraper razor blade window tint remover
- Plastic tint removal scraper for car window
- Adhesive remover for window tint residue spray
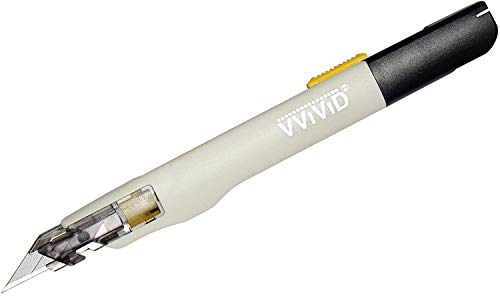
- Multi-function utility knife with replaceable blades for tint removal


Before You Start
Prepare the work area to minimize mess and protect surrounding surfaces. Ventilate the space if using solvents. For vehicle windows, wash the glass lightly to remove loose dirt before starting. Always wear protective gloves and eye protection. Do not rush—let solvents do the work for a few minutes before scraping.
Step-By-Step: How To Clean Tint Residue Off Window
- Identify the residue: Inspect the window to locate sticky sections and test a small spot with a solvent-soaked cloth.
- Apply solvent: Lightly spray or apply adhesive remover for window tint residue spray on the tint edges and residue. Let it sit for 2–5 minutes to soften.
- Choose the right scraper: Use a plastic tint removal scraper for delicate glass or a glass scraper razor blade window tint remover for tougher spots. Start with the plastic tool to minimize scratches.
- Gently lift the edge: Place the scraper at the edge of the residue and hold at a shallow angle. Gently drag the blade away from the glass in smooth strokes.
- Reapply as needed: If adhesive remains, apply more solvent and repeat the lifting process. Do not apply excessive pressure.
- Switch blades if needed: For stubborn residue, switch to a fresh blade from the window tint removal blade scraper set to maintain sharpness.
- Clean and wipe: After lifting, wipe the area with a clean, lint-free cloth. Repeat on all affected areas until clear.
- Final rinse: For vehicle windows, rinse with water and dry with a microfiber towel to avoid streaks.
- Other surfaces: If residue drips onto frames or seals, wipe immediately to prevent buildup or staining.
- Inspect and repeat: Revisit any spot that still looks hazy and repeat the solvent application and scraping with care.
- Seal the area: If you plan to re-tint, ensure the surface is completely dry and free of residue to improve adhesion.
Troubleshooting
| Symptom | Likely Cause | Fix | Prevention |
|---|---|---|---|
| Streaks or hazy glass | Residual film or improper cleaning | Reapply solvent, wipe with a clean cloth, dry thoroughly | Test small area first; use microfiber cloths |
| Scratches on glass | Using dull blades or applying too much pressure | Switch to a sharp blade; use plastic scraper for initial pass | Keep blades clean; use light pressure |
| Residue returns after cleaning | Adhesive is not fully softened | Reapply adhesive remover and wait longer | Work in sections; avoid overheating with solvents |
| Blades sticking or gumming | Residue clogging blade | Clean blade frequently or replace with fresh blade | Keep tools dry and clean |
Common Mistakes
- Using excessive force while scraping, which can scratch glass or damage coatings.
- Skipping the test patch and applying solvents indiscriminately.
- Choosing the wrong tool for delicate areas near edges or seals.
- Waiting too long to wipe away solvent, causing drips and staining.
Tips For Best Results
- Work in shaded, cool conditions to prevent solvents from evaporating too quickly.
- Use a soft microfiber cloth for final wiping to avoid lint and streaks.
- Keep a spray bottle of water handy to dilute solvent if needed and prevent over-softening.
- Place protective tape along edges to guard seals and framing during scraping.
- Store blades in a safe container and replace them after every few uses to maintain sharpness.
Call A Professional
Consider professional help if window tint removal involves laminated or privacy glass with special coatings, or if residue is embedded in heat-reject coatings. Stop and consult a pro if you notice pitting, bubbling, or any damage to the glass surface.
FAQ
What is the safest tool for first pass on window tint residue?
A plastic tint removal scraper for car window is typically safest for initial passes to minimize risk of scratching.
Can adhesive remover damage window seals or coatings?
Most spray removers are formulated to be safe on glass, but always test a hidden area and follow label directions to avoid damage.
How long should I wait after applying solvent?
Allow 2–5 minutes for the residue to soften before scraping, and reapply if needed for stubborn spots.
Is it necessary to dry the window after cleaning?
Yes, drying with a microfiber cloth prevents streaks and prepares the surface for any re-tinting or sealing.
What if residue returns after cleaning?
Reapply solvent and repeat the process in smaller sections to ensure complete removal.
Buying Guide
Choosing the right tools for tint residue removal depends on window type, coating, and the level of residue. Consider the following factors to select effective equipment and solvents.
- Size and type of window: Vehicles, home windows, and glass doors may need different blade types and scrapers.
- Noise level and ease of use: Manual scrapers are quiet and straightforward, while more robust tools may require extra caution.
- Energy and solvent efficiency: Moderate-duty adhesive removers balance effectiveness with safety for most glass surfaces.
- Controls and ergonomics: Comfortable handles and replaceable blades reduce fatigue on large jobs.
- Placement and access: Narrow gaps may require slim scrapers and angled blades to reach edges without damage.
- Compatibility with coatings: Check that solvents and blades are safe for the specific glass coatings to avoid dulling or etching.
- Maintenance: Keep blades sharp, clean, and dry; replace dull blades promptly to maintain performance.
When evaluating options, compare products like a window tint removal blade scraper set versus a glass scraper razor blade window tint remover, and choose a plastic tint removal scraper for delicate surfaces. A multi-function utility knife with replaceable blades for tint removal can be a versatile addition for tough spots. The right combination improves efficiency and reduces the risk of damage, helping both DIY enthusiasts and professionals achieve clean, clear glass.