Tarnished chrome can lose its shine and look dull or hazy. This guide provides practical, step-by-step methods using common chrome care products to restore bright, reflective finishes on household fixtures, wheels, and trim. Readers will learn technique, safe practices, and when to seek professional help.
Quick Answer
For quick results, start with a dedicated chrome polishing kit with buffing wheels or a chrome cleaner and polish paste. If heavy rust is present, apply a chrome rust remover spray first, then finish with polish. Always test a small area first and work with gentle pressure to avoid scratching.
What You’ll Need
- Chrome polishing kit with buffing wheels microfiber cloth
- Chrome cleaner and polish paste 4 oz
- Chrome rust remover spray 12 oz
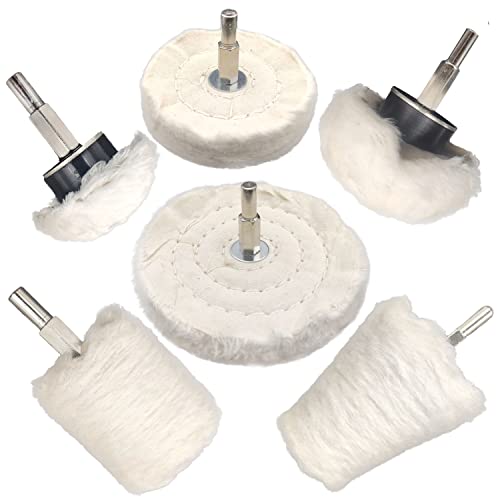
- Electric drill polishing kit for chrome with felt wheels
- Chrome wheel polishing kit with hex pad and compound

Before You Start
Prepare the workspace with good ventilation and lay down a protective cover to catch runoff. Wet the surface with water to reduce friction and prevent heat buildup. Read manufacturer instructions for each product and avoid mixing cleaners. Wear safety glasses and gloves, and keep pets and children away.
Time estimate: 45–90 minutes for one surface, depending on tarnish severity. For larger jobs such as wheels or trim, plan for extended sessions and periodic breaks to avoid heat damage to tools.
Step-By-Step: How To Restore Shiny Chrome
- Remove loose dust with a microfiber cloth to avoid grinding grit into the chrome.
- Apply a light coat of chrome cleaner and polish paste to a soft applicator and rub in small circular motions, following the grain of the chrome where visible.
- For stubborn tarnish, use the chrome polishing kit with buffing wheels on a low-speed setting; let the buffing wheel work the paste into the surface.
- If rust is present, spray a small amount of chrome rust remover spray and let it dwell according to the product instructions before buffing.
- Switch to a clean microfiber cloth to wipe away residue, checking for dull patches that may need a second pass.
- For vehicle wheels or tight crevices, attach a chrome wheel polishing kit with hex pad and compound and work in gradual, even strokes.
- Rinse with water or wipe with a damp cloth to remove any remaining cleaner, then dry with a separate microfiber towel to prevent water spots.
- Finish with a final polish using the buffing wheel or a soft cloth to restore high gloss, then seal with a chrome-safe wax or sealant if available.
Troubleshooting
| Symptom | Likely Cause | Fix | Prevention |
|---|---|---|---|
| Dull finish persists after polishing | Insufficient cleaner or overworked area | Reapply cleaner and repeat with lighter pressure | Work in small sections; don’t overheat the surface |
| Scratches appear | Grit embedded in cloth or pad | Switch to clean pad or microfiber, re-wipe | Use fresh towels/pads for each pass |
| Rust returns quickly | Underlying corrosion or improper sealing | Apply rust remover thoroughly, then seal | Regular maintenance and applying protective coatings |
| Streaky finish | Residue left from cleaner | Rinse thoroughly and buff dry | Finish with a final wipe using a dry microfiber |
Common Mistakes
- Using harsh abrasives that scratch chrome finishes
- Skipping a test patch on an inconspicuous area
- Over-wetting polished surfaces, causing streaks
- Neglecting to dry thoroughly after cleaning
- Using incompatible cleaners that strip protective coatings
Tips For Best Results
- Work in a shaded area to prevent rapid evaporation of cleaners and to avoid heat buildup.
- Always follow product instructions and test on a small area first.
- Maintain a consistent motion—steadier pressure yields more uniform shine.
- Use the electric drill polishing kit for chrome with felt wheels on curved surfaces to reach tight spots.
- After cleaning, consider a light protective sealant to reduce future tarnish.
Call A Professional
Consider professional help if chrome has deep pitting, heavy rust that penetrates the metal, or if the surface is part of critical safety equipment. Seek a pro when multiple areas differ in tone or if DIY methods fail to restore uniform shine.
FAQ
What is the best method for removing heavy chrome rust?
Use a dedicated chrome rust remover spray following the product directions, then finish with polishing to restore shine.
Can I use household cleaners on chrome?
Most household cleaners are too harsh; stick to dedicated chrome cleaners and polishes or kit components designed for chrome care.
Is it safe to use an electric drill for chrome polishing?
Yes, with caution and the correct felt wheels and low speed to avoid heat buildup and gouging.
How often should chrome be polished?
For high-use items, polishing every 1–3 months helps maintain luster; less frequent on decorative pieces.
Can I mix products?
Avoid mixing cleaners; combine products only as directed by their manufacturers to prevent chemical reactions.
Do I need to seal chrome after polishing?
A protective sealant or wax can help reduce tarnish and make future cleaning easier.
Will tarnish return after cleaning?
Exposure to moisture, humidity, and minerals can cause tarnish to recur; regular maintenance helps sustain shine.
Buying Guide
When choosing chrome cleaning and polishing products, consider size, ease of use, and compatibility with your chrome surface. Key buying factors include:
- Size and coverage: Larger bottles or kits offer better value for extensive projects, while smaller pastes are convenient for spot cleaning.
- Noise level and ease of use: Hand applications are quiet and simple; powered polishing kits save time but require caution.
- Energy efficiency: For powered tools, look for energy-efficient motors and variable speed controls to minimize heat.
- Controls and ergonomics: Comfortable handles, clear instructions, and safety features help reduce user fatigue.
- Placement and storage: Store in a dry, cool area away from direct sunlight; organize tools for quick access.
When comparing options, assess the combination of a cleaning paste, polishing wheels, and protective finishes as a complete solution. For larger projects such as wheels or trim, a dedicated polishing kit with felt wheels can yield the best results.