Stamp pads are essential tools for crafters, teachers, and hobbyists who rely on clear, consistent ink. Proper cleaning extends the life of rubber stamps and maintains vibrant colors. This guide provides practical, step-by-step methods tailored for common stamp pad types and workloads, using readily available cleaning products.
Whether you’re refreshing a single pad after a big project or maintaining an entire stamp collection, following these steps helps prevent ink buildup, smudging, and uneven impressions. The methods below emphasize safe handling and efficient cleanup to keep surfaces and inks in top shape.
Quick Answer
To clean stamp pads effectively, select a dedicated stamp cleaning solution or ink pad cleaner, apply a small amount to a microfiber cloth or sponge, gently dab and blot the pad surface until ink transfers and residue lifts, then let the pad air-dry flat before storage. For stubborn stains, use a stamp cleaning brush and sponge kit combined with a careful circular motion, and finish with a light spray of ink pad cleaning spray if needed.
What You’ll Need
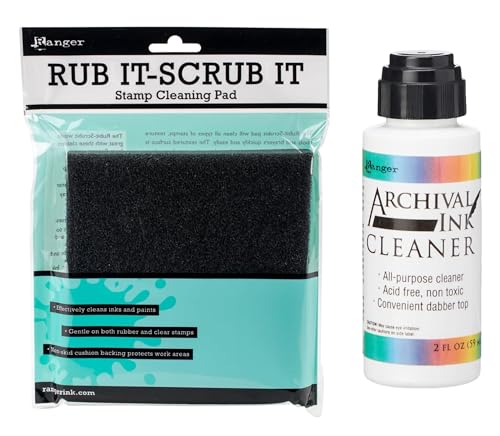
- Rubber stamp cleaning kit
- Ink pad cleaner
- Stamp pad cleaning solution for rubber stamps
- Microfiber cloth set for stamp cleaning
- Stamp cleaning brush and sponge kit
- Ink pad cleaning spray for rubber stamps


Before You Start
Prepare a clean, lint-free workspace and lay down a disposable mat or old towel to catch excess liquid. Work in a well-ventilated area, especially when using sprays or liquids. Test any cleaner on a small, inconspicuous area of the stamp pad first to ensure colors and materials won’t be damaged. Allow pads to rest flat on a dry surface during drying to prevent pooled moisture.
Important cautions: never immerse rubber stamps or pads in water for long periods, as excessive moisture can degrade foam or felt components. Avoid harsh solvents and abrasive cleaners that could remove ink-absorbing layers. If a pad begins to crumble or disintegrate, discontinue use and replace it.
Time estimate: 10–25 minutes per pad, depending on how soiled the pad is.
Step-By-Step: How To Clean Stamp Pads
- Prepare the pad: Gently press the pad to remove loose ink with a clean microfiber cloth, avoiding scrubbing that can spread ink into the pad’s pores.
- Apply cleaner: Lightly mist or dab your chosen ink pad cleaner, stamp pad cleaning solution, or spray to a damp, not soaking, cloth or sponge.
- Wipe in sections: Work in small sections, using a circular or back-and-forth motion to lift ink from the surface and edges. Use a stamp cleaning brush to address textured edges and corners.
- Blot excess moisture: Place the pad on a dry microfiber cloth and gently blot to remove any residual liquid and loosened ink. Avoid rubbing vigorously as it can wear the pad.
- Rinse as needed: If using a soapy cleaner, repeat with a clean damp cloth to remove any soap residue which can deter future ink transfer.
- Dry thoroughly: Allow the pad to air-dry completely, preferably flat and face-up, before reusing. This prevents mold and preserves ink absorption.
- Condition if applicable: Some pads benefit from a light conditioning with a compatible product to maintain pliability; follow manufacturer recommendations.
- Inspect after drying: Check for even color and surface texture. If areas remain stubborn, repeat steps 2–4 with a gentler approach.
- Store properly: Once dry, return pads to their case or container in a clean, dust-free area away from direct sunlight.
- Clean tools: Wash brushes, sponges, and cloths after use to prevent cross-contamination of inks and ensure reuse readiness.
- Document maintenance: Note when you clean a pad, aiding rotation and shelf-life planning for future projects.
Troubleshooting
| Symptom | Likely Cause | Fix | Prevention |
|---|---|---|---|
| Uneven impressions after cleaning | Residual ink or dried spots | Re-clean affected areas with gentle circular motions | Regular, light cleanings after use |
| Pad feels stiff or dry | Overdrying or harsh cleaners | Apply a small amount of conditioning product or water with caution | Use light liquids and air-dry in a humid area if possible |
| Color transfer on pad from another pad | Cross-contamination | Dedicated cloths per color family; clean surfaces between colors | Separate cleaning tools for each color family |
| Ink smudging during stamping | Ink residue or pad over-saturation | Rinse and blot until residue is gone, re-ink lightly | Clean pads promptly after heavy use |
Common Mistakes
- Using overly saturated liquids that flood the pad and damage the sponge
- Scrubbing too hard, which wears down texture and reduces ink pickup
- Skipping drying, leading to mold or uneven impressions
- Mixing cleaners that aren’t compatible with the pad material
Tips For Best Results
- Schedule regular maintenance for frequently used pads to prevent heavy buildup.
- Use a dedicated cleaning kit designed for rubber stamps to ensure compatibility and safety.
- Keep a small color-coded cleaning cloth for each color family to avoid cross-contamination.
- Store pads with lids on to minimize dust and ink evaporation between projects.
- Air-dry pads in a dust-free area on a clean surface to avoid particles sticking to the surface.
Call A Professional
Seek professional help if a pad shows signs of cracking, persistent staining that affects print quality, or if the pad is part of a high-value branding kit. Do not attempt to repair structural damage with adhesives or solvents that could compromise the pad’s integrity.
FAQ
Can I use dish soap to clean stamp pads?
Yes, a mild, fragrance-free dish soap diluted with water can be used on some pads, but ensure thorough rinsing and complete drying to prevent residue.
How often should I clean stamp pads?
Clean pads after heavy projects or when you notice color transfer or blotchy impressions; routine light maintenance after each session helps.
Is heat drying safe for stamp pads?
Air drying is recommended; heat can warp foams and affect ink absorption, reducing pad life.
What if a pad starts to crumble?
Cease using it and replace the pad. Crumbling indicates material degradation that cleaning cannot fix.
Are alcohol-based cleaners safe for all pads?
No. Alcohol can dry out and damage certain pad foams; use alcohol-free formulas unless the manufacturer specifies compatibility.
Can I clean ink pads and stamps together?
It’s best to clean pads separately from stamps to prevent ink transfer and preserve stamp integrity.
Do I need to lubricate stamp pads?
Most pads do not require lubrication; follow the manufacturer’s instructions for conditioning or refreshing pads if applicable.
Buying Guide
When selecting stamp pad cleaning products, consider the following factors to ensure compatibility and effectiveness for American crafting needs.
- Size and coverage: Choose cleaners and brushes that match your typical pad size and project scale.
- Noise level and ease of use: Non-spritz methods with microfiber cloths reduce noise and mess, ideal for home studios.
- Energy efficiency and materials: Water-based cleaners consume less energy and are gentler on pads compared with harsher solvents.
- Controls and application: Sprays, foams, and wipes offer different control—opt for a method that minimizes oversaturation.
- Placement and storage: Keep cleaners in a cool, dry place, away from sunlight, with tools organized by color family to speed up cleaning sessions.
For best results, match products to your pad materials (foam, felt, or leather components) and test cleaners on a small, inconspicuous area first. A well-chosen cleaning kit helps maintain print quality and extends the life of both stamps and pads, making craft sessions smoother and more enjoyable. If you rely on color-rich projects, investing in a complete stamp cleaning kit and microfiber cloth set can save time and reduce wear over the long run.