Maintaining a clean shower head filter improves water flow, extends the life of the filter, and helps reduce mineral buildup. This guide walks through practical steps using common tools and readily available products to restore optimal performance in American households.
Whether you’re dealing with hard water deposits or a reduced spray pattern, a focused cleaning routine can make a noticeable difference. The steps are designed to be safe for typical shower heads and filters while avoiding damage to seals or threads.
Quick Answer
Detach the filter cartridge, scrub the head and housing with a mild cleaner, use a lime remover if mineral buildup is present, rinse thoroughly, reinstall the cartridge, and test the spray. For persistent deposits, use a dedicated shower head descaler with a brush and a universal remover wrench for easier access.
What You’ll Need
- shower head cleaning brush kit
- shower head descaler lime remover with brush
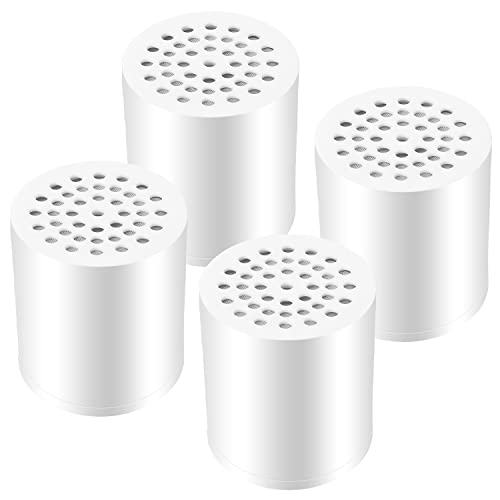
- shower filter replacement cartridge 1/2 inch NPT
- universal shower head remover wrench
- shower cleaning kit with flexible brush and spray bottle


Before You Start
Turn off the water supply to the shower and place a towel or cloth under the area to catch drips. If the shower head is connected to a long hose, consider removing the head entirely for easier access. Protect the threads with plumbers tape if you reinstall a cartridge or head, and ensure the replacement cartridge is compatible with your model (1/2 inch NPT is common but verify your shower head threading). Schedule a cleanup when water pressure is reasonable to avoid prolonged downtime.
Note: Some mineral buildup is normal, but heavy corrosion or cracked fittings require professional attention. If you notice any leaks after reassembly, recheck the cartridge seating and seals.
Step-By-Step: How To Clean A Shower Head Filter
- Remove the shower head and filter cartridge if possible, using the universal shower head remover wrench to loosen stubborn fittings without damaging surfaces.
- Inspect the filter housing and rinse the cartridge under warm running water to remove loose debris.
- Soak the cartridge in a mild cleaning solution or a shower head descaler lime remover with brush if mineral buildup is visible. Let it sit according to product directions, then scrub gently with the brush.
- Use the shower head cleaning brush kit to scrub mineral deposits from the nozzles and interior channels. For hard-to-reach areas, switch to the flexible brush from the shower cleaning kit with flexible brush and spray bottle.
- Rinse the cartridge and head thoroughly to remove all cleaning residues. If needed, repeat soaking and brushing for stubborn scale.
- Install a fresh shower filter replacement cartridge 1/2 inch NPT if the old cartridge shows wear or substantial buildup. Finger-tighten first, then snug with the wrench—do not over-tighten.
- Reattach the shower head and cartridge assembly. Run cold water for a minute to verify there are no leaks, then switch to hot to ensure proper spray patterns and full flow.
- Inspect each nozzle for clearance; gently rub with a soft cloth if any deposits remain. If spray is uneven, use the brush to clear blocked nozzles.
- Replace any worn washers or O-rings if you notice leaks around the head junction. Recheck the connection after the next few uses.
- Keep a regular cleaning schedule: monthly for mineral-rich water, or quarterly for softer water. Document the date on a small label near the shower head if desired.
Troubleshooting
| Symptom | Likely Cause | Fix | Prevention |
|---|---|---|---|
| Reduced spray after cleaning | Deposits still clogging nozzles | Rebrush with the shower head cleaning brush kit and re-soak with descaler | Establish a bi-monthly cleaning routine |
| Leaks at connection | Over-tightened or worn O-ring | Reseat cartridge, replace O-ring, or apply plumber’s tape | Use proper hand-tightening and then snug with wrench |
| No flow at all | Clogged cartridge or blocked inlet | Remove and replace cartridge with shower filter replacement cartridge 1/2 inch NPT | Inspect inlet screens regularly |
| Unresponsive spray patterns | Deposits on nozzles | Clean nozzles with brush; ensure nozzles are open | Rinse after every use if water is hard |
Common Mistakes
- Using abrasive cleaners that scratch the filter housing or head
- Over-tightening connections, which can crack fittings
- Ignoring incompatible cartridge sizes or thread types
- Forgetting to rinse thoroughly before reassembly
Prevent issues by following product instructions and confirming thread compatibility before purchasing replacements.
Tips For Best Results
- Choose a descaler specifically designed for lime and mineral deposits to avoid harming seals.
- Keep a dedicated cleaning kit within reach to simplify routine maintenance.
- Label your filter cartridge with replacement dates to track service intervals.
- Consider upgrading to a filter with a higher sediment capture rating if you have very hard water.
Call A Professional
Stop and call a professional if you notice persistent leaks after replacement, evident corrosion, or if the head don’t align with standard 1/2 inch NPT fittings. Seek help if you are unsure about removing a built-in filter cartridge or if the shower system is integrated with a complex valve assembly.
FAQ
How often should I clean a shower head filter?
Most households benefit from cleaning every 1–3 months, depending on mineral content in the water and usage. Increase frequency with hard water or visible buildup.
Can I use vinegar to descale a shower head?
Vinegar can be effective for mineral buildup but should be used with caution on certain materials. Always test a small area and follow with thorough rinsing.
Is a universal shower head remover wrench safe for all heads?
It works for many standard fittings, but always verify compatibility with your model to avoid damage.
Do I need to replace the filter cartridge every time I clean?
Not necessarily; clean the cartridge if it remains functional. Replace when flow is reduced or the cartridge shows wear or deterioration.
What if the spray pattern doesn’t improve after cleaning?
Inspect nozzles for mineral buildup and verify the filter and head are properly installed. Consider replacing the cartridge if buildup persists.
Will cleaning affect water pressure?
Yes, thorough removal of deposits can restore pressure. If pressure remains low after cleaning, check plumbing and valve issues beyond the head.
Is the 1/2 inch NPT cartridge common?
Yes, many showers use 1/2 inch NPT fittings, but always verify the thread size on your unit before buying replacements.
Buying Guide
When choosing components for cleaning a shower head filter, consider several key factors to maximize performance and longevity:
- Size and compatibility: Confirm the filter cartridge size and thread type (commonly 1/2 inch NPT) to fit your shower head and valve assembly. Measure the inlet and outlet threads if unsure.
- Descaling power: A dedicated lime remover or descaler tackles mineral buildup effectively. Look for products with brush-integrated designs for easier cleaning.
- Tools included: A complete shower head cleaning kit, including brushes and flexible tools, reduces the need for multiple purchases and simplifies maintenance.
- Nozzle design: Nozzles with flexible materials or easily removable components facilitate easier cleaning and longer head life.
- <bNoise and water efficiency: If upgrading, consider a filter that supports compatible water-saving features without sacrificing spray quality.
- <bPlacement and ease of access: Wall-mounted or handheld heads influence how often you’ll clean and how easily you can access the filter housing.
- <bReplacement frequency: Evaluate cartridge life in relation to water hardness; hard water may require more frequent replacements.
Consider evaluating multiple products to balance cost, ease of use, and availability. A practical approach is pairing a cleaning kit with a compatible replacement cartridge and a universal remover wrench to cover most common scenarios.