Shower cartridge cleaning helps restore steady water flow and balanced temperature without replacing the entire valve. Regular maintenance can prevent mineral buildup and reduce leaks. This guide provides a practical, American-friendly approach to cleaning and refreshing a shower cartridge using common tools and products.
Readers will find a concise Quick Answer, a complete materials list, and a safe, step-by-step process. The instructions emphasize safety, compatible tools, and practical troubleshooting to keep shower valves performing well longer.
Quick Answer
Quick method: shut off water, disassemble the valve, scrub the cartridge with a dedicated brush, apply descaling solution if needed, rinse, and reassemble. If mineral buildup is severe, use a replacement tool kit to facilitate removal and reinstall a fresh cartridge.
What You’ll Need
- Shower valve cartridge cleaning brush
- Shower cartridge puller tool
- Shower valve cartridge cleaning kit
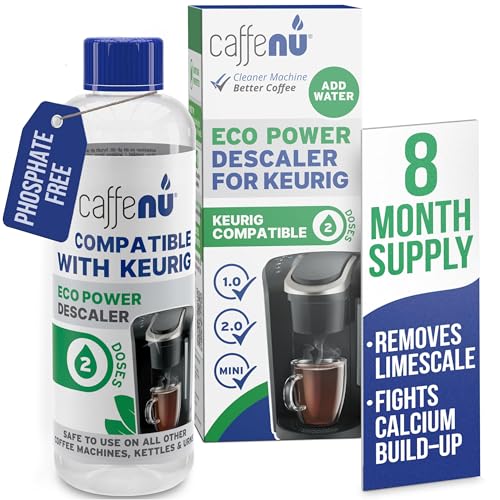
- Descaling solution for shower valve cartridge
- Shower cartridge replacement tool kit


Before You Start
Turn off the bathroom water supply and drain any residual water. Gather tools in a accessible workspace. Wear eye protection and gloves to guard against sharp edges and chemicals. Know your valve type, as some cartridges use snap-in designs or retaining clips. Estimate total time: typically 45–90 minutes for the first attempt, depending on access and level of buildup.
Step-By-Step: How To Clean A Shower Cartridge
- Shut off water at the main supply and relieve pressure by turning on the shower for a few seconds.
- Remove the handle and decorative escutcheon to access the valve trim and mounting nut.
- Carefully detach the cartridge retainer clip or nut, noting its orientation for reassembly.
- Gently pull the cartridge out using a shower cartridge puller tool if needed, avoiding damage to seals.
- Inspect o-rings and seals; replace if cracked or worn using a shower cartridge replacement tool kit as necessary.
- Rinse the cartridge under lukewarm water to remove loose debris, then use a shower valve cartridge cleaning brush to scrub mineral deposits.
- Soak the cartridge in a descaling solution for shower valve cartridge according to product instructions for 10–30 minutes.
- Rinse thoroughly and dry with a clean cloth before reinstalling the cartridge.
- Reassemble the valve, reattach trim, and restore water supply. Test for leaks and smooth operation.
- If flow or temperature remains irregular, repeat the cleaning cycle or consider replacing the cartridge.
- Document the process and set a maintenance reminder for 12–24 months to prevent buildup.
Troubleshooting
| Symptom | Likely Cause | Fix | Prevention |
|---|---|---|---|
| No hot water or cold water only | Thermostatic blend cartridge stuck | Clean cartridge; inspect thermostatic components | Regular descaling and inspection |
| Low water pressure | Mineral buildup on cartridge | Deep clean with brush and descaler | Clean annually or as needed |
| Door/valve leaks after reassembly | O-rings damaged or misaligned | Replace seals; reseat cartridge | Mark parts to avoid misassembly |
| Uneven temperature when mixing | Stuck or worn cartridge | Clean/replace cartridge; verify valve body | Use compatible cartridges |
Common Mistakes
- Using metal tools that scratch the cartridge body
- Forcing the cartridge out without a puller when space is tight
- Skipping the descaling soak and rinsing thoroughly
- Installing seals backward or in the wrong orientation
Tips For Best Results
- Work with the water off and the area dry to prevent slip hazards.
- Label and photograph parts during disassembly to simplify reassembly.
- Opt for a descaling solution formulated for shower valves to avoid residue buildup.
- Choose a compatible cartridge replacement kit if the old unit shows wear beyond cleaning.
- Schedule routine checks; even well-maintained cartridges benefit from periodic cleaning.
Call A Professional
Consider contacting a plumber if:
- The valve body shows corrosion or leaks beyond the cartridge area.
- Water continues to leak after reassembly or there is inconsistent pressure that cleaning didn’t fix.
- You are unsure of the cartridge type or there is limited space for removal.
FAQ
Can I use any descaling solution on a shower cartridge?
Use a descaling product labeled safe for plumbing components and follow the manufacturer’s instructions to avoid damage.
How often should I clean a shower cartridge?
A routine clean every 1–2 years is common, or sooner if you notice mineral buildup or reduced flow.
What tools help remove a stubborn cartridge?
A dedicated Shower cartridge puller tool and a compatible Shower cartridge replacement tool kit simplify stubborn removals.
Is replacement necessary if the cartridge is damaged?
Yes; damaged seals or worn parts typically require replacement to restore performance.
Will cleaning affect warranty?
Follow manufacturer guidelines; improper disassembly may affect warranties, so refer to product instructions.
Buying Guide
When choosing cleaning and replacement options for a shower cartridge, consider size, compatibility, and ease of maintenance.
Key buying factors include:
- Cartridge compatibility: Confirm model and valve type to ensure a proper fit.
- Renewal toolkit: A kit should include a cleaning brush, removal tools, replacements for seals, and descriptive instructions.
- Descaling solutions: Pick a formula designed for shower valves to avoid damage to coatings or seals.
- Noise and water flow: Post-cleaning performance should restore steady flow and temperature control without leaks.
- Installation ease: User-friendly tools reduce the risk of damage and shorten installation time.
- Maintenance frequency: Choose parts and kits that support periodic cleaning and straightforward reassembly.
For most homes, combining a Shower valve cartridge cleaning kit with a Shower cartridge replacement tool kit provides flexibility for cleaning, testing, and replacing components as needed.