Sediment filters protect your water system by catching particles before they reach appliances and fixtures. Over time, minerals and debris clog the media, reducing flow and efficiency. This guide explains a practical, DIY approach to cleaning a sediment filter and restoring performance safely.
The steps here emphasize standard home-use filter housings and commonly available tools. Following the instructions can extend filter life, improve water pressure, and prevent costly replacements. Always refer to your specific model’s manual for nuances.
Quick Answer
Shut off water supply, relieve pressure, disassemble the housing, rinse or replace the cartridge if needed, scrub the housing and O-rings, reassemble with new seals if necessary, and test for leaks. Use a sediment filter cleaning kit and appropriate wrenches to avoid damage.
What You’ll Need
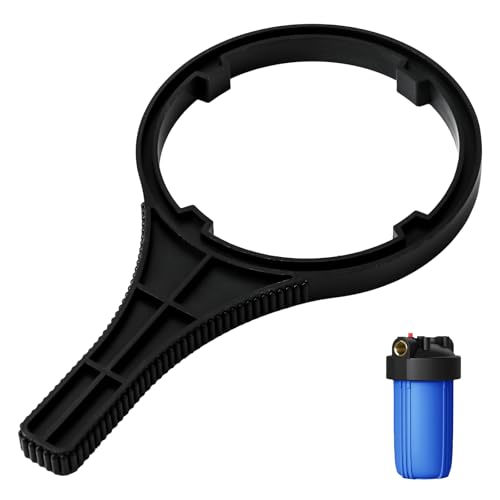
- sediment filter housing wrench
- 10 inch sediment filter cleaning brush
- Big Blue filter housing wrench
- sediment filter cleaning kit
- replacement filter housing 10 inch 2.5 inch


Before You Start
Turn off the cold water supply and relieve system pressure by opening a faucet downstream. Place towels to catch spills and wear gloves. Have a bucket handy for draining water. Depending on the system, plan 15–30 minutes for the process and allow the housing to cool if recently used. Avoid overtightening seals when reassembling to prevent leaks.
Step-By-Step: How To Clean Sediment Filter
- Shut off water and close any inlet valves to ensure no water enters the housing during disassembly.
- Place a pan beneath the housing, then use the sediment filter housing wrench or Big Blue filter housing wrench to unscrew the housing cap.
- Carefully lift the cap and remove the filter cartridge. Inspect the cartridge for deep clogs; replace if discoloration or mineral buildup is extensive.
- Rinse the cartridge under running water or soak briefly in a mild cleaning solution recommended by the manufacturer; agitate gently with the 10 inch sediment filter cleaning brush if buildup persists.
- Clean the inside of the housing with water and a soft cloth or sponge. Check the O-rings for wear, cracks, or deformation; replace them if needed.
- Reinsert the cartridge, ensure it seats properly, and apply a light coating of silicone lubricant to O-rings if compatible with the system. Reattach the housing cap and tighten firmly without overtightening.
- Turn the water back on and slowly pressurize the system. Check for leaks around the housing and connections; tighten slightly if necessary.
- Run water for several minutes to purge air and rinse the new or cleaned cartridge. Monitor flow and listen for unusual sounds.
- Document any notable changes in water clarity or pressure and reset any indicators on the filtration system if applicable.
Troubleshooting
| Symptom | Likely Cause | Fix | Prevention |
|---|---|---|---|
| Leaking at the housing seam | O-ring damaged or misaligned | Inspect and replace O-ring; lubricate with silicone | Regularly inspect O-rings during maintenance |
| Low water pressure after cleaning | Clogged cartridge or improper seating | Rethink cartridge seating; replace cartridge if needed | Rinse cartridge thoroughly before reassembly |
| Water looks cloudy | Air in the line or incomplete purge | Open downstream taps to bleed air; run system longer | Prime the system after reassembly |
| Filter housing won’t loosen/tightens | Cap threads damaged or overtightened | Inspect threads; replace cap if needed | Use correct wrench and hand-tighten plus a final snug |
Common Mistakes To Avoid
- Using harsh cleaners that can degrade seals or housing material
- Over-tightening the housing cap, causing thread or O-ring damage
- Running the system without purging air after maintenance
- Ignoring manufacturer guidance on cartridge replacement intervals
Tips For Best Results
- Keep spare O-rings and a replacement cartridge on hand as part of the sediment filter cleaning kit
- Label filters after cleaning to track maintenance frequency and performance
- Perform maintenance during a low-demand period to minimize disruption
- Regularly inspect housing seals for signs of wear or dehydration
- Use the correct wrench to avoid damage to the housing or fittings
Call A Professional
Seek professional help if you notice persistent leaks, cracks in the housing, corroded fittings, or if the system presents electrical or water quality concerns. Do not attempt repairs beyond your comfort zone or without the proper tools. If the unit is under warranty, contact the manufacturer for guidance to avoid voiding coverage.
FAQ
How often should I clean a sediment filter?
Frequency depends on water quality and system usage; many households inspect every 3–6 months and replace cartridges as recommended by the manufacturer.
Can I clean a sediment filter without removing the cartridge?
Some filters allow partial cleaning, but full cleaning generally requires removal to inspect the cartridge and seals.
What if the housing leaks after reassembly?
Check O-rings for damage, misalignment, and improper seating; replace worn parts and reassemble carefully.
Is a cleaning kit essential?
A sediment filter cleaning kit helps organize brushes, seals, and spares, improving maintenance consistency.
Buying Guide
When selecting replacement components and tools for sediment filters, consider size, compatibility, and build quality. A standard 10-inch or Big Blue housing is common, but confirm the model on your system. Look for corrosion-resistant materials and robust O-rings. Noise level and energy use are typically minimal for filtration tasks, but choose tools with durable construction to withstand repeated use. Placement should allow easy access for routine maintenance and safe drainage.
Key buying factors include selecting the correct housing size and filter cartridge type, ensuring compatible end fittings, and evaluating ease of use for the included cleaning kit and wrenches. For most households, a basic sediment filter cleaning kit paired with the appropriate housing wrench covers routine maintenance needs. If you plan to upgrade or replace a housing, verify that the new unit matches inlet/outlet dimensions and space constraints.