Secretlab fabric chairs blend style with comfort, but like any workspace seat, they collect dust, oils, and spills over time. A careful cleaning routine can restore the chair’s look and extend its life without harming the fabric or components. This guide walks through practical steps using common cleaning tools and products available to American shoppers.
Quick Answer
For routine cleaning, vacuum the chair with a soft brush attachment, spot-clean stains with a gentle fabric upholstery cleaner spray, and finish with microfiber cloths to lift remaining residue. Use a dedicated stain remover spray for tougher spots, and keep a fabric chair cleaning kit handy for ongoing upkeep.
What You’ll Need
- Fabric Upholstery Cleaner Spray for Fabric Office Chair
- Microfiber Cleaning Cloths for Fabric Chairs
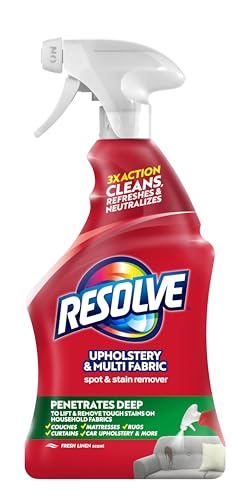
- Stain Remover for Fabric Upholstery Spray
- Vacuum with Soft Bristle Brush Attachment for Fabric Chair
- Fabric Chair Cleaning Kit with Brushes and Lint Roller


Before You Start
Turn off and unplug any connected power options or adjustable lumbar components if applicable. Perform a patch test in an inconspicuous area to ensure the cleaner doesn’t discolor the fabric. Vacuum the chair thoroughly before applying cleaners to remove loose dust and debris. Protect surrounding surfaces and work in a well-ventilated area. Expect a cleaning session to take about 20–40 minutes depending on chair usage and stains.
Step-By-Step: How To Clean A Fabric Chair
- Detach or move removable cushions if possible to access all fabric surfaces.
- Use the vacuum with a soft bristle brush attachment to remove loose dust from the seat, backrest, arms, and crevices.
- Lightly dampen a microfiber cloth with warm water and wipe the fabric to lift surface dirt.
- Apply a small amount of Fabric Upholstery Cleaner Spray to a clean cloth and test on a hidden area, then gently blot the chair in sections, avoiding soaking the fabric.
- For any stains, spray the Stain Remover for Fabric Upholstery Spray directly onto the spot and blot with a clean cloth until the stain lifts.
- Use the cleaning kit brushes to work cleaning solution into textured fabric or hard-to-reach seams, then wipe away residue with a fresh cloth.
- Allow the chair to air-dry completely before sitting. Keep it in a well-ventilated area and avoid direct sunlight to prevent fading.
- Brush the fabric lightly with a lint roller or cleaning kit brush to remove any remaining lint or fibers after drying.
- Reassemble cushions and test the chair’s movement and any adjustables to ensure no residue affects mechanisms.
- Repeat as needed for ongoing maintenance or after new spills.
- For persistent odors, consider a second gentle cleaning or a fabric-safe deodorizing spray once completely dry.
Troubleshooting
| Symptom | Likely Cause | Fix | Prevention |
|---|---|---|---|
| Stains reappearing after cleaning | Incomplete blotting or deep-set stains | Apply stain remover again and blot thoroughly; allow extra drying time | Clean spills promptly; blot rather than rub |
| Fabric looks faded after cleaning | Over-wetting or harsh cleaners | Rinse with a cloth dampened with clean water and dry completely | Use proper fabric cleaner and test first |
| Rough texture after drying | Residue from cleaners | Wipe with clean, damp cloth and dry fully | Avoid excessive cleaning solutions |
| Persistent odors | Trapped moisture or oil buildup | Ventilate and clean with mild cleaner; consider a fabric-safe deodorizer | Clean spills quickly; regular maintenance |
Common Mistakes
- Over-wetting the fabric, which can seep into foam and backing materials.
- Using harsh cleaners or bleach that can discolor or degrade fabric.
- Neglecting the chair’s crevices where dust and oils accumulate.
- Skipping a patch test or drying too slowly, which can cause staining or odor.
Tips For Best Results
- Schedule a light clean every 1–3 months, with deeper spot treatment as needed.
- Use a microfiber cloth for the most effective lift without abrasion.
- Keep a dedicated stain remover spray on hand for quick response to spills.
- Rotate cleaning focus across the seat, back, arms, and legs to prevent uneven wear.
- Store cleaning sprays in a cool, dry place away from direct sun when not in use.
Call A Professional
Consider professional upholstery cleaning if the chair has extensive staining, noticeable odor that persists after cleaning, or if the fabric shows signs of wear or dye transfer beyond home methods. Seek a technician who specializes in fabric office chairs and fabric seating to avoid voiding warranties or causing fabric damage.
FAQ
Can I use any fabric cleaner on a Secretlab chair?
Use cleaners labeled for fabric upholstery and perform a patch test first. Avoid harsh chemicals that could damage the fabric or seat components.
Will cleaning damage the chair’s padding?
When used as directed, cleaning products should not affect padding. Prevent soaking and ensure thorough drying.
How often should I clean my fabric chair?
Light routine cleaning every 1–3 months and a deeper clean every 6–12 months depending on use and spills.
What should I do about persistent odors?
Ventilate the chair during drying and consider a fabric-safe deodorizing spray after cleaning and fully drying.
Is vacuuming alone enough for maintenance?
Vacuuming removes surface dust and debris; combined with spot cleaning, it helps maintain fabric appearance and longevity.
Buying Guide
When choosing fabric chair cleaning supplies for a Secretlab chair, consider size and accessibility of the chair surfaces, noise level of cleaning tools, and compatibility with your chair’s fabric type. Look for a lightweight vacuum with a soft bristle brush to reach mesh backs and tight seams. A fabric upholstery cleaner spray designed for office fabrics reduces risk of water spots, while a dedicated stain remover spray helps with stubborn marks without over-wetting. A fabric chair cleaning kit with brushes and a lint roller accelerates fast touch-ups between deeper cleanings. For best results, select products approved for synthetic fabrics and ensure easy access to all chair zones, including armrests and under-seat areas. Always follow the product’s patch test instructions and drying times before full application.