Scuff marks on interior walls are a common household issue, especially in high-traffic areas. This guide explains practical, safe methods to remove marks without damaging paint or wallpaper, using common cleaning tools and supplies. Readers will learn quick fixes for everyday scuffs and more thorough options for stubborn stains.
Quick Answer
Light scuffs respond well to a damp microfiber cloth or a Magic Eraser melamine sponge, followed by a gentle wipe with a clean, dry cloth. For tougher marks, try a non-scratch scrubbing sponge or a soft-bristle wall scrub brush. Always test a small, inconspicuous area first.
What You’ll Need
- Microfiber cloths or a wall cleaning microfiber mitt
- Magic Eraser melamine sponge or similar scuff remover
- Non-scratch scrubbing sponge for walls
- Soft bristle wall scrub brush for scuffs
- Wall touch-up repair kit with sponge and paint pen
- Bucket with warm water and mild dish soap (optional)
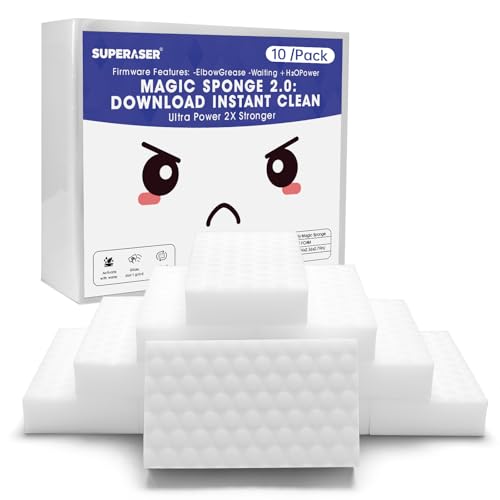


Before You Start
Prepare the area by laying down towels to catch drips and protecting nearby furniture. Work from top to bottom to avoid reappearing streaks. Safety notes: avoid abrasive tools on delicate wall finishes or glossy paints. For ceiling or textured surfaces, use gentler tools and lighter pressure. Time estimate: about 10–30 minutes per wall, depending on the stain severity.
Caution: Do not use bleach or ammonia-based cleaners on painted walls unless the paint manufacturer approves it. Always test first in an inconspicuous spot.
Step-By-Step: How To Remove Wall Scuffs
- Dry wipe the area with a clean microfiber cloth to remove loose dust.
- Dampen a cloth with warm water and gently rub the scuff in a circular motion.
- If the mark persists, use a small amount of mild dish soap on the cloth and continue light rubbing.
- For stubborn marks, dampen a Magic Eraser lightly and test on a small area before proceeding fully.
- Switch to a non-scratch scrubbing sponge if the surface shows signs of wear after erasing. Apply gentle pressure.
- For textural or stubborn stains, use a soft bristle wall scrub brush with light, even strokes.
- Rinse the area with a clean, damp cloth to remove soap residue, then dry with a dry microfiber cloth.
- If color mismatch occurs after cleaning, apply a wall touch-up repair kit with sponge and paint pen to blend the area.
- Repeat if necessary, avoiding excessive moisture that could damage paint or wallpaper.
- Finish by inspecting from different angles to ensure an even appearance.
Troubleshooting
| Symptom | Likely Cause | Fix | Prevention |
|---|---|---|---|
| Rubbing causes dull or discolored spot | Finish wear or painted surface sensitivity | Switch to a softer tool and lighter pressure; skip harsh cleaners | Test in a hidden area before broader use |
| Residue left after cleaning | Soap residue | Rinse with a clean damp cloth and dry | Use minimal soap and thorough rinsing |
| Paint chip or scrape | Over-aggressive scrubbing | Cease scrubbing; apply touch-up paint kit | Use gentler tools in the future |
| Stains return after drying | Underlying stain or staining from marker | Apply stain-blocking primer or touch-up paint | Address stains quickly to prevent setting |
Common Mistakes
- Using abrasive sponges on painted walls, which can dull finishes
- Soaking walls with excessive water, risking warping or paint damage
- Over-relying on chemical cleaners that may discolor certain paints
- Skipping a test patch before wider application
To avoid these pitfalls, start with the mildest method and gradually escalate only as needed. Always use clean tools and gentle pressure.
Tips For Best Results
- Test any product on an inconspicuous area first to confirm colorfastness.
- Work in small sections to prevent cleaning solution from running onto outlets or trim.
- For high-traffic spots, consider adding a washable topcoat or repainting periodically to maintain a fresh look.
- Keep replacement pads or sponges handy to avoid cross-contamination between clean and dirty areas.
- If you use a paint pen, choose a color that matches the wall and blend edges softly for seamless repair.
Call A Professional
Consider contacting a wall repair professional if: there are multiple deep stains that resist standard cleaning, the wall finish has extensive wear, or there are signs of moisture damage or mold. Stop if the wall feels soft or the paint is bubbling, which may indicate damage beneath the surface.
FAQ
What is the safest method for cleaning matte walls?
Begin with a dry microfiber wipe, then use a barely damp microfiber cloth with mild soap if needed.
Can Magic Eraser damage paint?
Yes, it can remove or dull finishes if used with excessive pressure or on delicate surfaces; test first and use light pressure.
Is it okay to use water alone on glossy walls?
Water alone can work, but a small amount of mild soap helps lift oily or sticky scuffs more effectively.
When should I repaint after cleaning?
If the cleaned area remains discolored or uneven, a light touch-up with matching paint or a full repaint may be necessary.
Are there wall types that shouldn’t be cleaned with sponges?
Vinyl wallpaper, delicate textures, and paper-backed surfaces may require gentler cleaning or professional guidance.
What if a scuff reappears after cleaning?
Reapply a touch-up or primer to seal the area, then repaint if needed to blend with surrounding walls.
Buying Guide
Choosing the right tools to clean scuff marks involves balancing effectiveness, safety, and wall type. Consider the following factors:
- Size and weight of the cleaning tool: lighter tools reduce fatigue for larger walls.
- Noise level: some brushes and sponges are quieter, useful in bedrooms or offices.
- Material compatibility: ensure detergents and sponges are suitable for your wall finish.
- Ease of replacement: look for readily available replaceable sponges and pads.
- Controls and ergonomics: comfortable handles improve grip and control for precise cleaning.
- Placement options: compact tools fit behind furniture and in tight spaces.
- Durability and warranty: higher-quality tools may offer longer life and better performance.
Commonly used items include the Magic Eraser melamine sponge wall scuff remover, Wall cleaning microfiber mitt scuff marks, Non-scratch scrubbing sponge for walls, Soft bristle wall scrub brush for scuffs, and Wall touch-up repair kit with sponge and paint pen. When selecting, match the tools to your wall type (painted, matte, glossy, or wallpaper) and your cleaning pace. A balanced kit helps maintain clean walls with minimal risk of damage.