Preparing wood surfaces before staining is essential for achieving an even, durable finish. The removal of sawdust and fine particles ensures the stain penetrates evenly and attaches correctly. This guide walks through practical steps and the right tools to use for clean, ready-to-stain wood in a typical workshop setting.
Following a consistent cleaning routine helps minimize dust-induced blotching and enhances color uniformity. The methods below emphasize safety, efficiency, and using common woodworking supplies available in most American shops.
Quick Answer
Plan your cleanup in two passes: first remove loose dust with a vacuum or compressed air, then wipe down with a tack cloth or microfiber cloth to pick up fine particles. Finish with a light wipe to ensure a spotless surface.
What You’ll Need
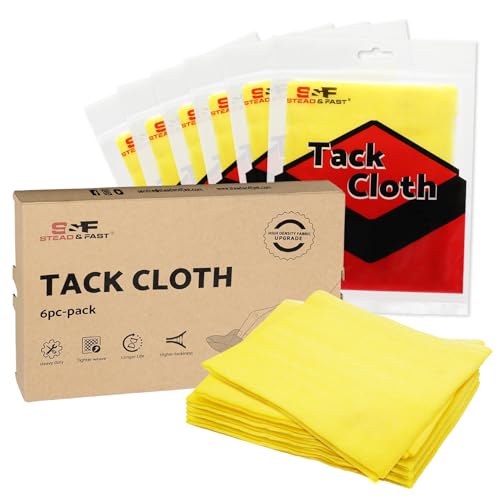
- Tack cloth 12×12 inch woodworking dust removal
- Shop vac HEPA filter for wood dust
- Microfiber dust cloth for woodworking prep
- Compressed air blower for cleaning wood surfaces before stain
- Dust collection attachment for orbital sander


Before You Start
Inspect the wood surface for loose fibers, sap, or old finishes that may bleed into the stain. Work in a well-ventilated area and wear a dust mask to protect against fine particles. Ensure sanding is complete and the surface is smooth to prevent uneven stain absorption. Avoid moisture near unfinished wood, as it can raise grain and complicate staining.
Step-By-Step: How To Clean Sawdust Off Wood Before Staining
- Prepare the work area by laying down a clean drop cloth and turning on ventilation. Gather all cleaning tools in reach.
- Rinse off loose dust with a dust collection attachment for orbital sander or a shop vac to capture large particles as you go.
- Use the dust collection attachment for orbital sander to minimize airborne dust while sanding and to keep the surface ready for final cleaning.
- Apply a tack cloth to lift fine dust left on the wood surface. Use steady, even strokes to avoid re-depositing particles.
- For stubborn particles, wipe with microfiber dust cloth for woodworking prep to trap dust without leaving lint behind.
- Blow remaining dust off with a compressed air blower for cleaning wood surfaces before stain, keeping the nozzle at a safe distance to prevent gouging.
- Brush away any remaining dust with a dry brush or cloth, then perform a final pass with a clean tack cloth.
- Inspect the surface under good lighting. If sheen or dust persists, repeat the tack cloth pass until the surface is uniformly smooth.
- Wipe the entire area with a fresh microfiber cloth to remove residual oils or fingerprint oils before staining.
- Proceed with staining only after the surface is completely dry and dust-free.
- Store cleaning tools appropriately and clean the workspace to prevent cross-contamination with other finishes.
Troubleshooting
| Symptom | Likely Cause | Fix | Prevention |
|---|---|---|---|
| Dust still visible after cleaning | Lint or fine particles left from cloths | Switch to fresh tack or microfiber cloth; wipe again | Use lint-free cloths and lint-free surfaces |
| Dust clumps when applying stain | Sticky residues or oils on the wood | Wipe with clean microfiber cloth; dry surface thoroughly | Pre-clean with tack cloth before staining |
| Dust blowing back onto surface | Insufficient containment or strong air flow | Reduce air pressure and direct away from surface; seal work area | Ventilate properly and use containment |
| Sawdust deposits after final wipe | Re-deposition from cloth fibers | Use a fresh, lint-free cloth; discard used cloths | Keep cleaning cloths clean and dry |
Common Mistakes
- Over-wetting or dampening wood before staining, which raises grain.
- Relying on one cleaning method; multiple passes yield better results.
- Using dirty or linty cloths that shed fibers onto the surface.
- Neglecting to clean tooling and surrounding areas, causing contamination.
Tips For Best Results
- Finish each sanding stage with a final dust removal pass before staining.
- Work in short, controlled sessions to prevent dust from resettling on the wood.
- Keep cleaning tools dedicated to stain prep to avoid cross-contamination with finishes.
- Test stain on a scrap piece first to confirm staining behavior after cleaning.
Call A Professional
Consider a professional if the wood shows heavy finishes, deep scratches, or if you are working on specialized woods that require controlled environments. Stop and consult a woodworker or finish specialist if staining results are inconsistent or if you notice chemical reactions on the surface.
FAQ
What is the best method to remove sawdust before staining?
Use a vacuum or dust collection, followed by tack cloths or microfiber cloths for fine dust, and finish with a compressed air blast if needed.
Can I stain right after cleaning with compressed air?
Yes, as long as the surface is completely dry and free of dust and oils.
Why use a tack cloth instead of a damp cloth?
Tack cloths lift fine dust without introducing moisture that can raise the grain.
Which tool helps prevent sawdust during sanding?
A dust collection attachment for an orbital sander reduces debris in the air and on the surface.
Is a HEPA-filter vacuum necessary?
While not mandatory, a HEPA-filter shop vac minimizes fine dust exposure and improves cleanliness.
Buying Guide
When choosing tools for cleaning wood before staining, consider the following factors to optimize outcomes and ease of use.
Size and ergonomics: Compact tools keep the workspace efficient, especially in small shops. A 12×12 inch tack cloth is handy for targeting small surfaces and edges.
Noise and filtration: A shop vac with a HEPA filter reduces exposure to fine dust, improving both health and air quality.
Energy efficiency: View energy use for air blowers and vacuums; choose models with efficient motors and good filtration.
Controls and ease of use: Simple on/off operation and easy-to-clean components save time during prep.
Placement and workflow: Plan a clean, contiguous workflow—from sanding to vacuuming to wiping—to minimize dust re-settling.
Which combination of tools fits your typical projects—softwoods for furniture or dense hardwoods for cabinetry? The answer often guides whether to prioritize a high-quality tack cloth, a robust HEPA-filter vacuum, or a dedicated dust collection attachment for your sander. Consider purchasing a coordinated set of these items to streamline prep and ensure consistently clean staining surfaces.