Preparing a smooth, clean surface is essential for a durable, even stain finish on wood. This guide walks American readers through the best practices for cleaning sanded wood prior to staining, including tools, methods, and common issues to avoid.
Quick Answer: After sanding, remove all dust with a dust brush, then use a tack cloth or lint-free microfiber cloth to wipe surfaces. For fine particles, supplement with a HEPA vacuum attachment for wood dust. Wipe with denatured alcohol prep wipes if needed, allow to dry, and inspect the surface before staining.
What You’ll Need
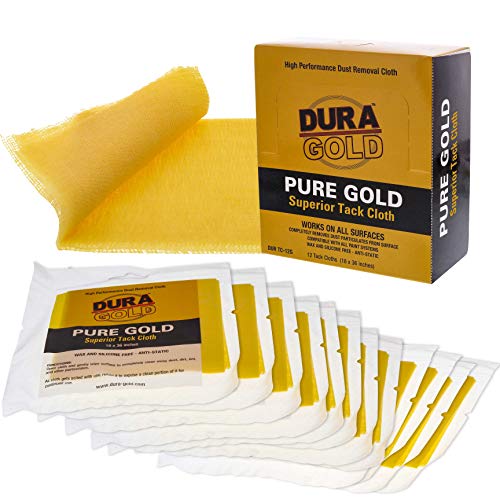
- tack cloth woodworking sanding cleanup
- HEPA vacuum attachment for wood dust
- lint-free microfiber cloth wood finishing prep
- denatured alcohol wood prep wipes
- dust brush for sanding cleanup power sander


Before You Start
Clear the work area and protect nearby surfaces from dust. Wear a dust mask or respirator when sanding, and ensure proper ventilation. The goal is to remove all particles, oils, and residues that could interfere with stain adhesion. Time estimate: 15–45 minutes depending on surface size and the number of passes. Avoid rushing; lingering dust can ruin color uniformity.
Step-By-Step: How To Clean Sanded Wood Before Staining
- Finish sanding to the final grit and let the surface rest briefly to settle loose particles.
- Use a dust brush for sanding cleanup power sander to sweep large areas and corners.
- Wipe with a tack cloth woodworking sanding cleanup to lift remaining dust from grain recesses.
- For fine dust, run a vacuum equipped with a HEPA vacuum attachment for wood dust along the surface and edges.
- Follow with a lint-free microfiber cloth wood finishing prep to capture any fine particles left behind.
- Apply denatured alcohol wood prep wipes to remove oils or residues; allow the surface to dry completely.
- Inspect for shiny spots or raised grain; lightly re-sand with the final grit if needed, then re-clean.
- Wipe again with a clean microfiber cloth to ensure an even, dust-free surface.
- Test a small area with your chosen stain to confirm color consistency before full application.
- If possible, complete the staining in a dust-free environment or finish within a short window to prevent dust intrusion.
- Dispose of used wipes and cloths according to local regulations, especially if chemicals were involved.
Troubleshooting
| Symptom | Likely Cause | Fix | Prevention |
|---|---|---|---|
| Dust clinging to wet stain | Residual dust or oils | Re-clean with tack cloth or microfiber cloth after wiping with denatured alcohol | Always dry completely before staining |
| Uneven color or blotching | Uneven surface or oils | Ensure complete cleaning and consider conditioning stain on problematic areas | Use denatured alcohol wipes strategically |
| Sticky or tacky finish | Sanded surfaces not fully cleaned | Re-clean with microfiber cloth and verify dryness | Use clean tools and surfaces |
| Dust appears after wiping | Dry air or missed particles | Re-sweep with dust brush and re-clean | Work in a low-dust environment |
Common Mistakes
- Skipping the final wipe; fine dust hides in the grain leading to blotching
- Rushing the drying step after denatured alcohol wipes
- Using dirty cloths or tools that re-deposit dust
- Over-wetting the surface, which can raise grain or warp wood
Tips For Best Results
- Always work with the wood at room temperature in a dust-free area when possible.
- Choose the final grit based on desired smoothness; finer grits reduce dust specks in stain.
- Use a new tack cloth or microfiber cloth for each pass to avoid redepositing dust.
- Test stain on a hidden patch to confirm color and grain fill before full application.
Call A Professional
Consult a professional if the wood has extensive finishes, tannin bleed, or unusual odors that suggest contamination. Seek help if stains lift or peel after initial cleaning and application attempts, or if surfaces are warped or severely cracked.
FAQ
What is the best method to remove sanding dust?
Use a combination of a dust brush, a HEPA vacuum attachment for wood dust, and a tack cloth or lint-free microfiber cloth for final wipe-down.
Do I need denatured alcohol before staining?
Denatured alcohol wipes can remove oils and residues; ensure the surface dries completely before staining.
Can I stain immediately after cleaning?
Yes, but only after the wood is fully dry and free of dust to prevent blotching or adhesion issues.
How long should the wood dry after cleaning?
Allow at least 15–30 minutes for drying, longer in humid environments or after using denatured alcohol.
Buying Guide
When selecting cleaning tools for sanding cleanup, consider size, surface type, and dust control needs. A comprehensive kit should include a tack cloth, microfiber cloths, and a vacuum option with a proper dust attachment. Look for lint-free fabrics that won’t shed fibers onto the wood. For sensitive finishes, denatured alcohol wipes provide a quick clean without leaving residue. Assess compatibility with your sander and work environment to minimize dust generation and maximize stain adhesion. A well-chosen cleaning routine reduces rework and yields a more even stain color.