Maintaining a clean RV air conditioning system helps maximize cooling efficiency, extend equipment life, and improve air quality on the road. This guide explains a practical, step-by-step method to clean an RV A/C filter, along with safe handling tips and product-focused options that fit typical RV setups in the United States.
Quick Answer
To refresh your RV’s cooling, remove the A/C filter, rinse or wipe it clean, and use a dedicated coil cleaner if needed. Follow with a brush-based cleaning for ducts and a thorough dry before reassembly. If in doubt, start with a gentle approach to avoid damaging components.
What You’ll Need
- RV air conditioner filter cleaning kit
- RV AC vent cleaning brush
- RV air conditioner filter cleaning brush
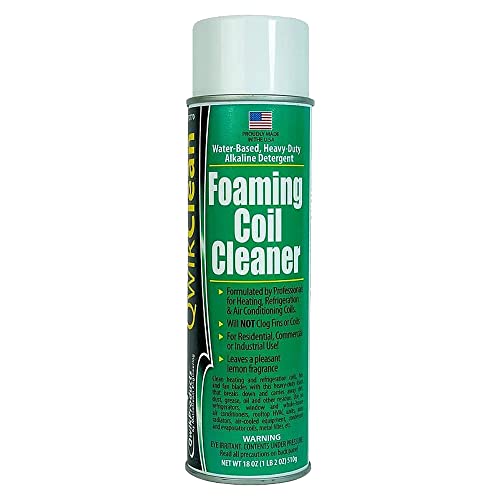
- RV AC coil cleaning spray
- RV duct cleaning brush kit


Before You Start
Ensure the RV AC is off and cool before starting. Disconnect power to the unit to prevent accidental activation. Work in a well-ventilated area and use gloves to protect hands from sharp edges. Keep the interior space dry to prevent mold growth. Time estimate: 30–60 minutes for typical units, more for extensive duct cleaning. Important: never run the AC while cleaning the coil or exposed components until they are completely dry.
Step-By-Step: How To Clean RV A/C Filter
- Power down the RV’s electrical system and remove the ceiling vent cover to access the filter housing.
- Carefully slide out the filter and inspect it for tears or heavy soiling that may require replacement.
- Rinse a removable fabric or pleated filter under cool running water. Gently shake and air-dry completely before reinstalling.
- If the filter is heavily soiled or oily, apply a mild cleaning spray designed for RV filters and scrub with an RV air conditioner filter cleaning brush for even cleaning.
- For deeper cleaning, use the RV coil cleaning spray on the evaporator coils following the product’s instructions, allowing it to foam and break up dirt.
- While the coils are soaking, use the RV duct cleaning brush kit to loosen debris in accessible ducts and vents.
- Rinse away residue from coils with a gentle spray and let everything dry completely.
- Reinsert the dry filter and secure the vent cover, ensuring a snug fit to prevent air leaks.
- Reconnect power and run a short test cycle to verify airflow and cooling without blocking cold air paths.
- Observe for unusual noises or reduced cooling efficiency over the next few uses; recheck filters for proper seating if symptoms persist.
Troubleshooting
| Symptom | Likely Cause | Fix | Prevention |
|---|---|---|---|
| Weak airflow after cleaning | Filter not seated, or coils blocked | Re-seat filter; inspect and clean coils | Regular maintenance every 1–3 months of use |
| Unpleasant odor | Mold growth in ducts | Thorough duct cleaning; dry everything completely | Keep area dry and replace heavily soiled filters |
| Coil residue after spray | Improper rinse or over-application | Rinse as directed and allow full drying | Use manufacturer-approved cleaners only |
| AC not cooling well | Air leaks or dirty coils | Seal leaks; clean coils thoroughly | Schedule regular inspections |
Common Mistakes
- Using high-pressure water directly on coils or filters, which can damage fins and seals.
- Starting the unit while filters are wet, risking electrical short or mold growth.
- Ignoring signs of mold or mildew: odors require immediate action beyond surface cleaning.
- Skimping on drying time before reassembly, leading to reduced efficiency and condensation issues.
Tips For Best Results
- Schedule maintenance at the start of camping season for optimal performance.
- Use a dedicated cleaning kit designed for RV systems to avoid cross-contamination.
- Pair filter cleaning with coil cleaning spray application for a comprehensive refresh.
- Keep spare filters on hand to minimize downtime during trips.
- Store cleaning brushes and sprays in a labeled container to prevent accidental misuse on non-RV equipment.
Call A Professional
Stop and call a pro if symptoms include persistent poor airflow after cleaning, water leaks around the unit, unusual noises, or signs of refrigerant issues. Do not attempt refrigerant handling yourself, and avoid disassembly beyond the accessible filter area if there is any doubt about safety.
FAQ
Can I clean the RV A/C filter without removing it?
Removal is recommended for a thorough cleaning; reattach securely after washing or brushing.
How often should I clean the RV A/C filter?
Inspect monthly during heavy use; clean or replace every 1–3 months depending on conditions.
Is it necessary to use a coil cleaner?
A coil cleaner helps break mineral deposits and grime; use only products approved for RV systems.
What if the filter is torn?
Replace the filter promptly to maintain efficiency and airflow.
Buying Guide
When shopping for RV air conditioning maintenance supplies, consider several factors to choose the right tools and products.
- Size and fit: Ensure brushes and cleaning kits are compatible with your RV model’s filter size and duct layout.
- Noise level: Some vent accessories operate quietly; look for user-reviews indicating minimal noise during operation.
- Energy efficiency: While cleaning does not typically impact efficiency directly, a well-maintained system uses energy more effectively; choose cleaners that support safe, efficient cleaning.
- Controls: Simple, straightforward spray bottles and brush handles reduce the likelihood of accidental damage during cleaning.
- Placement compatibility: Consider where you store supplies and how easy it is to access the roof or cabinet-mounted unit for maintenance.
Consider a complete kit that includes: an RV air conditioner filter cleaning kit, an RV AC vent cleaning brush, an RV air conditioner filter cleaning brush, an RV AC coil cleaning spray, and an RV duct cleaning brush kit. These components provide a cohesive approach to filter, coil, and duct maintenance, ensuring a more comfortable and reliable RV climate control experience.