Plastic windows, including vinyl frames and acrylic panes, require a careful cleaning routine that avoids scratches and streaks. By using the right tools and cleaners, homeowners can restore clarity without risking damage to seals or coatings.
This guide walks through a practical method for effectively removing grime, dust, and fingerprints from plastic windows. It covers safe supplies, step-by-step procedures, troubleshooting tips, and buying considerations for future upkeep.
Quick Answer
Use a dedicated plastic-safe window cleaning spray, a microfiber cloth, and a squeegee with a soft rubber blade. Extendable poles help reach high or awkward areas. A complete window kit provides pads and sponges to tackle stubborn grime without scratching the surface.
What You’ll Need
- Plastic-safe window cleaning spray for windows
- Microfiber cloth for plastic window cleaning
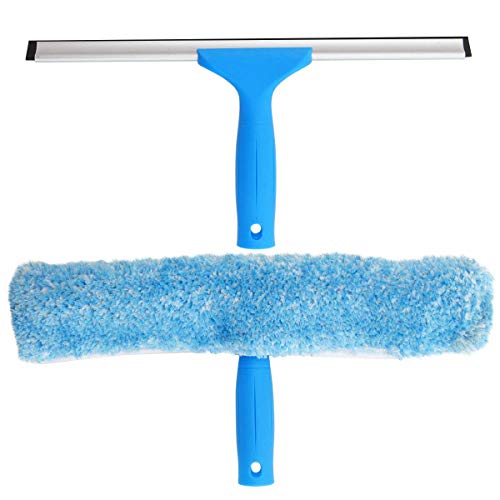
- Squeegee with soft rubber blade for plastic windows
- Extendable window cleaning pole kit
- Window cleaning kit with microfiber pads and sponge for plastic windows


Before You Start
Inspect the windows for chips, cracks, or peeling sealant. For fragile acrylic panes, avoid ammonia-based cleaners that can dull clarity. Remove loose dust with a dry microfiber cloth before applying liquid cleaner. Work on a cool day or during shade to prevent rapid drying that leaves streaks. Time estimate: 20–40 minutes for a standard interior and exterior pair of windows. Important: test any cleaner on a small area first to confirm no adverse reactions or clouding.
Step-By-Step: How To Clean Plastic Windows
- Assemble tools on a stable surface. Attach the extendable window cleaning pole kit to reach overhead or tall frames.
- Lightly dust the frame and sill with a dry microfiber cloth to prevent scratching during wet cleaning.
- Spray the plastic-safe window cleaning spray onto a microfiber cloth or directly onto the pane, avoiding oversaturation on edges.
- Wipe the glass in a gentle, circular motion to lift grime, then switch to a horizontal or vertical motion to reduce streaks.
- Use the squeegee with a soft rubber blade to remove cleaner from the pane, starting at the top and pulling downward in smooth strokes.
- Wipe the blade after each pass with a lint-free cloth to prevent re-depositing dirt.
- For stubborn spots, apply a small amount of cleaner with a microfiber pad and let it sit for 10–15 seconds before rewiping.
- Dry the edges where cleaner may pool, using a dry microfiber cloth to finish with a streak-free shine.
- Inspect from different angles to catch any remaining smudges, repeating steps as needed on problem areas.
- Clean exterior panes first if both sides are accessible; then treat interior panes to avoid bringing outdoor grime inside.
- Store tools in a dry area and rinse microfiber pads after use to prolong life and prevent cross-contamination.
- Schedule regular cleanings to prevent buildup and extend the life of seals and coatings.
Troubleshooting
| Symptom | Likely Cause | Fix | Prevention |
|---|---|---|---|
| Streaks after cleaning | Drying too fast or insufficient wiping | Wipe with a clean microfiber cloth and use even, consistent strokes | Clean on a shaded day; maintain a damp-to-dry workflow |
| Cloudy appearance on plastic panes | Cleaner left residue | Re-wipe with a fresh microfiber cloth and ensure blade is clean | Rinse and dry thoroughly after each pass |
| Scratches or hazing | Rubbing with abrasive cloth | Switch to a softer microfiber and avoid hard scrubbing | Use only dedicated window fabrics |
| Sticking squeegee blade | Residue on blade | Wipe blade with a damp cloth and dry it | Use minimal soapy solution on the blade |
Common Mistakes
- Using abrasive cleaners or rough fabrics that scratch plastic surfaces.
- Cleaning in direct sun or on hot surfaces, causing rapid drying and streaks.
- Over-wetting panes, especially near frames, which can loosen seals over time.
- Neglecting to wipe the squeegee blade after each pass, leading to re-deposited dirt.
- Skipping a test patch on sensitive plastics before full application.
Tips For Best Results
- Choose a dedicated plastic-safe window cleaning spray to preserve clarity and avoid hazing.
- Match microfiber cloths to the task: use lint-free pads for glass and plush pads for stubborn grime on frames.
- Keep a dedicated squeegee spare with a soft blade for plastics to prevent scratches from hardened edges.
- Employ an extendable pole kit to reduce ladder use and reach awkward spots safely.
- Perform a quick exterior wash on a calm day to minimize wind-driven debris and streaks.
Call A Professional
Consider contacting a pro if windows have deep scratches, clouding that won’t clear with typical cleaners, or if the panes are single-pane acrylics with delaminating coatings. Warning signs include persistent haze after multiple cleanings and visible cracking at edges, which may indicate structural or seal damage requiring specialized care.
FAQ
What is the best cleaner for plastic windows?
A plastic-safe window cleaning spray designed for vinyl and acrylic surfaces works best, paired with a microfiber cloth.
Can I use a regular glass squeegee on plastic windows?
Yes, but ensure the blade is soft and designed for plastic to prevent scratches and streaks.
How often should I clean plastic windows?
Interior windows can be cleaned every 1–2 months; exterior panes may need more frequent cleaning depending on climate and exposure.
Will ammonia-based cleaners damage plastic windows?
Avoid ammonia-based cleaners on some plastics, as they can dull clarity or affect coatings. Always check product labels.
Buying Guide
When choosing tools and cleaners for plastic windows, consider size, noise, and ergonomics. Look for a lightweight, adjustable extendable pole that reaches high windows without straining. For fresh air and quiet operation, select a squeegee with a flexible, soft rubber blade and a blade that resists nicks. Energy-efficient, compact cleaners minimize chemical use while delivering effective results. A complete kit with microfiber pads and sponges provides versatility for frames, sills, and hard-to-reach corners. Finally, prioritize products labeled as safe for plastic to protect acrylic and vinyl surfaces over time. Are you balancing cost with long-term value? A bundled kit often saves time and ensures you have compatible tools for ongoing maintenance.