Plastic Adirondack chairs are a popular choice for decks, patios, and sunny outdoor spaces due to their durability and low maintenance. Over time, dirt, mildew, and ground-in grime can dull their appearance. This guide provides a clear, step-by-step approach to restoring plastic Adirondack chairs to a fresh, like-new look using common tools and safe cleaning methods.
Quick Answer
For a fast refresh, rinse the chair, apply a non‑abrasive outdoor furniture cleaner, scrub with a non-scratch nylon bristle brush, rinse again, and wipe with a microfiber cloth. For built-up grime or mildew, a light pressure wash can speed results, followed by air-drying in a shaded area.
A Quick Look at What You’ll Need
The following tools and supplies cover standard cleaning tasks and more stubborn grime. Select items based on the chair’s condition and your preferred cleaning method.
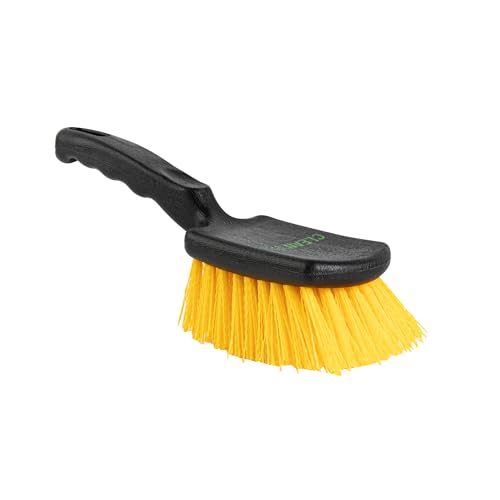
- Plastic Adirondack chair cleaning brush nylon bristles
- Outdoor furniture cleaner spray for plastic chairs
- Non-scratch scrub brush for plastic outdoor chairs
- Microfiber cleaning cloth for plastic Adirondack chairs
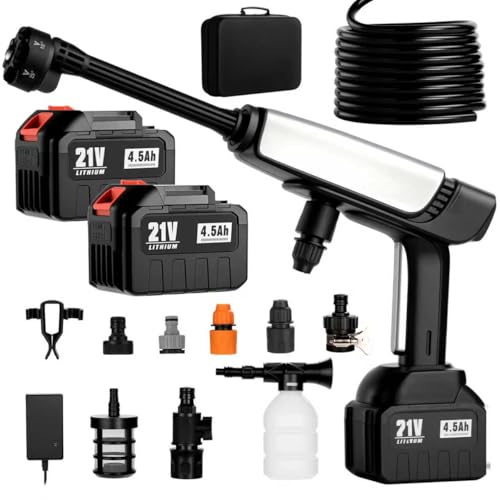
- Portable pressure washer for outdoor furniture cleaning

Before You Start
Before cleaning, inspect for cracks, loose screws, or warped slats. Protect nearby plants and landscaping, and wear gloves to prevent skin irritation from cleaners. Surface prep helps prevent streaks and ensures even results. Time estimates vary: simple wipe-downs take about 15–30 minutes, while deep cleaning may require 45–90 minutes depending on soil buildup. Safety note: avoid harsh chemical mixtures that can degrade plastic; test cleaners on a small, inconspicuous area first.
Step-By-Step: How To Clean Plastic Adirondack Chairs
- Rinse the chair with a garden hose to loosen loose dirt and debris. This reduces scratch risk during scrubbing.
- Mix a mild cleaning solution according to the cleaner’s directions or apply an outdoor furniture spray directly to a damp surface.
- Dip the plastic Adirondack chair cleaning brush nylon bristles into the solution and scrub the chair, focusing on armrests, slats, and the seat where grime collects.
- For stubborn stains, use the non-scratch scrub brush for plastic outdoor chairs or a lightly abrasive pad to lift the stain without scratching the surface.
- Rinse thoroughly with clean water, ensuring all soap residues are removed to prevent streaking.
- Wipe the chair dry with a microfiber cleaning cloth for plastic Adirondack chairs to remove remaining damp spots and reduce water marks.
- If mildew is present, apply a solution of water and a mildewcide or white vinegar diluted with water, scrub gently, rinse, and dry completely.
- Optionally, for large outdoor setups, use a portable pressure washer for outdoor furniture cleaning on a low setting to avoid surface damage; maintain a safe distance from the chair to prevent warping.
- Allow the chair to air-dry in a shaded area to prevent sun damage and run-off streaks before placing back in use.
- Inspect after drying; re-clean any small spots and tighten hardware if necessary.
- Store or cover chairs to protect from seasonal weather when not in use for extended periods.
Troubleshooting
| Symptom | Likely Cause | Fix | Prevention |
|---|---|---|---|
| Streaks after cleaning | Leftover soap or mineral deposits | Rinse thoroughly and wipe with a dry microfiber cloth | Rinse until clear water runs off |
| Fading color or dull plastic | Harsh cleaners or sun exposure | Switch to mild cleaner and limit direct sunlight during cleaning | Clean in shaded areas when possible |
| Mildew spots persist | Moisture retention in slats | Use mildewcide or vinegar solution, scrub, rinse, and dry completely | Dry promptly after cleaning and cover during rain |
| Scratches appear after scrubbing | Using abrasive tools | Switch to non-scratch brushes and avoid stiff brushes on glossy finishes | Test in a hidden area first |
| Stiff, hard-to-clean spots | Ground-in grime | Let cleaner sit for a few minutes, then re-scrub | Regular cleaning to prevent buildup |
Common Mistakes To Avoid
- Using abrasive brushes or scouring pads on smooth plastic surfaces
- Skipping thorough rinsing, which leaves soap residue and causes streaks
- Cleaning in direct sunlight, which can dry cleaners unevenly and cause spotting
- Neglecting to dry chairs completely, leading to mildew growth
- Using harsh solvents that can soften or warp plastic
Tips For Best Results
- Perform a quick rinse before cleaning to reduce friction and dirt buildup
- Work in small sections to prevent cleaner from drying on the surface
- Use microfiber cloths to capture dust and avoid lint residues
- In humid climates, clean in the morning or evening when temperatures are cooler
- Seasonally inspect chairs for cracks or loose hardware and address promptly
Call A Professional
Consider contacting a professional if chairs have extensive structural damage, deep cracks, warped components, or if mildew has penetrated the plastic to the point where color and texture are altered. Seek expert help when cleaners fail to remove stubborn stains or when a pressure washer is required but safety concerns exist.
FAQ
Can I use bleach on plastic Adirondack chairs?
Avoid concentrated bleach on colored plastics; test a small area first and dilute appropriately if recommended by the cleaner’s instructions.
How often should I clean plastic Adirondack chairs?
Clean regularly during the grilling season or heavy outdoor use, and perform a deeper clean every few months or after inclement weather.
Is a pressure washer safe for all plastic chairs?
Low-pressure settings and a careful distance are essential; high pressure can warp or crack plastic over time.
What’s the best way to store chairs after cleaning?
Dry thoroughly and store or cover to protect from sun, rain, and debris when not in use.
Buying Guide
When choosing cleaning tools and accessories for plastic Adirondack chairs, consider size, material compatibility, and the cleaning context. A balanced kit helps maintain chair longevity and appearance.
Size and Fit
Choose brushes and cloths that comfortably reach armrests and slats without bending or twisting the tool. Compact brushes work well for tight gaps, while longer-handled tools provide better reach.
Noise and Convenience
Manual brushes are quiet and controlled, while a portable pressure washer speeds up cleaning but may create noise. If neighbors are close, opt for quieter methods and schedule cleaning during reasonable hours.
Energy and Water Use
DIY cleaning with a spray bottle and microfiber cloth uses minimal water. If you opt for a pressure washer, choose a model with adjustable pressure to balance efficiency and surface safety.
Controls and Ease-of-Use
Look for ergonomic handles, comfortable grip, and clearly labeled spray settings. A kit that includes a microfiber cloth and a dedicated scrub brush reduces setup hassles.
Placement and Storage Considerations
Store cleaning supplies in a dry, shaded area to prevent chemical degradation. Keep sprays away from direct sunlight and heat sources to maintain effectiveness and safety.