Oven drip pans accumulate grease, baked-on grime, and spilled food, which can affect oven performance and flavor. With the right tools and a simple routine, you can restore shine and prevent lingering odors. This guide walks through safe, effective methods for American kitchens to keep drip pans clean and ready for use.
Whether you’re tackling a routine cleaning or a stubborn buildup, the steps below are practical for most household ovens. A little preparation goes a long way toward easier cleanup and better results.
Quick Answer
Best quick method: Remove pans from the oven, wipe loose debris, soak in hot soapy water, scrub with a long-handle oven drip pan cleaning brush, then rinse and dry. For heavy grease, use a non-scratch scouring pad set plus a heavy-duty oven degreaser spray. Consider lining refurbished pans with aluminum foil liners for future use.
What You’ll Need
- Oven drip pan cleaning brush with long handle
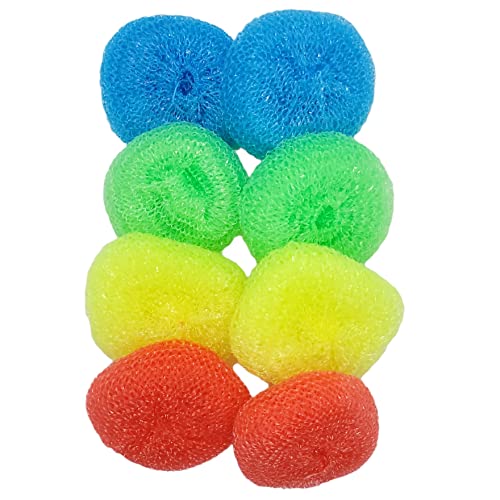
- Non-scratch scouring pad set for oven drip pans
- Heavy-duty oven degreaser spray for drip pans 16 oz
- Aluminum foil drip pan liners for oven pans 9×13 inch
- Heat-resistant disposable gloves for oven cleaning


Before You Start
Ventilate the area if the oven has a strong odor from grease. Allow the oven to cool completely before touching hot components. Remove racks and any foil liners; check manufacturer guidelines for any specific care notes. Time estimate: 20–40 minutes for typical buildup, longer for severe grime. Important: never mix caustic cleaners with aluminum foil liners, and avoid abrasive tools on non-stick surfaces to prevent scratching.
Step-By-Step: How To Clean Oven Drip Pans
- Put on heat-resistant disposable gloves for protection and grip.
- Remove the drip pans from the oven and place them on a sturdy surface.
- Wipe away loose debris with a paper towel or soft cloth to reduce splatter during washing.
- Prepare a warm, soapy water bath in a sink or basin. Add a few drops of dish soap and mix well.
- Soak the pans for 10–15 minutes to loosen baked-on grease.
- Apply the heavy-duty oven degreaser spray to areas with stubborn grime and let it sit for 5–10 minutes.
- Scrub with the long handle oven drip pan cleaning brush, using circular motions to lift residue without bending the metal.
- For remaining stubborn spots, use the non-scratch scouring pad set to avoid scratching the surface.
- Rinse thoroughly with warm water, ensuring all soap and degreaser residues are removed.
- Dry completely with a clean cloth, then reassemble or replace with aluminum foil drip pan liners for easier future cleaning.
- Reinsert the drip pans and any racks, and run a brief oven cycle if you wish to burn off residual cleaner.
Troubleshooting
| Symptom | Likely Cause | Fix | Prevention |
|---|---|---|---|
| Grease remains after cleaning | Insufficient soaking time or scrub strength | Increase soak time; reapply degreaser and scrub with a brush | Soak after cooking and wipe spills promptly |
| Scratches on pans | Using abrasive pads on non-stick surfaces | Switch to non-scratch pads and avoid metal scrapers | Reserve abrasive tools for metal pans only |
| Streaky or cloudy aluminum liners | Residue from cleaners | Rinse liners well or replace with fresh liners | Rinse during final rinse and dry before use |
| Strong chemical odor after cleaning | Overuse of degreaser or insufficient ventilation | Increase ventilation and rinse thoroughly | Use milder cleaners on light buildup |
Common Mistakes
- Letting grease harden without soaking first
- Using metal scouring pads on non-stick or painted pans
- Overapplying degreaser and skipping thorough rinsing
- Neglecting to dry pans completely before reinserting
Tips For Best Results
- Schedule a routine every few months to prevent heavy buildup.
- Line pans with aluminum foil liners to simplify future cleanup; replace liners regularly.
- Keep a spray bottle of water for quick dilution of deep-cleaning products to reduce residue.
- Wash drip pans separately from oven racks to avoid cross-contamination of cleaners.
Call A Professional
Contact a professional if the drip pans are severely warped, discolored beyond cleaning, or if the oven shows signs of gas or electrical issues after cleaning. Stop cleaning and seek help if components emit unusual smells, smoke, or if you notice persistent leaks, cracks, or other damage that could affect oven safety.
FAQ
Can I use bleach on oven drip pans?
Bleach is not recommended for most drip pans; it can damage surfaces and create strong fumes. Use gentle degreasers and soap with a thorough rinse.
Are aluminum foil liners safe for all ovens?
Aluminum foil liners are generally safe for 9×13 inch pans, but check your oven’s manual. Do not cover vent openings or heat sensors.
How often should drip pans be cleaned?
Clean drip pans every 1–3 months depending on cooking frequency and spill frequency, with immediate cleaning after obvious spillovers.
What if the pans still look dirty after cleaning?
Repeat the soaking and scrubbing steps, or consider replacing severely damaged or warped pans.
Can I put drip pans in the dishwasher?
Dishwasher use depends on material; metal pans may rust in water, while some glass or coated pans could degrade. Check manufacturer guidelines.
Buying Guide
When selecting tools and supplies for cleaning oven drip pans, consider size, material, and intended usage. A well-chosen set of tools reduces effort and protects surfaces.
- <bSize and fit: Ensure the drip pans and liners fit your oven’s dimensions, typically 9×13 inch or the pan size specified by the manufacturer.
- <bNoise level: Look for brushes and pads that work quietly without excessive bristles shedding into food or onto cookware.
- <bEnergy and efficiency: Efficient cleaning tools minimize time and water use. A long-handled brush reduces bending and scrubbing effort.
- <bControls and safety: Use heat-resistant gloves and non-scratch pads to avoid damage to coated or non-stick surfaces.
- <bPlacement: Use aluminum foil liners to simplify future maintenance but avoid placing liners over heating elements or vents.
With the right tools, routine care keeps ovens cleaner, safer, and more efficient. Are you ready to simplify your next oven cleanup with a dedicated brush, non-scratch pads, and liners?