Mold on interior walls is a common problem in homes with humidity fluctuations, poor ventilation, or water intrusion. Vinegar offers a natural cleaning option that can help inhibit mold growth when used correctly. This guide covers practical steps, safety tips, and the right tools to use for effective mold removal on painted and non-porous wall surfaces.
The process focuses on applying household vinegar to affected areas, scrubbing away mold stains, and preventing recurrence through proper drying and environmental controls. Readers will learn how to prepare the area, choose the right cleaning supplies, and finalize the job with protective measures to minimize exposure to mold spores.
Quick Answer
Directly spray undiluted white vinegar on moldy areas, let it sit for at least an hour, then scrub with a stiff bristle brush and rinse. Repeat if necessary and allow the surface to dry completely. For porous surfaces, consider sealing after thorough drying to reduce future mold uptake.
What You’ll Need
- Spray bottle for vinegar mold cleaning
- Microfiber cleaning cloths for mold removal
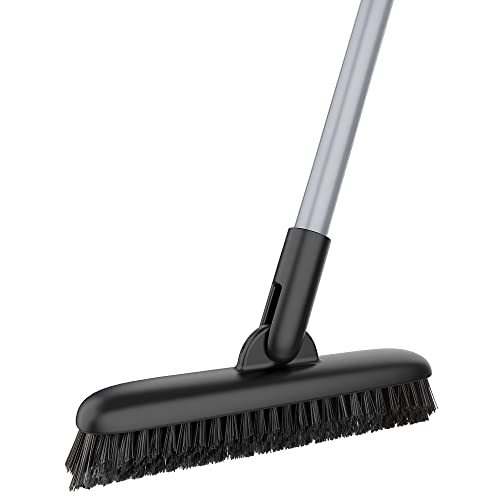
- Stiff bristle scrub brush for mold on walls
- Plastic putty knife scraper for wall mildew
- Protective gloves nitrile mold cleaning


Before You Start
Inspect the affected area for water damage, discoloration, or crumbling paint. Ensure good ventilation by opening doors and windows or using a fan. Wear protective gloves to protect skin and eye protection if splashes occur. Move furniture away from the wall and cover floors to catch drips. Plan for several hours of drying time between steps to prevent re-growth.
Step-By-Step: How To Clean Mold Off Walls With Vinegar
- Put on protective gloves nitrile mold cleaning and eye protection. Remove any loose items from the area.
- Fill the spray bottle for vinegar mold cleaning with pure white vinegar. Do not dilute for stubborn mold spots on non-porous surfaces.
- Spray the vinegar generously on the mold-affected area and let it sit for at least 60 minutes to penetrate the spores.
- Use a stiff bristle scrub brush for mold on walls to scrub the area in circular motions, applying steady pressure to lift stains.
- Wipe away loosened residue with a microfiber cleaning cloths for mold removal, rinsing the cloth frequently to avoid smearing.
- If paint or wallpaper is damaged, gently use a plastic putty knife scraper for wall mildew to lift flaking mold; avoid tearing the surface.
- Re-spray the area with vinegar and repeat scrubbing if any mold remains. Allow the surface to air dry completely.
- Inspect for lingering moisture or musty odors. If necessary, re-clean and re-dry the area, then consider sealing the surface to curb future growth.
- Address underlying moisture sources after cleaning, such as fixing leaks, improving ventilation, or using a dehumidifier in damp rooms.
- Document the area and schedule periodic checks to catch new mold early before it spreads.
- Dispose of used cloths and wipe containers safely. Clean tools with soap and water to prevent cross-contamination.
- Return the room to normal use once the area is completely dry and odor-free.
Troubleshooting
| Symptom | Likely Cause | Fix | Prevention |
|---|---|---|---|
| Faint musty odor persists after cleaning | Moisture remains in wall cavity | Address moisture source; run dehumidifier; re-clean after drying | Improve ventilation; monitor humidity levels |
| Stains return within days | Residual spores or porous surface | Re-clean with vinegar; seal porous areas after full dry | Control humidity; fix leaks promptly |
| Paint peeling near mold | Moisture damage or poor adhesion | Remove peeling, repair wall, repaint after drying | Address moisture and use mold-resistant paint |
| Tools show mold after use | Cross-contamination | Sanitize tools with soap and water; dry thoroughly | Dedicated cleaning kit for mold areas |
Common Mistakes
- Using bleach on porous surfaces, which can feed mold underneath paint.
- Not ensuring the area is fully dry before reoccupying the space.
- Overlooking hidden moisture sources that allow recurrence.
- Rubbing too hard and damaging wall material, especially with painted finishes.
Tips For Best Results
- Test vinegar on a small inconspicuous spot first to ensure colorfastness.
- For large mold patches, work in sections to prevent spreading spores to clean areas.
- Use undiluted white vinegar for best antimicrobial effect on non-porous areas.
- Keep a clean rinse cloth ready to minimize re-depositing mold residue.
- Consider combining with a dehumidifier in high-humidity rooms to reduce mold recurrence.
Call A Professional
Consult a pro if mold covers a large area (typically more than 10 square feet), if there is visible mold behind walls, or if there is suspected structural water damage. Stop cleaning and seek help immediately if you notice symptoms of mold exposure such as persistent coughing, wheezing, or skin irritation.
FAQ
Can vinegar kill all types of mold?
White vinegar is effective against many common mold species on non-porous surfaces, but some types on porous materials may require professional remediation.
Is vinegar safe for all wall types?
Most painted and sealed walls tolerate vinegar, but check a hidden area first to ensure no adverse reaction.
How long should I wait between cleaning passes?
Allow at least 60 minutes for the vinegar to work before re-cleaning or scrubbing.
Should I seal walls after cleaning?
Sealing is sometimes recommended on porous surfaces after thorough drying to reduce future mold uptake.
What if mold returns after sealing?
Investigate ongoing moisture sources and consider professional assessment for hidden leaks or ventilation issues.
Buying Guide
When choosing products for mold cleaning and prevention, consider factors such as how large the affected area is, how loud and energy-efficient cleaning tools are, and how easy they are to use in tight spaces. A balanced approach uses simple solutions like vinegar for initial remediation and combines sturdy tools to maximize effectiveness without introducing harsh chemicals.
Key buying factors include size and portability of the spray bottle, the effectiveness of microfiber cloths in picking up spores, the stiffness of the brush for stubborn spots, and the durability of a scraper for lifted residues. Look for gloves with good chemical resistance and comfortable fit to extend cleaning sessions. Consider whether you need additional moisture control devices, such as a dehumidifier, and plan for proper storage of cleaning supplies to avoid cross-contamination.
For comparisons, evaluate products based on grip comfort, compatibility with vinegar cleaning, surface compatibility (painted vs. unpainted walls), and ease of sanitization after use. A well-rounded kit often includes a spray bottle, microfiber cloths, a stiff brush, a scraper, and nitrile gloves, forming a practical system for regular mold checks and quick spot treatments.