Cleaning a microwave can be quick and effective using baking soda. This natural solution helps loosen grime, neutralizes odors, and leaves the interior shining without harsh chemicals. The following guide provides a practical, step-by-step method tailored for American kitchens and common microwave builds.
Baking soda acts as a gentle abrasive and deodorizer when activated with steam. Combined with a few soft cleaning tools, it minimizes streaks and protects the interior surfaces. Readers will find a clear sequence of steps, safety notes, and practical tips to achieve a spotless microwave without disassembly or harsh cleaners.
Quick Answer
Best approach: Create a baking soda steam solution, wipe with microfiber cloths, and finish with a non-scratch scrub tool for stubborn spots. This method is safe for most microwave interiors and avoids damaging coatings.
What You’ll Need
The following tools and materials support a thorough interior clean using baking soda. Place them within easy reach before you begin.
- baking soda microwave cleaning kit
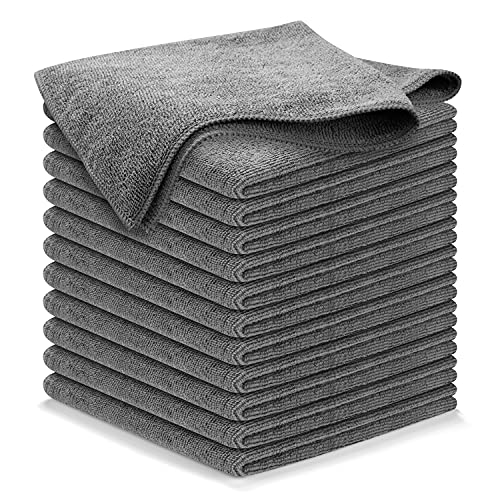
- microfiber cloths for microwave interior cleaning
- non-scratch silicone scrub brush for microwave
- non-abrasive sponge for microwave cleaning
- microwave oven interior cleaning brush set


Before You Start
Safety and prep are essential. Remove the turntable plate and any removable components, then set them aside for separate cleaning. Use a microwave-safe bowl for the baking soda solution. Avoid metal objects or aluminum foil inside the microwave. Allow the interior to cool if it has just been used at high power. Expect total prep and cleanup time to run about 15–25 minutes, depending on the level of grime.
Step-By-Step: How To Clean A Microwave With Baking Soda
- Mix a cleaning solution by whisking 2–3 tablespoons of baking soda into 1 cup of warm water until the paste-like consistency forms.
- Pour a small amount of the solution into a microwave-safe bowl and place it inside the microwave. Close the door.
- Run the microwave on high for 3–5 minutes, letting the steam loosen stuck-on food and odors. Do not open the door during steaming.
- Carefully remove the bowl using a potholder; steam will be hot. Wipe the interior walls with a microfiber cloth to remove loosened residue.
- Gently scrub stubborn spots with a non-scratch silicone scrub brush for microwave or a non-abrasive sponge. Focus on corners and the door seal.
- Wipe the ceiling, walls, and door frame again with a fresh microfiber cloth dampened with plain water to remove any remaining baking soda residue.
- Clean the turntable and ring separately in warm, soapy water; rinse and dry before reassembling inside the unit.
- For lingering odors, place a damp cloth with a small amount of baking soda for 5–10 minutes, then wipe away to refresh the interior.
- Inspect seals and gaskets for grime. If needed, use the microwave oven interior cleaning brush set to lightly brush those areas without applying excessive pressure.
- Perform a final wipe-down with a dry microfiber cloth to remove any moisture and to prevent streaks on reflective surfaces.
- Test by running a quick 30-second cycle with a cup of water to ensure the interior is evenly cleaned and odor-free.
- Replace the turntable and plug the microwave back in. Dispose of the used baking soda solution safely.
Troubleshooting
| Symptom | Likely Cause | Fix | Prevention |
|---|---|---|---|
| Persistent odor after cleaning | Residual odor on interior surfaces | Re-run steam step with fresh baking soda solution | Clean promptly after each use; wipe with baking soda solution weekly |
| Streaks on walls | Excess moisture or residue | Wipe with dry microfiber cloth; rinse with plain water | Do not oversaturate cloths; use light, even pressure |
| Residue on door seal | Residue buildup around gasket | Gently scrub with non-scratch brush; wipe clean | Clean gasket during every deep clean |
| Steaming stops mid-cycle | Door not fully closed or vent blocked | Reclose door firmly and ensure vents are clear | Inspect door latch and vent area regularly |
Common Mistakes
- Using abrasive scrubbers that scratch interior surfaces
- Overheating baking soda solution and creating sprays beyond the interior
- Ignoring the turntable and its support ring during cleaning
- Not removing the turntable before cleaning the interior
- Directly wiping hot surfaces with cold cloths, which may crack coatings
Tips For Best Results
- Run the steam cycle, then wipe in sections rather than spraying large areas at once to control moisture.
- Use a fresh microfiber cloth for each pass to prevent redistributing grime.
- Keep a small kit nearby with a microfiber cloth, silicone brush, and sponge for quick touch-ups between deep cleans.
- For heavily stained interiors, repeat the process once more using a slightly stronger baking soda paste (add a pinch more baking soda).
Call A Professional
Seek professional help if the microwave shows signs of malfunction, persistent electrical smells, unusual noises, or damage to the door seal that affects containment. If the unit has been exposed to high heat or heavy grime that cannot be safely removed with standard cleaning methods, contact a qualified appliance technician.
FAQ
Can baking soda damage a microwave?
No, when used with water and applied with non-abrasive tools, baking soda is gentle on most interior coatings.
Is it safe to use baking soda directly on the door seal?
Avoid soaking the gasket; use a damp cloth and a light scrub as needed.
How often should I clean my microwave with baking soda?
A full clean every couple of weeks or after noticeable spills keeps interior grime minimal.
What if my microwave has stubborn, burnt-on food?
Use a paste of baking soda and water, apply to the spots, let sit briefly, then scrub gently with a non-scratch brush.
Buying Guide
When choosing cleaning tools and accessories for a baking-soda-based microwave clean, consider size, materials, and compatibility with microwave interiors:
- <bSize and capacity: Ensure the interior tools accommodate the typical microwave interior geometry; larger units may benefit from longer handles on brushes.
- <bNon-scratch brushes and sponges: Prioritize non-abrasive options to protect coatings while still removing tough residue.
- <bMicrofiber cloth quality: Ultra-soft, lint-free cloths reduce streaks and capture grime efficiently.
- <bCleaning kits: A dedicated baking soda microwave cleaning kit can streamline supplies in one place.
- <bPlacement: Store tools in a cabinet near the kitchen to encourage regular maintenance after meals.
What combination of brushes, sponges, and cloths best fits your routine? A compact kit with microfiber cloths and a silicone scrub brush often offers the most versatility for quick and thorough cleanups, while a dedicated microwave cleaning kit provides a complete solution for deeper cleans.