Clean mason jars are essential for food storage, crafts, and preserving homemade goodness. This practical guide covers safe methods, handy tools, and best practices to keep jars sparkling and free of residues. The steps below are designed for common kitchen jars and will help maintain clarity and odor-free glass.
Quick Answer
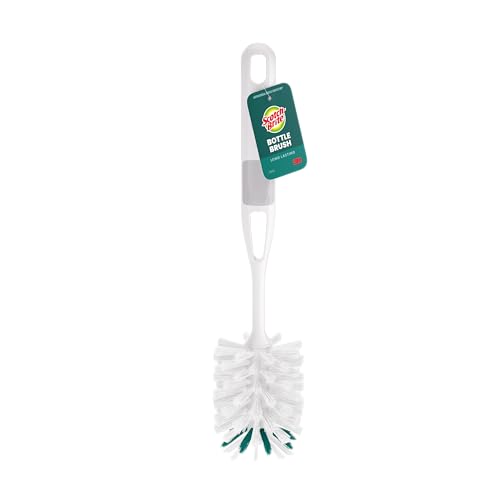
Use a long-handled bottle brush for mason jars to reach deep corners, or a wide-mouth mason jar cleaning brush for larger openings. For delicate jars or stubborn residue, a silicone jar cleaning brush is gentle yet effective. Rinse with hot water, wash with dish soap, rinse again, and air-dry upside down on a rack.
What You’ll Need
- Long-handled bottle brush for mason jars
- Wide-mouth mason jar cleaning brush
- Silicone jar cleaning brush for glass jars
- Narrow neck mason jar brush
- Jar cleaning brush set


Before You Start
Prepare a clean workspace and clear space to air-dry jars. Use hot water and a mild dish soap to avoid damaging any labels or coatings. If jars have strong odors or dried-on residue, consider soaking briefly in warm, soapy water or a vinegar solution. Important safety note: avoid using abrasive pads that can scratch glass and compromise the jar’s seal if you’re planning to reuse lids with compatibility issues.
Estimated time for a standard cleanup: 5–10 minutes per batch. If you’re sterilizing jars for canning, additional time and steps are required after washing.
Step-By-Step: How To Clean Mason Jars
- Rinse the jar with warm water to remove loose debris and to prevent muddy or sticky residue from drying on the glass.
- Fill the sink or a basin with warm, soapy water. Use a dish soap that cuts grease and is suitable for food-contact surfaces.
- Choose the appropriate brush: a long-handled bottle brush for deep jars, a wide-mouth brush for wide openings, or a silicone brush for delicate surfaces. Use a narrow neck brush for tight spots around rims.
- Insert the brush into the jar and swirl gently to dislodge stuck particles. For stubborn residue, let the jar soak for 5–10 minutes before scrubbing.
- Thoroughly scrub the inside walls, bottom, and around the neck. Don’t forget the lip and threads where residue can hide.
- Rinse the jar in clean, hot water until no soap suds remain. Pay attention to the rim and bottom to remove all soap traces.
- Inspect for any remaining spots. If needed, repeat steps 3–6 or use a paste made from baking soda and water for persistent stains.
- Place jars upside down on a rack or clean towel to air-dry completely. Avoid stacking while damp to prevent odor transfer or moisture retention.
- If sterilizing for canning, follow the appropriate canning process after washing, ensuring lids and rings are compatible and properly sealed.
- Store clean jars in a dry, protected area to prevent dust and odors from returning before use.
- For future use, designate a dedicated jar-cleaning routine to keep jars ready for storage or canning projects.
- Maintain the brushes by rinsing thoroughly after each use and letting them dry fully to prevent mildew buildup.
Troubleshooting
| Symptom | Likely Cause | Fix | Prevention |
|---|---|---|---|
| Persistent milky film | Residue from hard water or soap | Rewash with a vinegar rinse (1:1 water and white vinegar) then soap | Use filtered water; avoid over-soaping |
| Stubborn oil or grease | Grease from food storage | Soak longer; scrub with a paste of baking soda and water | Pre-rinse before storing oily contents |
| Scratches on glass | Overly abrasive tools | Switch to softer bristles, avoid steel wool | Use non-abrasive brushes for delicate jars |
| Odors linger | Residual scents from foods | Rinse with hot water; air-dry; consider a brief vinegar soak | Rinse promptly after use with strong-smelling foods |
| Mold in the cap area | Moist environment, improper drying | Thoroughly dry rims and threads; sanitize if needed | Dry jars completely before resealing |
Common Mistakes
- Using abrasive scrubbers that scratch glass or wear away jar finishes
- Leaving soap residue, which can affect flavor or odor
- Forgetting to clean the jar lids and rings, especially the threads
- Not allowing jars to dry fully, leading to mildew or odor transfer
- Neglecting narrow-neck jars, which require appropriate brushes to reach all areas
Tips For Best Results
- Keep a dedicated jar-cleaning toolkit handy, including a long-handled bottle brush and a narrow neck brush for tight spaces
- Warm water cleans more effectively than cold water when dealing with oily residues
- For hard-to-reach spots, tilt the jar and brush from multiple angles to dislodge hidden debris
- Rinse with clean hot water immediately after washing to reduce soap residue buildup
- Consider a post-clean air-dry routine on a rack to prevent dust settling on still-damp glass
Call A Professional
Cleaning jars is straightforward, but seek professional help if jars show deep cracks, severe chips, or if you encounter persistent odors that resist standard cleaning. If jars have compromised seals or lids, or you are canning with specialty jars and equipment, consult a canning or home preservation expert to ensure safety and proper technique.
FAQ
What is the best brush for mason jars with narrow necks?
A narrow neck mason jar brush is specifically designed to reach tight spaces and is ideal for long, slender jars.
Can I use vinegar to clean jars?
Yes, a mild vinegar rinse can help remove mineral deposits and odors; rinse thoroughly afterward.
How do I prevent odors from lingering after washing?
Rinse with hot water, air-dry completely, and consider occasional baking soda or vinegar rinses to neutralize lingering scents.
Are silicone brushes safe for glass jars?
Yes, silicone brushes are gentle on glass and effective at reaching curved interiors without scratching.
How should I store clean jars to keep them odor-free?
Store in a dry, clean cabinet with lids loosely placed or removed to prevent moisture buildup and odors.
Is it safe to reuse canning lids after washing?
Use lids as recommended by the canning guidelines, ensuring they are in good condition and compatible with the jars.
Buying Guide
Choosing the right jar-cleaning tools can simplify maintenance and extend the life of mason jars. Consider size, material, and cleaning reach when selecting tools.
- Brush type and reach: A set that includes a long-handled bottle brush, wide-mouth brush, and a narrow neck brush covers diverse jar shapes.
- Material: Soft nylon or silicone bristles protect glass surfaces while providing effective scrubbing. Avoid abrasive materials that can scratch jars.
- Ergonomics: Comfortable handles reduce hand fatigue during thorough cleaning sessions, especially for multiple jars.
- Maintenance: Look for brushes that are dishwasher-safe and easy to rinse to prevent mildew.
- Completeness: A jar cleaning brush set often provides the best value by offering all needed tools in one purchase.
- Compatibility: Ensure tools fit both standard and wide-mouth mason jars, and include options for narrow-neck jars.
When evaluating options, consider your typical jar sizes, how often you wash jars, and whether you will use jars for canning or storage. A balanced kit with multiple brush types generally yields the best results for most households.