Lint buildup in dryer vents is a common CLG (causes lint buildup) issue that can reduce drying efficiency, increase energy use, and pose a fire hazard. This guide explains safe, effective methods to clean lint vents using common tools and a structured step-by-step process tailored for American homes.
Quick Answer
To clean a lint vent effectively, disconnect power, remove the lint trap, and use a vent brush or kit with extensions to reach the duct. Clear debris from the vent opening, check the exterior vent, and reassemble. For stubborn clogs, a flexible snake rod can help break up buildup.
What You’ll Need
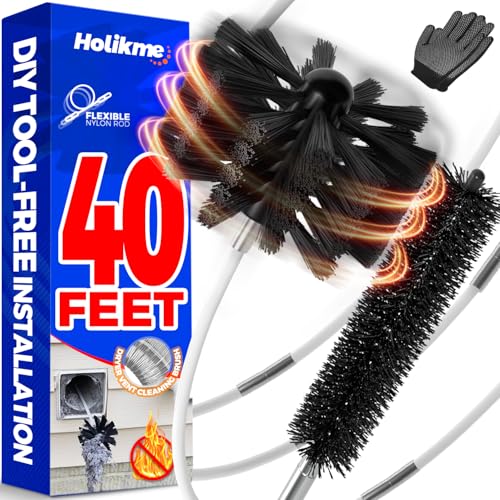
- Dryer vent cleaning brush with extendable rod
- Dryer vent cleaning kit stainless steel brush flexible extension
- Lint trap vent cleaning kit with vacuum hose attachment
- Accordion brush dryer vent cleaning tool set
- Gas dryer vent cleaning kit with flexible snake rod


Before You Start
Before beginning, unplug the dryer and move it away from the wall. Turn off any gas supply if using a gas dryer and ensure the area around the vent is clear. Inspect both ends of the vent for visible damage or kinks. Plan for a 30–60 minute session depending on vent length. Safety first: never force tools through a clogged vent, and avoid dislodging the ductwork.
Step-By-Step: How To Clean Lint Vent
- Unplug the dryer and pull it away from the wall to access the vent.
- Remove the lint trap and vacuum out the cabinet where the lint screen sits to remove loose lint.
- Attach the extendable brush to the drill or manually extend the rod and insert into the vent opening from the exterior or interior side, depending on access.
- Slowly rotate and push the brush through the vent, sweeping lint toward the interior or exterior with steady, gentle motions.
- If the bend is tight, use a flexible extension or accordion brush set to reach around corners.
- Withdraw the brush, clean it, and repeat as necessary until the vent is clear.
- Use a vacuum with a hose attachment at the vent opening to remove loosened lint and debris from the exterior side.
- Inspect the exterior vent cover for obstructions and clean the vent hood and screen.
- Reconnect the dryer’s vent and the power source, then run a short test cycle to confirm proper airflow.
- Check the area for any signs of overheating after the test run and re-tidy the workspace.
- Replace the lint trap and ensure it seats correctly to promote efficient airflow.
- Schedule regular maintenance, especially before peak heating or high-use seasons.
Troubleshooting
| Symptom | Likely Cause | Fix | Prevention |
|---|---|---|---|
| Dryer takes longer to dry | Partial vent blockage | Clean vent and lint trap; check exterior vent | Clean monthly during heavy use |
| Lint accumulation around the lint trap | Improperly seated lint screen | Re-seat or replace lint trap; inspect housing | Regularly inspect alignment |
| Excessive heat or burning smell | Severe blockage or damaged duct | Disassemble and remove buildup; replace damaged sections | Inspect vent integrity yearly |
| Vent exterior is blocked | Debris or snow covering vent | Clear exterior cover and screens | Keep area clear; install screens |
Common Mistakes
- Using one short brush or a rigid rod to reach deep ducts—this leaves buildup behind.
- Forcing tools through bends or crimps—risk of damaging ductwork or fire hazards.
- Neglecting the exterior vent—lint and pests can accumulate outside, reducing airflow.
- Not unplugging the dryer or turning off gas when applicable—safety risk.
Attention to safety and proper technique reduces the risk of damage and improves dryer performance over time.
Tips For Best Results
- Work from the interior to the exterior in stages to ensure complete clearance.
- Choose a vent brush with a long, flexible handle to navigate bends without forcing.
- Pair a brush kit with a vacuum hose attachment for efficient debris removal.
- After cleaning, run the dryer empty on a high heat setting for 10–15 minutes to dislodge remaining lint.
- Document the date of cleaning and inspect the vent system quarterly.
Call A Professional
Consider professional assistance if any of the following apply: persistent drying inefficiency after cleaning, frequent overheating or burning smells, visible lint near the exterior vent, history of vent damage, or if the vent runs through tight spaces that require specialized equipment. Gas dryer users should have a licensed technician inspect gas lines and venting for safety and compliance.
FAQ
How often should I clean my lint vent?
Most households benefit from a thorough cleaning once a year, with more frequent cleanings for households with heavy dryer use or multiple pets.
Can I use a regular vacuum to clean the vent?
Vacuuming is helpful for the accessible interior area, but avoid pushing debris further into tight ducts; use dedicated vent brushes for deeper cleaning.
Is it safe to clean a gas dryer vent myself?
It is safe when following safety precautions, but gas dryers require careful handling of gas lines and venting; contact a professional if unsure.
What signs indicate a clogged vent?
Longer drying times, hot clothing after cycles, increasing energy use, or a burning smell are common indicators.
Should I disconnect power during cleaning?
Yes. Always unplug the dryer before starting any cleaning to prevent electrical shock or injury.
Do vent lengths affect cleaning difficulty?
Yes. Longer or winding ducts may require multiple tools, extensions, or professional help to ensure full clearance.
Buying Guide
When choosing a lint vent cleaning solution, consider several factors to ensure effective results and safe operation.
- Size and reach: Select a kit with extendable rods or flexible extensions to access long or tight duct runs.
- Brush type: Stainless steel brushes are durable and stiff enough to remove stubborn buildup; softer brushes help avoid duct damage.
- Versatility: Kits that include exterior and interior components, plus a vacuum hose attachment, streamline cleaning.
- Compatibility: Ensure the kit works with your dryer type (gas or electric) and matches your vent diameter.
- Durability: Look for corrosion-resistant construction and secure couplings for repeated use.
- Ease of use: Ergonomic handles, clear instructions, and minimal tool swapping enhance efficiency.
- Safety features: Tools designed to minimize forces on ducts and reduce the risk of punctures or loosening joints.
- Maintenance needs: Consider how easy it is to clean and store tools after use.
For most homes, a combination of an extendable dryer vent cleaning brush and a vacuum-assisted kit delivers the best balance of reach, cleaning power, and ease of use. Assess your vent layout, access points, and the presence of any prior damage to choose the right set. Planning ahead reduces cleanup time and improves dryer efficiency, helping to prevent potential fire hazards.