Kitchen cabinets endure daily exposure to cooking oils, splatters, and fingerprints. A proper cleaning routine can restore their appearance, protect the finish, and extend their life. This guide walks through practical steps using common household cleansers and targeted tools designed for American kitchens.
Quick Answer
For most cabinets, start with a gentle cleaning solution and a soft cloth to lift surface dirt, then use a more thorough cleaner for grease buildup. Dry the surface to prevent streaks. Regular maintenance with the right tools keeps cabinets looking new longer.
What You’ll Need
- Cabinet cleaning brush with long handle for reach and scrubbing tight corners
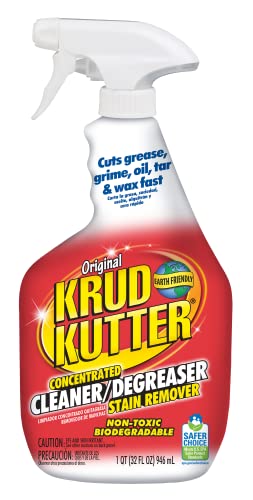
- Grease remover spray for kitchen cabinets to tackle sticky, oily residues
- Microfiber cleaning cloths for kitchen cabinets for lint-free drying and polishing
- Wood cabinet cleaner conditioner spray for finish protection
- Melamine sponge magic eraser kitchen cabinet cleaner for stubborn spots


Before You Start
Protect nearby surfaces and hardware. Remove items from doors and shelves, and place a drop cloth or old towel on the counter. Test cleaners in an inconspicuous area to confirm no discoloration. Plan for a staged cleanup—smaller sections first to maintain control. Expect the process to take 20–40 minutes per cabinet run, depending on the finish and level of grime.
Cautions: avoid overly abrasive pads that can scratch veneer, and never spray cleaner directly onto hinges or metal hardware. If cabinet doors have a high-gloss or matte finish, use products labeled for that finish to prevent dulling.
Step-By-Step: How To Clean Kitchen Cabinets
- Remove all items from cabinets and wipe loose dust with a dry microfiber cloth.
- Dust the top edges and inside corners with a long-handle cabinet cleaning brush to free embedded dirt.
- Apply a light mist of grease remover spray for kitchen cabinets to a microfiber cloth and wipe the exterior surfaces in the direction of the grain.
- For stubborn spots, use a melamine sponge magic eraser kitchen cabinet cleaner gently to lift grime without damaging the finish.
- Spray a small amount of wood cabinet cleaner conditioner spray onto a clean cloth and buff the surface to restore shine and protect the wood.
- Wipe down all doors, frames, and takes careful attention to recessed panels or trim. Use a damp cloth to remove any residue, then dry with a separate microfiber cloth.
- Clean the cabinet interiors with a light solution of water and a mild detergent if needed, then dry completely before replacing items.
- Reassemble doors and hardware, wiping metal hinges with a dry cloth to prevent rust and ensure smooth operation.
- Inspect for remaining greasy patches. Repeat as necessary in areas with heavier buildup.
- Establish a routine: a quick weekly wipe-down and a deeper clean every few months to prevent buildup.
- Document any finish wear or scratches for future touch-ups or refinishing decisions.
- Store cleaning supplies out of reach of children and pets when not in use.
Troubleshooting
| Symptom | Likely Cause | Fix | Prevention |
|---|---|---|---|
| Streaks after cleaning | Residue from cleaner | Buff with a dry microfiber cloth; use less product next time | Apply cleaner to cloth, not directly to surface |
| Faded or dull finish | Harsh cleaner or over-wiping | Switch to a finish-safe cleaner; wipe with the grain | Ventilate area and test first |
| Scratches on veneer | Abrasive sponge or aggressive scrubbing | Use soft pads and light pressure | Avoid rough tools; regular routine reduces buildup |
| Sticky residue after spray | Overuse of spray cleaner | Wipe with a damp cloth and dry | Spray lightly onto cloth, not directly on surface |
| Hardware sticking or squeaking | Dusty hinges | Clean and lubricate hinges as needed | Regular maintenance |
Common Mistakes
- Using harsh or solvent-heavy cleaners on wood finishes
- Skipping a final drying step, leaving streaks or moisture behind
- Neglecting interior surfaces, which accumulate dust and grime
- Over-wetting wood panels, which can cause warping over time
Tips For Best Results
- Work in sections to maintain control and prevent drying marks
- Choose a cleaner that matches your cabinet finish (sealed wood, painted, or laminate)
- Always wipe in the direction of the grain to minimize scratches
- Regular quick wipe-downs save deeper scrubbing later
- Keep a dedicated set of microfiber cloths for cabinet cleaning to avoid cross-contamination
Call A Professional
Consider a pro if cabinets have extensive finish damage, visible cracks, or warping that cleaning cannot resolve. Seek professional help for refinishing, veneer repairs, or issues behind hardware that require dismantling or specialized tools. If moisture or mold is suspected in cabinet interiors, contact a professional promptly.
FAQ
What is the best way to remove grease from kitchen cabinets?
Use a grease remover spray applied to a microfiber cloth, then wipe in the direction of the grain and dry thoroughly.
Can I use all-purpose cleaner on wood cabinets?
Only if the product is labeled safe for wood finishes; otherwise, use a wood cabinet cleaner conditioner spray to protect the surface.
How often should I deep clean kitchen cabinets?
Plan a deep clean every 2–3 months, with quick weekly wipe-downs to prevent heavy buildup.
Is it safe to use a magic eraser on cabinets?
Yes, on many finishes for stubborn spots, but test first in a hidden area to ensure there is no dulling or damage.
What maintenance should follow a cabinet cleaning?
Dry thoroughly, polish with a conditioner spray if recommended for the finish, and reassemble hardware to maintain a smooth operation.
Buying Guide
Choosing the right cabinet cleaning products involves considering finish type, ease of use, and safety. Here are key buying factors to help navigate options:
- <bFinish compatibility: Determine whether cabinets are painted, stained, or laminated, and select cleaners labeled for that finish.
- <bEffectiveness: Look for grease removers with proven spray formulations and microfiber cloth compatibility for lint-free results.
- <bProtection: Consider a wood cabinet cleaner conditioner spray to restore shine and provide a protective layer after cleaning.
- <bTools: A long-handle cabinet cleaning brush helps reach high tops and deep corners without climbing stairs or stools.
- <bDurability: Choose durable microfiber cloths and melamine sponges designed for repeated use and minimal scratching.
- <bSafety: Prioritize non-toxic, low-odor products with clear usage instructions for households with kids and pets.
- <bFinish maintenance: Some products offer finishing care to extend the life of wood cabinets through regular applications.