Keeping a kitchen bin clean helps prevent odors, bacteria, and pests. This guide provides a clear, step-by-step method using common cleaning tools designed for American households. The approach works well for traditional trash cans and stainless steel models alike.
Quick Answer
scrub routine involves rinsing, applying a cleaner, brushing, and a final rinse. For stubborn smells, a deodorizer and scrub brush kit can be used. Regular maintenance with a dedicated cleaning brush keeps bins fresh and reduces buildup.
What You’ll Need
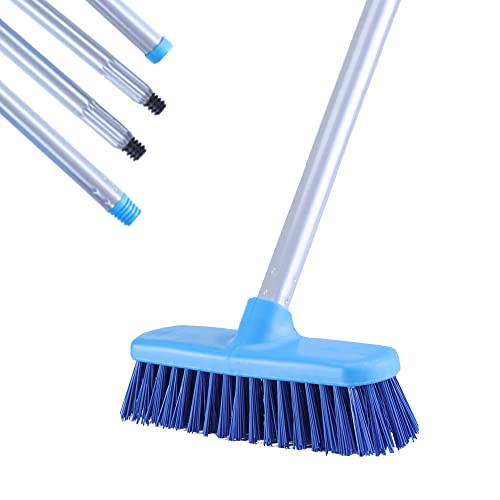
- Long-handled trash can cleaning brush
- Garbage can cleaning kit with brush and scraper
- Stainless steel trash can scrub brush
- Two-in-one trash can cleaning brush and sponge
- Trash can deodorizer and scrub brush kit
- Protective gloves (optional)
- Warm water and mild dish soap or a dedicated bin cleaner


Before You Start
Choose a well-ventilated area or outdoor space to avoid fumes indoors. Empty the bin and rinse out any loose debris. Use gloves if you have sensitive skin or are cleaning a heavily soiled container. Work on a surface that won’t be damaged by cleaners, such as a garage floor or outdoor pavement. Time estimate: 15–30 minutes per bin, depending on how dirty it is.
Step-By-Step: How To Clean A Kitchen Bin
- Remove the trash liner and dispose of waste in a sealed bag to minimize odors during cleaning.
- Rinse the interior with warm water to loosen trapped debris; use a spray bottle or hose if outdoors.
- Apply a mild dish soap solution or bin cleaner evenly across the interior walls and bottom.
- Use a long-handled trash can cleaning brush or garbage can cleaning kit with brush and scraper to scrub all surfaces, paying attention to corners and the lid edge.
- For stubborn grime, employ the scraper included in the kit to lift stuck-on residue without scratching.
- Rinse thoroughly with clean water until all soap is removed; wipe dry with a towel or allow to air dry fully.
- If odors persist, sprinkle a small amount of baking soda or use a trash can deodorizer and scrub brush kit to deodorize and brush at once.
- Reposition a fresh bag, insert it into the can, and run a quick wipe along the rim to prevent future residue.
- Optional: spray a light disinfectant on the interior once dry for extra protection, then reattach the liner.
- Clean the exterior as well, especially if it’s a stainless steel model; wipe with a microfiber cloth to prevent streaks.
- Store cleaning tools in a designated area after use to prevent cross-contamination with kitchen surfaces.
Troubleshooting
| Symptom | Likely Cause | Fix | Prevention |
|---|---|---|---|
| Persistent odor after cleaning | Residue or trapped moisture | Rinse thoroughly, dry completely, and use a deodorizer | Empty and rinse liner weekly; keep lid closed |
| Scratches on stainless exterior | Harsh scrubbers | Switch to softer brushes and non-abrasive cleaners | Use plastic scrapers and gentle brushes |
| Soap residue after rinse | Too much soap | Rinse with additional clean water until no suds remain | Use minimal cleaner and thorough rinse |
| Bin still leaking after wash | Cracked bin or loose liner | Inspect for cracks; replace liner and, if needed, the bin | Inspect regularly and replace worn bins promptly |
Common Mistakes
- Using harsh cleaners that damage finishes or leave strong residues.
- Cleaning only the exterior while neglecting the interior and lid.
- Skipping thorough drying which leads to lingering odors or mold.
Tips For Best Results
- Clean on a regular schedule to prevent buildup rather than only addressing strong smells.
- Rotate between different brushes: a long-handled brush for the interior and a microfiber cloth for the exterior.
- Pair cleaning with a deodorizing step to extend freshness between cleaning sessions.
- Keep a spare liner handy to minimize contact with waste during cleaning.
Call A Professional
Consider a professional if the bin shows persistent odors despite repeated cleaning, if you notice persistent mold on seals, or if you own a high-end or commercial-grade bin with complex mechanisms. Seek expert help for cracked liners or damaged stainless surfaces that require specialized treatment.
FAQ
How can I remove strong kitchen bin odors?
Use a deodorizing spray or a baking soda treatment after cleaning, and ensure the interior is thoroughly dried before placing a new liner.
What should I use to clean a stainless steel trash can?
Non-abrasive cleaners and soft brushes prevent scratches; wipe with a microfiber cloth to avoid streaks.
Is it safe to use bleach in a kitchen bin?
Bleach can be used sparingly on non-painted interiors but should be diluted and thoroughly rinsed to avoid fumes and corrosion.
How often should I clean my kitchen bin?
Plan a cleaning every 1–2 weeks, or sooner if odors or spills are common in your household.
Can I clean a bin without removing the liner?
It’s better to remove the liner, but you can clean around it carefully with a brush and spray cleaner if needed.
What if my bin has stubborn residue around the lid?
Use a scraper or a two-in-one brush with a sponge to reach tight spots behind the lid.
Are there any eco-friendly bin cleaning options?
Yes—look for plant-based cleaners and reusable brushes; these reduce chemical use and waste.
Buying Guide
Choosing cleaning tools for a kitchen bin depends on several factors. Consider the size and shape of the bin, which determines reach and cleaning effectiveness. Noise level matters for indoor use, so select low-noise brushes and scrubbers if cleaning near living spaces. Look for energy-efficient cleaners or spray solutions that minimize waste and evaporate quickly. Controls on cleaners should be simple and safe, with non-slip grips on brushes. For placement, store products in a dry, ventilated area away from food prep zones to prevent cross-contamination. When comparing kits, evaluate whether they include a scraper, a durable brush, a sponge, and a deodorizer in a single package for value and convenience.