Maintaining clean, sterilized jars is a critical step in successful canning. This guide walks through practical methods to clean, disinfect, and prep jars for sealing, using common kitchen tools and purpose-built gear. Readers will learn efficient techniques that reduce risk of contamination and ensure best preservation results.
Quick Answer
Rinse jars, disassemble lids, wash with hot, soapy water, scrub both interiors and rims, rinse thoroughly, and air-dry on a rack. For tough residue, use a jar brush with stiff bristles, then run jars through the dishwasher if the rack is dishwasher-safe. Finish with a final sterilization step before filling.
What You’ll Need
- Wide-mouth canning jar cleaning brush
- Stiff bristle jar brush set for canning jars
- Dishwasher-safe jar rack for canning jars
- Stainless steel bottle brush for canning jars
- Jar scraper and lid magnet kit for canning jars


Before You Start
Prepare the workspace by clearing countertops and cleaning the sink area. Use hot water and a mild detergent, avoiding harsh chemicals that could leave residues. Inspect jars for cracks or chips and set aside any damaged ones. If you plan to sterilize jars by boiling, have a large pot ready and ensure lids are compatible with your canning method. Safety note: Always handle hot jars with clean tongs or heat-resistant gloves to prevent burns. Time estimates vary: basic cleaning 15–20 minutes; full sterilization with boiling 10–15 minutes per batch.
Step-By-Step: How To Clean Jars For Canning
- Rinse jars with warm water to remove loose debris, holding them upright to avoid splashing contaminants.
- Disassemble lids and bands; place them in hot, soapy water to loosen residue without damaging seals.
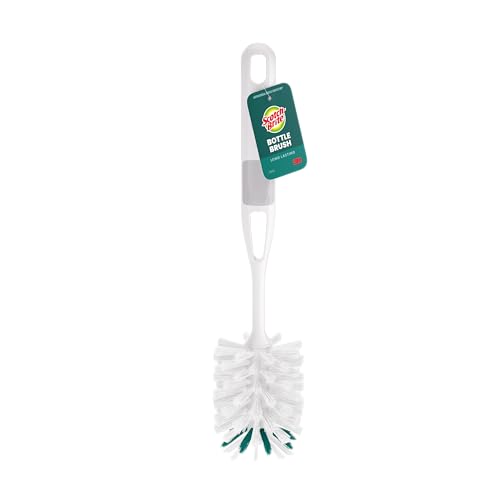
- Wash jars with a long-handled cleaning brush to reach the bottom and the curved sides; use a bottle brush for narrow necks when needed.
- Scrub rims and threads thoroughly to remove any film. A jar scraper can help lift stuck-on bits without scratching glass.
- Rinse jars completely with hot water, ensuring all soap is removed to prevent soapy film on seals.
- Air-dry upright on a clean rack or towel, keeping jars separated to minimize recontamination.
- If using a dishwasher, place jars carefully in a dishwasher-safe jar rack; select a hot-wash, sani-cycle if available, and skip high-heat drying to preserve jar integrity.
- Inspect jars again for any lint or residue; wipe rims with a clean, damp cloth before packing for canning.
- Optionally, sterilize jars by boiling filled jars in a canner as per your recipe’s instructions; ensure lids and rings are ready for use after cooling.
- Store clean jars in a dry, dust-free area until ready to fill, keeping them organized by size to streamline future batches.
- For persistent residue on metal lids or rings, a dedicated jar scraper and magnet kit can help remove debris without damaging the seals.
Troubleshooting
| Symptom | Likely Cause | Fix | Prevention |
|---|---|---|---|
| Jars still cloudy after washing | Soap residue or hard water mineral buildup | Rewash with a vinegar rinse (1 part vinegar to 4 parts water) and scrub again | Use distilled water if your supply has high mineral content |
| Lids not sealing | Residue on rims or damaged seals | Thoroughly wipe rims and inspect seals; replace damaged lids | Pre-clean rims before filling; avoid reusing bent lids |
| Cracked jars after sterilizing | Thermal shock from rapid temperature changes | Cool jars gradually and avoid sudden transfers from hot to cold | Match jar size to contents and follow boil times |
| Residue around jar threads | Soap residue or mineral buildup | Deep clean threads with a brush; rinse extra thoroughly | Rinse immediately after washing; skip harsh detergents |
Common Mistakes
- Using cold water on hot jars, causing cracking from thermal shock.
- Skipping thorough rims cleaning, which can lead to poor seals.
- Over-drying jars with towels that shed fibers into the interior.
- Rinsing lids with soap—lids should be rinsed clean but not scrubbed excessively to prevent film.
Tips For Best Results
- Always pre-inspect jars for chips and cracks; compromised jars can fail during processing.
- Keep a dedicated jar brush set solely for canning jars to avoid cross-contamination from other dishes.
- Use a jar rack in the dishwasher if available; this supports stability and reduces handling risk.
- When using a canner, add extra time for sterilization if processing low-acid products or high-altitude adjustments are needed.
Call A Professional
There are few scenarios that require a pro, but contact a canning expert or a local extension service if jars consistently fail to seal despite proper cleaning, if you notice odd odors after processing, or if you plan to can high-acid products and are unsure about the correct methods for your altitude.
FAQ
What is the safest way to clean jars before canning?
Rinse, wash with hot soapy water using a jar brush, rinse again, and air-dry on a rack. Sterilize if your process requires it.
Can I use a dishwasher to clean canning jars?
Yes, if your dishwasher-safe jar rack can hold jars securely and you choose a hot, thorough wash. Avoid high-heat drying to prevent damage.
How do I remove stubborn residue from jar rims?
Use a stiff-bristle jar brush and a scraper to lift residue, followed by a thorough rinsing to prevent seal issues.
How long should jars stay sterile before filling?
Depends on your method; typically, jars should be sterile by the time you begin filling. If not, re-sterilize as needed.
Buying Guide
When selecting tools for cleaning jars, consider size, material, and ease of use. The right kit should help you reach tight corners, scrub rims and threads, and dry jars efficiently without leaving fibers or residues. Key factors include:
- Size and reach: Brush heads that fit wide-mouth and standard jars help reduce cleaning time.
- Material: Stainless steel or high-quality nylon bristles resist wear and prevent scratching.
- Dishwasher compatibility: A dedicated jar rack that suits your dishwasher streamlines cleanup.
- All-in-one kits: Jar scraper and magnet sets simplify removing lids and organizing seals.
- Durability and safety: Durable handles and heat-resistant materials reduce risk during hot-wash cycles.
For most home canners, a combination of a wide-mouth cleaning brush, a stiff-bristle jar brush set, a dishwasher-safe jar rack, a stainless steel bottle brush, and a jar scraper with lid magnet provides comprehensive coverage. Consider your batch size, the complexity of recipes, and altar storage space when choosing a kit.