Interior doors accumulate dust, fingerprints, and smudges from family traffic and everyday use. A clean door not only looks better but helps preserve the finish and extend the life of the door and trim. This guide provides a clear, step-by-step approach to effectively cleaning interior doors using common household tools and targeted cleaners.
Quick Answer
For most interior doors, use a soft cloth or microfiber mitt with a mild cleaner to wipe the surface, then dry with a lint-free cloth. For stubborn smudges, apply a small amount of multi-surface cleaner and rub gently in the direction of the grain. Fine wood finishes benefit from a dedicated wood door cleaner spray and a microfiber cloth to buff to a subtle shine.
What You’ll Need
- Wood door cleaner spray 32 oz with microfiber cloth kit
- Extendable microfiber duster for interior doors
- Multi-surface cleaner spray for doors and trim 24 oz
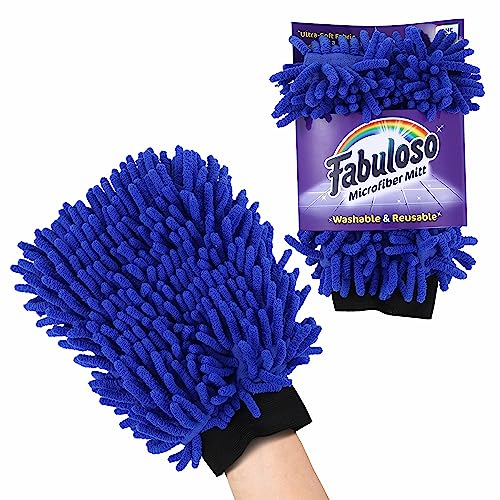
- Microfiber door cleaning mitt
- Lint-free microfiber polish cloth for door panels


Before You Start
Prepare the area by removing any items from the door or nearby surface hazards. Lay a soft cloth or drop cloth to catch drips. Test cleaners on a small, inconspicuous area to ensure no color or finish change. Wear gloves if you have sensitive skin or if using stronger cleaners. Allow doors to dry completely before re-hanging or closing to prevent streaks and residue transfer. Time estimate: 15–30 minutes per door, depending on smudge level.
Step-By-Step: How To Clean Interior Doors
- Dust the door surface with an extendable microfiber duster to remove loose dirt and spider webs from crevices and edges.
- Apply a light spray of multi-surface cleaner to a microfiber door cleaning mitt or microfiber cloth. Avoid saturating the surface to prevent drips.
- Wipe the door in the direction of the grain or natural wood pattern. For paneled doors, work from the top panels downward to keep grime from re-depositing on cleaned areas.
- For fingerprints and smudges, target the affected areas with a slightly damp cloth. Use a small amount of cleaner and a soft touch to lift oils without removing finish.
- Dry the door with a lint-free microfiber polish cloth to prevent streaks and water spots. Buff until the surface looks even and clean.
- If the door has a heavy finish or stubborn stains, use the wood door cleaner spray with the included microfiber cloth kit to avoid scratches and provide a uniform shine.
- Clean the trim and frame edges with the same method, paying attention to corners and joints where dust tends to accumulate.
- For high-traffic doors, repeat monthly or as needed. Regular maintenance reduces buildup and keeps the finish fresh.
- Inspect hardware during cleaning; wipe handles and hinges with a separate cloth to remove oils. Dry thoroughly to prevent corrosion.
- Reassess the door after drying. If residue remains, repeat the wipe with a fresh cloth to avoid streaking.
- Store cleaning tools in a dry place away from direct sunlight to preserve the cloths’ effectiveness and avoid fabric degradation.
- Finish with a final light buff to even out sheen and restore a uniform appearance across panels and trim.
Troubleshooting
| Symptom | Likely Cause | Fix | Prevention |
|---|---|---|---|
| Streaks after drying | Excess cleaner or mis-timed drying | Wipe with a dry microfiber cloth in the direction of the grain | Use minimal cleaner and wipe promptly |
| Residue on wood grain | Cleaner residue in pores | Buff with lint-free cloth until clear | Spot-test and use sparse cleaner |
| Smeared finish after cleaning | Over-wetting or aggressive rubbing | Switch to damp–not wet–cloth and gentle strokes | Choose appropriate cleaners for wood finishes |
| Color change or dullness | Harsh cleaner or sunlight exposure | Use a finish-safe product and avoid direct sunlight during cleaning | Clean in shade; follow label directions |
| Stubborn sticky residue | Oil-based grime | Use wood door cleaner spray per instructions | Regular maintenance to prevent buildup |
Common Mistakes
- Using abrasive pads or harsh chemicals that scratch or dull the finish
- Soaking wood with too much liquid which can cause swelling or warping
- Cleaning while doors are hot or in direct sunlight, which causes quick drying and streaks
- Neglecting the trim and edges where dust accumulates more rapidly
Tips For Best Results
- Choose a dedicated wood door cleaner spray for wood doors and a separate multi-surface cleaner for metal or painted surfaces.
- Use an extendable microfiber duster for hard-to-reach areas and high doors, reducing strain during cleaning.
- Keep a small kit of lint-free polishing cloths to buff finishes and maintain a uniform sheen.
- Work in a well-lit area to spot smudges quickly and ensure even cleaning across panels.
- Schedule routine cleaning to preserve the door’s appearance and reduce heavy buildup over time.
Call A Professional
Consider a professional if doors have deep gouges, significant finish damage, or if staining is uneven after cleaning. Seek expert help for refinishing or color matching, especially on older doors with custom stains or seals.
FAQ
What cleaners are safe for painted interior doors?
Use a mild, non-abrasive multi-surface cleaner or a cleaner specifically labeled for painted surfaces to avoid chipping or dulling the finish.
How often should interior doors be cleaned?
High-traffic doors may benefit from monthly cleaning; less-used doors can be cleaned every 2–3 months, depending on dust and smudge levels.
Can I use a wood cleaner on painted doors?
Pure wood cleaners are generally not recommended for painted doors. Use a dedicated wood cleaner only on real wood surfaces; otherwise, choose a general surface cleaner.
Is it safe to use water on all door finishes?
Water is safe in small amounts on many surfaces, but excessive moisture can cause damage. Always wring out cloth well and avoid soaking the door.
Should I wax or seal doors after cleaning?
Waxing is typically unnecessary for most interior doors and can create residues. If the door finish calls for a protective topcoat, follow the product’s instructions.
Buying Guide
When selecting products to clean interior doors, consider size, composition, noise, energy efficiency of appliances, and placement. For doors with wood finishes, a wood door cleaner spray paired with microfiber cloths helps maintain luster without scratching. For painted or composite doors, a multi-surface cleaner spray provides versatility across surfaces like trim, panels, and hardware. Look for lint-free microfiber cloths and mitts to prevent lint transfer. If cleaning multi-story interiors, an extendable duster makes reaching high doors easier while minimizing ladder time. Consider how you store supplies—keeping cleaning tools in a dedicated kit can streamline routine maintenance and reduce the risk of using the wrong product on sensitive finishes. Lastly, verify that cleaners are appropriate for the door’s finish and any warranty guidelines to avoid compromising coatings or seals.