Clean hummingbird feeders regularly to protect birds from mold, bacteria, and spoiled nectar. A well-maintained feeder not only supports healthy hummingbirds but also preserves the vibrant nectar they rely on. With the right tools and a simple routine,Anyone can keep a feeder in peak condition throughout the season.
The following guide walks through practical steps, recommended products, and safety tips tailored for American households. It emphasizes non-toxic cleaning and careful handling to ensure birds return to a clean, safe feeding station.
Quick Answer
Disassemble the feeder, rinse with warm water, scrub with a soft brush, soak in a mild, non-toxic cleaning solution, rinse thoroughly, and air-dry completely before reassembling. Clean at least every 1–2 weeks during peak season, more often in hot weather or cloudy periods when mold can form quickly.
What You’ll Need
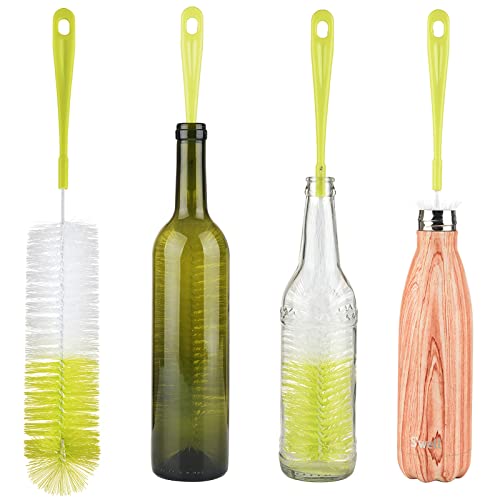
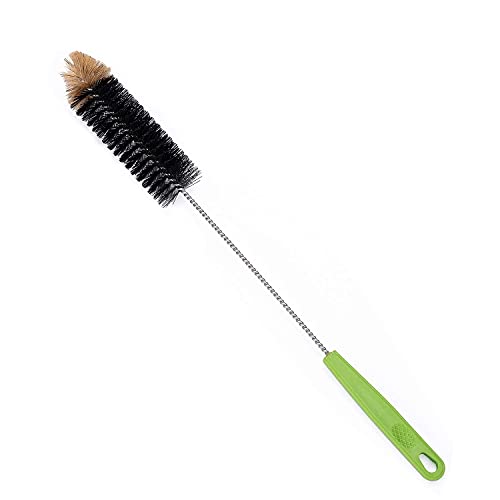
- Hummingbird feeder cleaning brush long handle
- Hummingbird feeder bottle brush narrow neck
- Hummingbird feeder cleaning kit with multiple brushes
- Non-toxic cleaning solution for hummingbird feeders
- Soft bristle hummingbird feeder cleaning brush for glass feeders

Before You Start
Set up a clean workspace and wear gloves if desired. Empty old nectar completely and discard it. Use warm, not boiling, water to avoid cracking glass feeders. Always rinse thoroughly after cleaning to remove all soap residues, which can be harmful to hummingbirds. Plan for a 15–30 minute cleaning session per feeder, depending on design and the level of grime.
Check for cracks or leaks before reassembly, and ensure no plastic parts have degraded in direct sun exposure. If a feeder is heavily moldy or has stuck-on residue, extra soaking time with the non-toxic solution can help loosen deposits.
Step-By-Step: How To Clean A Hummingbird Feeder
- Detach the feeder from its hanger and remove all nectar ports and caps. Separate sections to allow full access to interior surfaces.
- Rinse components under warm running water to flush out loose nectar and debris.
- Prepare a cleaning solution using a non-toxic mixture appropriate for hummingbird feeders. Soak all parts according to the product instructions, typically 5–15 minutes.
- Use a soft bristle hummingbird feeder cleaning brush for glass feeders or the long-handle brush to reach narrow-inside areas and ports. Scrub gently to remove mold and sugar buildup.
- Rinse each piece thoroughly until all cleaning solution is gone. Check ports for any stubborn deposits and repeat brushing if necessary.
- Allow components to air-dry completely on a clean towel or drying rack before reassembling. Fill with fresh nectar and rehang once dry.
- Inspect the completed feeder for leaks and ensure all seals are secure. Refill with fresh nectar and monitor for any dripping after initial use.
- Schedule the next cleaning cycle based on climate conditions and feeder design, typically every 1–2 weeks during peak season.
Troubleshooting
| Symptom | Likely Cause | Fix | Prevention |
|---|---|---|---|
| Mold or dark spots inside | Insufficient cleaning or drying | Deep clean with bottle brush; ensure full drying | Clean more frequently in hot weather |
| Sticky ports or nectar leaks | Residue buildup | Brush ports thoroughly; inspect seals | Rinse well and avoid sugary substitutes |
| Cracked plastic components | Sun exposure or impact | Replace damaged parts; avoid leaving in direct sun | Inspect regularly and replace aging parts |
| Discolored nectar | Old nectar or bacteria | Dispose and use fresh nectar | Prepare small batches; refrigerate short-term if needed |
Common Mistakes
- Using harsh detergents or bleach; residues can harm birds.
- Not removing all nectar and cleaning solution from crevices.
- Overlooking narrow necks and internal ports during brushing.
- Reusing spoiled nectar or leaving nectar in the feeder for extended periods.
- Ignoring drying time, which can invite mold growth.
Following a consistent routine helps avoid these pitfalls and keeps hummingbirds healthy and attracted to your feeder.
Tips For Best Results
- Opt for a non-toxic cleaning solution specifically designed for hummingbird feeders to protect delicate nectar and bird health.
- Utilize a dedicated hummingbird feeder cleaning kit with multiple brushes to reach every corner, especially in glass feeders with long, narrow necks.
- Choose soft bristle brushes to prevent scratching glass or delicate surfaces.
- Rinse thoroughly and allow full air-dry to prevent residual moisture that fosters mold.
- Keep replacement parts on hand so quick fixes don’t disrupt feeding.
- Schedule seasonal checks and consider a deeper clean after heavy rain or pollen blooms when nectar clarity decreases more quickly.
Call A Professional
Contact a professional if the feeder shows persistent mold, extensive cracking, or if you notice a persistent leak that cannot be fixed with standard cleaning. Seek expert help if you suspect infestations or chemical sensitivities in the nectar environment or if you’re unsure about the integrity of any feeder components.
FAQ
How often should I clean a hummingbird feeder?
In warm or hot climates, clean every 5–7 days; in cooler conditions, every 1–2 weeks is usually sufficient. Always inspect for mold and remove it promptly.
Can I use dish soap to clean my feeder?
Non-toxic, fragrance-free dish soap is not recommended for most feeders because soap residues can harm birds. Use a dedicated non-toxic cleaning solution or plain hot water and brushes.
What should I do with old nectar?
Dispose of old nectar and rinse all parts before refilling with fresh nectar to prevent mold growth.
Are plastic feeders safe?
Yes, but inspect regularly for cracks and sun damage. Replace damaged parts promptly to prevent leakage and contamination.
Is boiling water safe for cleaning?
No. Boiling water can crack glass feeders and degrade plastic components. Use warm water and a non-toxic cleaner as directed.
Buying Guide
When choosing a hummingbird feeder and cleaning setup, consider size, design, and ease of cleaning. A feeder with wide openings and removable components simplifies maintenance. Noise level is not a concern for outdoor feeders, but the ease of disassembly, the availability of compatible brushes, and the presence of a broad cleaning kit can streamline routine care.
Key buying factors include size: larger feeders may hold more nectar but require more thorough cleaning. Noise level is generally irrelevant for cleaning tools, but ease of use matters. Energy efficiency isn’t a factor for feeders, but a durable design reduces replacement frequency. Look for sturdy materials, dishwasher-safe components if you prefer, and clear instructions for cleaning. Placement matters: hangers that protect from direct sun yet allow easy access improve both cleaning and bird activity. Compare kits that include a bottle brush, long-handled brush, and non-toxic solutions to ensure you have everything needed for ongoing upkeep.