Headlamps often lose clarity due to oxidation, pitting, and exposure to the elements. Cleaning and restoring visibility not only improves appearance but also boosts nighttime driving safety. This guide covers practical steps using common headlight restoration tools and supplies now available on the market in the United States.
Quick Answer
For best results, start with a headlight restoration kit designed for lenses, use proper sanding discs if needed, and finish with a protective sealant. Expect a noticeable improvement in brightness and clarity after following the steps below.
What You’ll Need
- Headlight restoration kit with polish and sealant
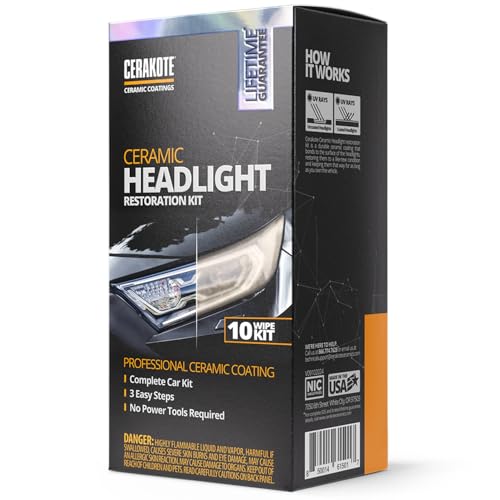
- Plastic headlight lens restoration kit
- Headlight polishing kit for cars with sanding discs
- 3M headlight restoration kit or equivalent
- Headlight cleaning and restoration kit


Before You Start
Before beginning, wash the car’s surface around the headlights to remove dirt and grime. Protect surrounding paint with painter’s tape. Work in a shaded, well-lit area to prevent overheating the lens and premature drying of products. Time estimate: 60 to 120 minutes, depending on the kit and lens condition. Wear eye protection and gloves to avoid irritation from sanding dust or chemicals.
Step-By-Step: How To Clean Headlamps
- Remove loose dirt: Rinse the headlamps with water and wipe with a microfiber cloth to reduce grit that can scratch the lens during polishing.
- Assess the lens condition: If the lens is only lightly cloudy, a polish-and-sealant kit may suffice. For deeper haze or peeling, proceed with sanding steps as outlined in the kit’s instructions.
- Prepare the surface: Apply masking tape around the edges to protect the car’s paint. If your kit includes sandpaper or sanding discs, start with the coarsest grit recommended and work progressively to finer grits.
- Sand (if required): Wet-sand the lens using circular motions, keeping the surface wet to minimize heat. Periodically wipe away residue to check progress. Do not press too hard or stay in one spot too long.
- Apply polishing compound: Use a foam applicator or polishing pad to apply the first layer of polish. Follow the kit’s guidance on pressure and speed if using a drill-based polisher.
- Buff and refine: Buff the lens until the haze diminishes and clarity improves. Wipe clean with a microfiber cloth to inspect results.
- Seal and protect: Apply the sealant or protective coating supplied in the kit. This helps resist future yellowing and oxidation and can improve UV resistance.
- Final wipe and cure: Allow the sealant to cure as directed by the kit’s instructions, typically a few hours or overnight. Check for even coverage and reapply if necessary.
- Test visibility: After curing, turn on headlights to ensure improved brightness and verify even light output on the road.
- Maintenance plan: Clean headlights periodically and reapply sealant as recommended to maintain clarity over time.
Troubleshooting
| Symptom | Likely Cause | Fix | Prevention |
|---|---|---|---|
| Lens still hazy after polishing | Aging plastic or deep oxidation | Proceed with a more aggressive sanding sequence or repeat polish steps per kit | Regular maintenance with sealant |
| Clouding returns after rain | Inadequate sealant or environmental exposure | Reapply sealant and ensure complete cure | Use high-quality sealant and avoid washing cars immediately after application |
| Scratches appear during sanding | Excessive pressure or contaminated sandpaper | Stop, clean surface, and start with a lighter touch | Use fresh, properly wet sandpaper and keep surface moist |
| Uneven clarity | Uneven pressure or missed spots | Re-sand the uneven areas and re-polish | Take your time and follow kit guidance |
Common Mistakes To Avoid
- Underestimating the impact of heat during sanding or polishing
- Using household cleaners that degrade plastic lenses
- Skipping masking tape, which can lead to paint damage
- Rushing the sealant cure time
- Overly aggressive rubbing that creates micro-scratches
Taking a methodical approach reduces the need to repaint or replace headlights later. Rely on the specific kit’s instructions to minimize risks.
Tips For Best Results
- Work in a shaded area to keep products from drying too quickly.
- Keep lenses consistently wet during sanding to prevent heat buildup.
- Test a small area first to calibrate pressure and speed.
- Use a high-quality sealant designed for automotive plastics for longer-lasting protection.
- Schedule routine maintenance every 6–12 months depending on climate and road salt exposure.
Call A Professional
If the headlamps show deep cracks, significant structural damage, or if DIY restoration fails to restore sufficient brightness, consider a professional evaluation. Stop and consult a mechanic or an auto body shop if you notice peeling plastics, severe yellowing that covers large sections, or mismatched headlamp alignment after restoration.
FAQ
Can I use any headlight restoration kit on all cars?
Most kits are designed for plastic lenses and are compatible with common headlamp materials, but always check the kit’s compatibility notes before use.
Will restoration fix yellowed lenses permanently?
Restoration improves clarity, and a quality sealant helps protect against future oxidation, but plastics may yellow again over time depending on climate and exposure.
Do sanding discs damage the lens?
Incorrect pressure or using worn discs can scratch. Follow the kit’s instructions precisely and replace discs as they dull.
How long does the sealant last?
Durability varies by product and conditions, but many sealants offer months of protection with proper curing and maintenance.
Is headlight restoration legal in all states?
Yes, it is generally legal, but ensure restored headlights meet visibility requirements and do not blind oncoming drivers.
Buying Guide
Choosing the right headlight restoration approach involves several factors. Size and type of the headlamp, regional climate, and desired longevity influence the best option. Consider a kit that includes both polish and sealant for a complete solution and ensure it provides clear instructions for your lens material.
Key buying factors include:
- Headlamp type and lens material: Most cars use polycarbonate lenses; confirm compatibility with your model.
- Removal of oxidation vs. surface polish: Deeper haze may require sanding discs, while minor cloudiness may only need a polish and sealant kit.
- Included abrasives and pads: A range of grits and a soft pad improve results and reduce scrubbing damage.
- Sealant quality and UV protection: A durable sealant extends clarity and minimizes future oxidation.
- Ease of use: Some kits are drill-assisted, others are manual; choose based on comfort and skill level.
- Ease of cleanup: Look for kits that minimize messy residues and include cleaning wipes or cloths.
- Brand reputation and warranties: Reputable brands like 3M offer reliable performance and customer support.
- Maintenance requirements: Some kits require reapplication every 6–12 months; factor in maintenance effort and cost.
For most drivers, a comprehensive kit that includes both the restoration compounds and a durable sealant provides the best blend of performance and convenience. When in doubt, start with a widely trusted option and follow the included instructions closely.