Kitchen cabinets face daily exposure to cooking oils, fingerprints, and dust. This guide provides a practical, step-by-step approach to safely remove grime while protecting finishes. Readers will learn how to choose the right tools, prepare surfaces, and tackle stubborn buildup without damaging wood, laminate, or painted surfaces.
By following the methods below, homeowners can refresh cabinets, reduce lingering odors, and maintain a clean, bright kitchen appearance with common household products and targeted cleaners.
Quick Answer
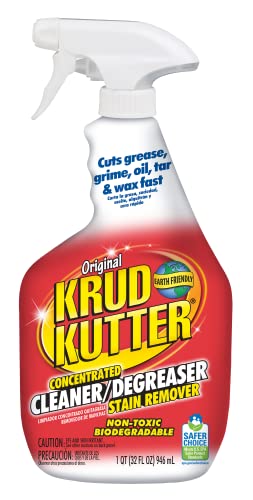
Use a grease remover spray for kitchen cabinets on cool surfaces, scrub with a stiff bristle brush or non-scratch sponge, then wipe with microfiber cloths for a streak-free finish. For stubborn grime, a handheld steam cleaner can lift grime without harsh chemicals. Always test a small area first.
What You’ll Need
- Grease remover spray for kitchen cabinets
- Stiff bristle cleaning brush for cabinets grime
- Microfiber cleaning cloths for kitchen cabinets
- Non-scratch scrub sponge for cabinet cleaning
- Handheld steam cleaner for kitchen cabinets


Before You Start
Prepare a work area by laying down a soft cloth or drop cloth to protect countertops. Remove items from cabinet doors and drawers to access all surfaces. Work in a well-ventilated space and wear gloves if you have sensitive skin. Time estimate: 30–60 minutes for a standard cabinet run, more for heavily soiled areas. Important: avoid using abrasive tools on glossy or delicate finishes to prevent scratches. Do not mix cleaners unless the product labels permit it.
Step-By-Step: How To Clean Grime Off Kitchen Cabinets
- Dust cabinet faces with a dry microfiber cloth to remove loose debris.
- Apply a grease remover spray for kitchen cabinets to a small, inconspicuous area to test for colorfastness or finish reaction; let sit per label instructions.
- Spray a light mist across the surface or dampen a microfiber cloth, then wipe in the direction of the wood grain or along the door edges.
- For built-up grime, scrub in circular motions with a stiff bristle cleaning brush for cabinets grime or a non-scratch scrub sponge for cabinet cleaning, focusing on handles, corners, and seams.
- Rinse the surface with a clean, damp microfiber cloth to remove residue from cleaner and loosened grime.
- Dry the surface with a dry microfiber cloth to prevent water marks and streaks. Repeat on tricky areas as needed.
- For stubborn spots, use a handheld steam cleaner for kitchen cabinets held at a safe distance and moved slowly across the surface; avoid excessive steam on sealed wood or veneer.
- Wipe down cabinet interiors, shelves, and the undersides of doors to remove any released grime and moisture.
- Inspect for remaining residue; apply a light cleaner again if necessary, then buff with a dry cloth until surfaces look uniform.
- Return items to cabinets and wipe any dust from hardware before reattaching handles or knobs.
- Establish a routine: quick wipe-downs after cooking days and a deeper clean every 4–6 weeks to prevent heavy buildup.
- Document any finish changes or stains noticed during cleaning and take corrective steps (refinish or seal as needed) if required.
Troubleshooting
| Symptom | Likely Cause | Fix | Prevention |
|---|---|---|---|
| Streaks after cleaning | Residue or improper drying | Wipe with a damp microfiber cloth, then dry thoroughly | Use microfiber cloths and avoid over-wetting |
| Finish dulling or discoloration | Harsh cleaners or aggressive scrubbing | Switch to gentler cleaners, test area first | Stick to manufacturer-recommended products |
| Scratches on wood veneer | Rough scrubbing or abrasive tools | Cease use of abrasive tools; use soft brushes | Regular maintenance with soft pads |
| Persistent grease in seams | Deep-set grime | Apply cleaner, let sit, then scrub with brush | Routine cleaning to prevent buildup |
Common Mistakes
- Using high-ammonia or solvent-based cleaners on sensitive finishes.
- Scrubbing too aggressively, which can scratch or dull surfaces.
- Omitting surface testing before large-area application.
- Over-wetting cabinetry, especially wood or veneer, which can cause warping.
- Relying on a single tool for all grime types instead of mixing brushes or cloths as needed.
Tips For Best Results
- Work in sections to prevent cleaner from drying before you wipe it away.
- Always wipe in the direction of grain to maintain the natural look of wood cabinets.
- Label and store cleaners separately when not in use to avoid cross-contamination.
- Use a microfiber cleaning cloths for kitchen cabinets for best lint-free results and to trap grease effectively.
- Switch between tools: a non-scratch scrub sponge for cabinet cleaning for tough spots and a stiff bristle cleaning brush for cabinets grime for crevices.
Call A Professional
Seek professional help if cabinet finishes are peeling, lifting, or blistering, or if stains persist after cleaning. Stop immediately and consult a pro if excessive moisture or heat seems to damage the substrate. If you’re unsure about the finish type (painted, stain, laminate, veneer), a professional can advise on compatible cleaners and refinishing options.
FAQ
Can I use regular dish soap to clean cabinet grime?
Light dish soap can be effective for minor grime, but for heavy grease, use a dedicated grease remover spray and follow with thorough rinsing.
Is steam safe on all cabinet types?
Steam is generally safe for sealed surfaces but should be avoided on unsealed wood or veneered finishes; always test a small area first.
How often should I deep-clean kitchen cabinets?
Deep-clean cabinets every 4–6 weeks for busy kitchens; surface quick-wipes can be done daily or after heavy cooking sessions.
What about cabinets with delicate finishes?
Use gentler cleaners and soft tools; avoid abrasive scrubbing and harsh solvents that can dull or scratch delicate finishes.
Buying Guide
When selecting cabinet-cleaning products, consider size, formulation, and compatibility with cabinet finishes. Evaluate the level of grime and whether a steam option adds value for your routine. Compare tools for risk of scratches against cleaning power, and assess how easy the items are to store. Additionally, think about noise, residue, and any scent concerns in open kitchens or households with sensitivities. A well-rounded kit can combine a grease remover spray, a stiff bristle brush, microfiber cloths, a non-scratch sponge, and a handheld steam cleaner to cover routine maintenance and deep clean needs.