Cleaning furnace ducts helps improve indoor air quality and system efficiency. This guide walks through practical, safe steps for American homes, using common tools and commonly available equipment. The focus is on minimizing dust dispersion while maintaining furnace performance.
Quick Answer
For a thorough DIY cleaning, position a vacuum with HVAC duct attachments near the supply ends, use a duct cleaning brush or snake to loosen debris, and rinse with a furnace vent cleaning wand or microfiber brush as you pull the liner. Keep fans running to capture particulates, seal off vents, and work methodically from accessible ducts to the main trunk. For stubborn buildup or sensitive systems, consider professional cleaning.
What You’ll Need
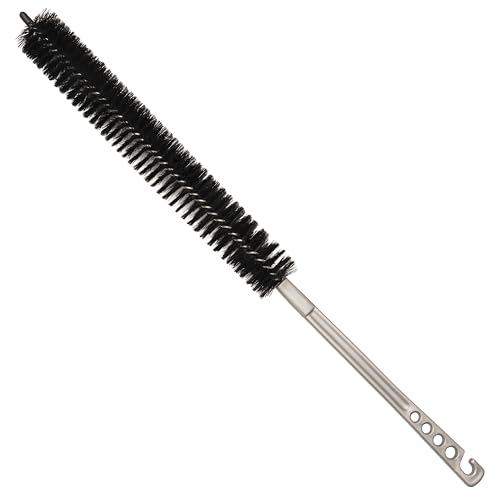
- HVAC duct cleaning brush kit 25 ft
- 50 ft flexible duct cleaning snake with attachments
- furnace vent cleaning wand with microfiber brush
- vacuum with HEPA and HVAC duct attachments
- metal air duct cleaning brush with interchangeable heads


Before You Start
Before cleaning, shut off the furnace or HVAC system to prevent dust circulation. Wear a dust mask, eye protection, and gloves. Cover nearby furniture and floors with drop cloths. If your ducts are asbestos-containing or show signs of mold, stop and contact a licensed professional. Estimate labor time at 2–6 hours for a standard home, depending on duct length and complexity. Safety note: never use metal tools that could puncture duct liners or come into contact with electrical components.
Step-By-Step: How To Clean Furnace Ducts
- Clear the workspace and set up a central intake vacuum with HEPA filtration near the main return line.
- Attach the appropriate cleaning tool to the vacuum to capture particles as dust is loosened.
- Insert the 25 ft duct cleaning brush into accessible supply ducts and gently scrub in short strokes to dislodge debris.
- Advance the 50 ft flexible duct cleaning snake with attachments through the main trunk, using attachments to reach bends.
- Use the furnace vent cleaning wand with microfiber brush to wipe and sweep the interior walls of vents and diffusers.
- Remove loosened dust with the vacuum, then repeat brushing motions in each segment to maximize debris capture.
- Inspect return and supply runs for remaining buildup; focus on transitions between sections and the main plenum.
- Reconnect all ducts, seal the system, and run the blower for 10–15 minutes with doors open to vent residual dust outside.
- Carefully detach tools and store them properly; wipe down surfaces and vacuum any stray dust around the work area.
- Document any unusual findings (e.g., mold or moisture) and consider a professional assessment if issues persist.
Troubleshooting
| Symptom | Likely Cause | Fix | Prevention |
|---|---|---|---|
| Dust still visible after cleaning | Insufficient access or blocked return | Re-run brushing with suction at the intake | Schedule periodic maintenance |
| Strong musty odor | Moisture/mold in ducts | Stop and inspect for mold; contact a pro | Control humidity and fix leaks |
| Dust appears in rooms when system runs | Loose seals or ducts, improper installation | Check seals; reseal with appropriate duct tape or mastic | Have a professional verify system integrity |
| Unusual noises during cleaning | Tool binding or damaged ductwork | Pause and inspect tool alignment; repair damaged sections | Use proper tools and avoid forcing through bends |
Common Mistakes
- Skipping the main trunk or difficult-to-reach joints
- Using aggressive metal tools that gouge duct interiors
- Cleaning without a HEPA-filtered vacuum present
- Cleaning when moisture or mold is present without remediation
Common mistakes can lead to re-suspension of dust, duct damage, or inadequate cleaning. Planning, the right tools, and patience reduce these risks.
Tips For Best Results
- Work in sections and take breaks to avoid overloading the vacuum with dust.
- Keep a steady pace; moving too quickly can miss debris, while moving too slowly may compact dust.
- Always use a HEPA-equipped vacuum to minimize airborne particulates.
- Run the system on a low fan setting after cleaning to help clear remaining dust without stirring particulates excessively.
- Inspect smoke or air quality after cleaning to confirm improvements and identify any persistent problems.
Call A Professional
Professional assistance is advised if there is visible mold growth, persistent odors, significant dust release after cleaning, or if ducts are unusually aged or damaged. If the system has asbestos-containing components, or if you are uncertain about any step, contact a licensed HVAC technician for evaluation and remediation.
FAQ
Can I clean furnace ducts myself?
Yes, with the right tools and precautions, many homeowners can perform a basic cleaning. For complex systems or signs of mold, hire a professional.
What tools are essential for duct cleaning?
A HEPA-equipped vacuum, duct cleaning brushes, and a flexible duct cleaning snake support thorough cleaning; a microfiber wand helps in delicate areas.
How often should ducts be cleaned?
Most homes can benefit from cleaning every 3–5 years, but frequency depends on usage, pets, and environmental factors.
Will cleaning ducts improve energy efficiency?
Cleaner ducts can improve airflow and efficiency, but gains may vary based on system condition and other factors.
Is duct cleaning safe for a furnace with a gas line?
Yes, when the system is shut off and proper precautions are followed; avoid introducing moisture or debris into burners or condensate lines.
Should I seal leaks before cleaning?
Sealing leaks can help, but it is not strictly required for cleaning. Major leak repairs are best handled by a professional.
What if I find mold during cleaning?
Do not attempt to clean mold yourself; contact a licensed HVAC or mold remediation professional for proper treatment.
Buying Guide
When choosing duct cleaning tools and equipment, consider size, compatibility, ease of use, and safety features. Size matters for reach; longer hoses and brushes help access remote sections of ducts. Noise level matters for comfort in busy homes, especially with children or pets nearby. Energy efficiency in a compatible vacuum reduces fatigue and ongoing costs during cleaning sessions. Controls should be intuitive, with secure attachments and clear labeling. Placement of equipment matters: keep the vacuum near the main return and ensure cords are managed to avoid tripping. Compare kit contents to ensure all required tool heads, brushes, and attachments are included for your system’s ductwork.