Foggy or yellowed headlights can reduce visibility at night and detract from a vehicle’s appearance. With a few common tools and a structured approach, drivers can restore clarity without expensive trips to a shop. This guide outlines a practical, do-it-yourself process using a standard headlight restoration kit and accessible materials.
Quick Answer
For best results, gather a headlight restoration kit with a UV sealant, wet sanding discs, a drill-powered polishing setup, and a plastic lens polish. Start with a careful cleaning, sand gradually from coarse to fine grits, polish to restore clarity, seal the surface with UV protection, and buff until the lens is clear and smooth.
What You’ll Need
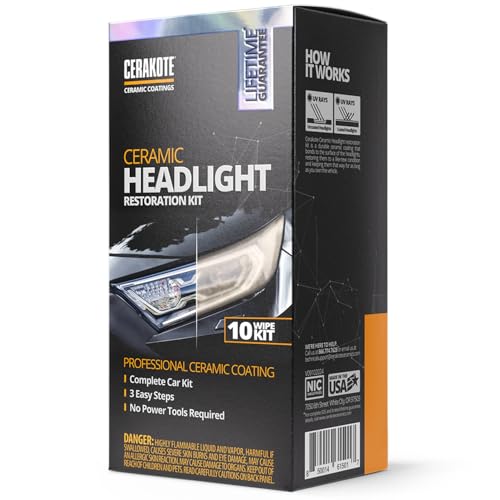
- Headlight restoration kit 3-step with UV sealant
- 4 inch 1500 2000 3000 grit headlight sanding discs for restoration
- Drill-powered headlight polishing kit with microfiber cloths
- Headlight lens polishing compound kit for plastic lenses
- UV protective sealant spray for headlight restoration


Before You Start
Ensure the vehicle is in a well-lit, shaded area. Clean the headlight lenses with soap and water to remove surface dirt. Mask surrounding paint to prevent accidental scuffing. Time estimate: 60–90 minutes for a pair of headlights. Avoid using metallic brushes or household cleaners that can scratch or haze the plastic lens. If the headlight cover is cracked or deeply pitted, consider replacement instead of restoration.
Step-By-Step: How To Clean Foggy Headlights At Home
- Prepare the surface by washing the headlights with a gentle soap and water solution and drying thoroughly.
- Apply masking tape around each headlight to protect adjacent paint and trim.
- Use the coarsest sanding disc (1500 grit) attached to a drill or rotary tool and sand the lens in smooth, overlapping passes; keep the surface wet to minimize heat buildup.
- Rinse the headlight, dry, then switch to 2000 grit discs and repeat the wet sanding process to refine the scratched surface.
- Finish with 3000 grit discs, maintaining a light touch to remove fine scratches and restore clarity.
- Apply the headlight polishing compound kit for plastic lenses using a clean microfiber cloth or polishing pad; rub in small circles until the fogging diminishes and clarity improves.
- Wipe away residue, inspect for remaining haze, and repeat polishing as needed for uniform clarity.
- Apply the UV protective sealant spray for headlight restoration; follow the product instructions for curing time and number of coats.
- Allow the sealant to dry fully before testing visibility in low light; re-clean any spots if streaks appear after curing.
- Remove masking tape and perform a final wipe-down; test headlight performance by turning on the vehicle lights in a dim area.
- For ongoing protection, reapply the UV sealant every 1–2 years or as recommended by the product guidelines.
- Dispose of used materials according to local regulations and store tools in a clean, dry area.
Troubleshooting
| Symptom | Likely Cause | Fix | Prevention |
|---|---|---|---|
| Haze remains after polishing | Insufficient sanding grit or uneven passes | Repeat sanding with 1500–3000 grit discs, ensuring even pressure | Follow progressive grit sequence and keep surface wet |
| Scratches appear after sealing | Dirt or residue trapped under sealant | Wipe lens thoroughly with a clean microfiber after final polish | Clean workspace and use lint-free cloths |
| Sealant fails to cure | High humidity or insufficient cure time | Re-apply in dry conditions with proper curing windows | Check product instructions for temperature and humidity ranges |
| Streaks or rainbow sheen | Excess sealant or improper application | Apply thin, even coats and wipe off excess promptly | Practice on a small area before full application |
Common Mistakes To Avoid
- Using excessive pressure during sanding, which can scratch the plastic.
- Skipping steps or rushing the polishing phase, leading to cloudy results.
- Neglecting to protect surrounding paint with masking tape.
- Over-application of sealant, causing peeling or hazing.
Tips For Best Results
- Work in small sections to keep sanding and polishing controlled.
- Keep lenses consistently wet during sanding to minimize heat and micro-marring.
- Choose a high-quality UV protective sealant spray designed for automotive plastics.
- Test different polishers setting on a hidden area before full use to avoid uneven results.
Call A Professional
Stop and consult a pro if the headlight housing is cracked, deeply pitted, or if restoration fails to improve visibility. Seek guidance if the vehicle has LED or HID systems, since improper restoration can affect beam alignment and warranty coverage.
FAQ
Can I use household products to clean foggy headlights?
Household cleaners may contain solvents that damage plastic lenses; use products designed for plastic headlight restoration for best results.
How long does a headlight restoration last?
Properly sealed lenses typically last 1–3 years, depending on climate, UV exposure, and driving conditions.
Is it safe to use a drill for polishing?
Yes, if used with a low-speed setting and appropriate backing pad; avoid overheating the plastic.
Will restoration improve both headlights equally?
Results may vary due to lens condition and mounting exposure; if one headlight is more degraded, focus on addressing it first and compare outcomes.
Should I replace headlights if they remain hazy after restoration?
If haze persists after multiple passes with sanding and polishing, lens replacement may be the preferred option for optimal visibility.
Do I need to remove the bumper or headlight assembly?
Typically not, but some cases benefit from partial removal for better sanding access and sealing coverage.
Buying Guide
Choosing the right headlight restoration kit and accessories depends on several factors. Consider the scope of damage, preferred process, and maintenance needs. A complete kit with an integrated UV sealant simplifies the process and offers consistent results, while separate components allow customization. When evaluating products, look for compatibility with plastic lenses, clear instructions, and durable sealant formulations. Is reliability your priority, or do you value a versatile set that can handle multiple cars?
Key buying factors include headlight lens material, kit contents, grit range, ease of use, drying time, and warranty or support from the brand. Compare kits that include a drill-powered polisher and microfiber cloths against more manual approaches. How often do you plan to restore headlights, and will you want a long-lasting UV sealant that resists yellowing and hazing?
Consider placement and storage: keep tools in a dedicated case, out of reach from children, and store sealants in a cool, dry area. For households with limited space, a compact, all-in-one restoration kit may streamline maintenance. If you frequently tackle other plastic lens surfaces, a versatile polishing compound kit can extend beyond headlights to tail lights or plastic housings.