Maintaining a clean range hood filter helps improve kitchen air quality and keeps the cooking space looking its best. This guide provides a step-by-step method to effectively clean the filter above the stove, using common household supplies and dedicated degreasing products.
The following sections outline a straightforward process, from gathering the right materials to finishing touches that prevent future buildup. Readers will find practical tips for different hood models and filter types.
Quick Answer
Remove the filter, soak it in warm, soapy water or a degreaser solution, scrub with a brush, rinse thoroughly, dry completely, and reinstall. For heavy grease, use a专 dedicated range hood degreaser spray and a nylon-bristle brush for best results.
What You’ll Need
- Range hood degreaser spray 22 oz or a mild household degreaser
- Microfiber cleaning cloth for range hood
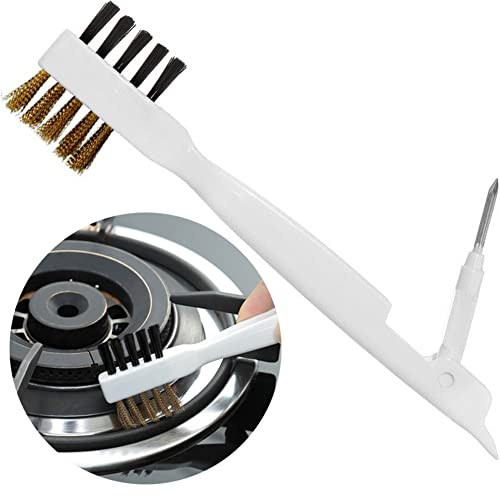
- Range hood cleaning brush nylon bristle
- Range hood grease filter scraper tool
- Stainless steel range hood filter replacement 12×12 (optional, if the current filter is damaged or severely worn)
- Warm water and a shallow basin
- Dish soap or dishwashing liquid
- Old towels or a drying rack


Before You Start
Prepare a workspace with good ventilation and place a towel or mat under the hood to catch drips. Turn off the range hood and ensure the surface below is free from clutter. If the filter is attached to an electrical housing, follow the manufacturer’s guidelines for removing and cleaning, and avoid soaking any electrical components. Plan for a 20–40 minute cleanup, depending on grease buildup. Important cautions include avoiding abrasive cleaners on stainless steel and never using bleach on metal surfaces, which can damage the finish.
Step-By-Step: How To Clean A Filter Above The Stove
- Power down and remove the filter: Open the hood and slide or lift the filter out following the model’s instructions.
- Brush off loose debris: Use the nylon bristle brush to loosen any crusted grease from the filter and the filter slots.
- Prepare cleaning solution: In a basin, mix warm water with a few drops of dish soap or apply the range hood degreaser spray 22 oz directly to the dirty areas.
- Soak the filter: Submerge the filter in the warm soapy solution for 10–15 minutes to loosen embedded grease.
- Scrub gently but thoroughly: Use the brush to scrub the filter’s surface and edges, paying attention to corners and grooves.
- Rinse and inspect: Rinse under warm running water until all soap and grease have washed away; inspect for remaining buildup.
- Dry completely before reinstalling: Pat dry with a microfiber cloth and let air-dry fully to prevent mold or warping.
- Reinstall the filter: Once dry, replace the filter back into the hood, ensuring it seats firmly and correctly.
- Wipe the exterior: Use a microfiber cloth to wipe the hood’s exterior, removing fingerprints and residue for a polished look.
- Test the system: Turn the hood on at a low speed to confirm proper airflow and that nothing is rattling or loose.
- Schedule regular cleanings: For best results, repeat every 1–3 months depending on cooking frequency and grease level.
- Consider upgrades: If the filter is damaged or overly worn, replace with a compatible stainless steel range hood filter 12×12 to maintain efficiency.
Troubleshooting
| Symptom | Likely Cause | Fix | Prevention |
|---|---|---|---|
| Grease residue remains after cleaning | Grease deeply embedded in filter material | Re-soak longer and scrub with a nylon brush; use a stronger degreaser | Clean more frequently to prevent heavy buildup |
| Filter doesn’t fit properly after reinstallation | Filter warped or wrong size | Check model specifications and replace with the correct size | Store replacement filters in a dry area and verify size before cleaning |
| Strong odor after reassembly | Residual grease on hood surfaces | Wipe exterior surfaces with microfiber cloth and mild cleaner | Clean regularly to minimize odors |
| Hood sounds loud or rattles | Filter not seated evenly | Re-seat and ensure clips or hinges are engaged | Inspect hardware during routine cleanings |
Common Mistakes
- Using abrasive pads on stainless steel can scratch finishes
- Leaving the filter soaking for too long, which may damage some plastics
- Ignoring the hood exterior while cleaning the filter, leading to visible grease buildup
- Not drying the filter completely before reinstallation, which can promote mold
Tips For Best Results
- Schedule a consistent cleaning rhythm aligned with cooking frequency to prevent heavy buildup.
- Pre-warm water helps loosen grease more quickly when soaking filters.
- Use microfiber cloths for streak-free surfaces and to minimize lint left behind.
- Keep a spare replacement filter on hand to minimize downtime if a filter is too worn.
- Whenever possible, wipe down the hood’s exterior after meals to reduce future grease transfer.
Call A Professional
Consider a professional if the hood display shows signs of damage, electrical concerns, or persistent odors after cleaning attempts. Stop immediately if the hood produces unusual noises, heat, or if you suspect a gas or electrical safety issue. A pro can assess ventilation efficiency, seal integrity, and ensure safe operation of the range hood system.
FAQ
How often should I clean a filter above the stove?
Typical guidance is every 1–3 months, depending on cooking frequency, grease level, and whether a vent system is actively used.
Can I use dish soap alone without a degreaser?
Yes, warm water and dish soap can work for light buildup, but a dedicated range hood degreaser spray is often more effective for heavy grease.
Is it okay to soak the filter overnight?
Soaking overnight is generally acceptable for stubborn buildup, provided the filter material is water-safe and properly supported.
What should I do if the filter looks damaged after cleaning?
Replace it with a compatible 12×12 stainless steel filter to maintain performance and safety.
Are there special steps for stainless steel hoods?
Use nonabrasive cleaners and avoid harsh chemicals; dry thoroughly to prevent water spots and corrosion.
Do I need to remove the entire hood for a deep clean?
Generally not; most maintenance can be done with the filter removed and exterior wiped down. More extensive service may require professional assistance.
What other maintenance improves air quality?
Regular vent inspections, cleaning of the ductwork if accessible, and replacing filters as recommended by the hood manufacturer.
Buying Guide
When selecting range hood filters and cleaning tools, consider size compatibility, material quality, and cleaning efficacy. A 12×12 stainless steel replacement filter is a common standard for many models, but always verify your hood’s dimensions before purchasing. Look for filters with durable construction and a design that makes removal and cleaning straightforward. Noise level and energy efficiency vary by hood model, so evaluating these factors alongside filter maintenance will help sustain performance. For cleaning, choose a range hood degreaser spray 22 oz and a set of microfiber cleaning cloth for range hood, paired with a range hood cleaning brush nylon bristle for tough buildup. If you frequently cook with high-fat foods, consider a second filter or a back-up to minimize downtime and keep the kitchen environment clean and safe.
Is your hood currently difficult to access or you’re thinking about upgrading to a higher-capacity model? Compare installation space, duct routing, and outdoor venting options to ensure optimal airflow. Placement and clearance around the hood influence both cleaning ease and performance. Would a quieter model or one with advanced controls better fit your kitchen routine? These considerations help guide a more informed purchase while aligning with cleaning practicality.