Film on windows can come from tinted coatings, protective films, or residue left after removal attempts. Cleaning the film effectively involves softening adhesives, lifting edges, and polishing the glass without scratching it. This guide walks American homeowners through a practical process using common tools and the right technique.
Following a systematic approach helps achieve clear, spotless panes while minimizing damage to the glass or surrounding areas. Safety and surface prep are essential, especially when dealing with sun exposure, heat, or chemical cleaners. The steps below are designed for DIY convenience with readily available supplies.
Quick Answer
Best first steps: heat the film lightly, lift an edge, apply adhesive remover, and gently scrape with a safe tool. Rinse with microfiber cloths and repeat as needed. Avoid harsh scrapers that can scratch glass.
What You’ll Need
- Window tint removal kit with scraper blade
- Adhesive remover for glass film residue
- Heat gun for removing window film
- Plastic window scraper with blade guard
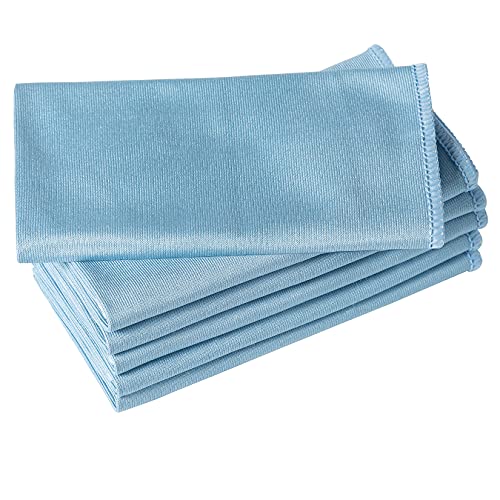
- Microfiber cleaning cloth for glass film residue


Before You Start
Prepare the work area to catch drips and protect surrounding surfaces. Work in a shaded area or during cool weather to prevent rapid drying. Use eye protection if spraying chemical removers. Tape off edges around the window to keep solvents off wood frames or painted trim. Time estimates vary by film thickness but typically range from 30 minutes to an hour per window, including set time for adhesives.
Step-By-Step Guide: How To Clean Film Off Windows
- Inspect the film to determine its type and thickness. If the film is old or stubborn, plan for multiple passes rather than forcing removal.
- Heat a small section of the film with a heat gun set on a low heat to soften the adhesive. Keep the nozzle moving to avoid heat hotspots.
- Gently lift a corner with the plastic window scraper with blade guard. Work slowly to avoid glass chipping or tearing the film.
- Apply adhesive remover for glass film residue to the lifted edge. Let it sit for 30–60 seconds to penetrate the adhesive bonds.
- Use the scraper to lift and peel the film away, pulling in a smooth, steady motion. If the film resists, reapply remover and reheat slightly before continuing.
- Wipe away residue with a microfiber cleaning cloth for glass film residue, turning the cloth to a clean area as needed. Repeat as necessary for full adhesive removal.
- For stubborn patches, reapply remover and gently scrub with the cloth in small circular motions. Avoid abrasive pads that could scratch the glass.
- Rinse the glass with a clean, damp microfiber cloth. Dry with a fresh cloth to prevent water spots. Inspect for any remaining adhesive and repeat steps if needed.
- Final polish with a dry microfiber cloth to restore clarity and shine. Consider applying a light glass cleaner to complete the finish if desired.
Troubleshooting
| Symptom | Likely Cause | Fix | Prevention |
|---|---|---|---|
| Adhesive residue remains after scraping | Film thicker than expected or improper solvent | Reapply remover, reheat slightly, and re-scrape | Test a small area first; use solvent recommended by product lines |
| Scratches on glass after cleaning | Rough scraper or dirty cloth | Switch to a plastic scraper with guard; use clean microfiber | Work with a damp cloth and gentle pressure |
| Streaks or hazy glass | Residue left behind or improper drying | Rinse thoroughly; dry with a lint-free cloth | Use fresh cloths for each pass |
| Heat damage on frame | Too much heat near wooden or vinyl framing | Reposition heat gun farther away; reduce temperature | Test heat on a non-visible area first |
Common Mistakes
- Using metal or sharp tools that can scratch glass surfaces
- Rushing the removal process, causing adhesive transfer or film tears
- Overheating edges near window frames or trim
- Skipping a test area before applying solvents
Tips For Best Results
- Always work in sections to keep products from drying too quickly
- Choose a solvent compatible with the film and glass type
- Keep a damp microfiber cloth ready to catch drips and reduce streaks
- After removal, consider a light glaze or conditioner to ease future cleaning
Call A Professional
Seek professional help if the film is a commercial solar coating, contains hazardous materials, or if removal requires extensive heat application near sensitive framing. Stop and call a pro if window panes appear damaged, if you cannot lift the film safely, or if multiple windows show warranty exclusions.
FAQ
What is the safest way to remove window film?
Begin with a gentle heat and lift a corner, then use an adhesive remover designed for glass films and a plastic scraper to lift the rest.
Can I reuse the same remover on multiple windows?
Yes, but ensure each area is fully cleaned and free of residue before moving to the next window.
Will window film residue harm my glass?
Residue can dull clarity and attract dirt; remove it completely with the right solvent and cloth.
How long should I let adhesive remover sit?
Typically 30–60 seconds, depending on the product and film thickness.
Is heat necessary for all films?
No; heat helps with tougher films but is not required for all removals.
What if I see water spots after cleaning?
Dry promptly with a lint-free cloth and use a glass cleaner if needed.
What kinds of tools are safest?
Plastic scrapers with guards and soft microfiber cloths are the safest tools for glass cleaning tasks.
Buying Guide
When choosing supplies to remove film from windows, consider size, ease of use, and compatibility with glass surfaces. Key buying factors include:
- Size and type of film: Thick or multi-layer films may require stronger solvents and longer dwell times.
- Noise and ease of operation: Electric heat guns vary in noise and heat output; user-friendly models reduce fatigue.
- Energy and solvent efficiency: Opt for low-toxicity, fast-acting removers to minimize exposure and waste.
- Controls and safety features: Look for adjustable heat settings, blade guards, and ergonomic handles.
- Placement and storage: Choose compact tools that fit within a standard toolbox or cleaning kit.
- Brand compatibility: Use products designed for glass to avoid damage and ensure effective residue removal.
For effective results, match the kit components to the project scale, and combine a dedicated removal kit with a reliable adhesive remover and a microfiber cloth set. If in doubt, start with a small area to gauge performance and adjust tools as needed.