Water spots, mineral buildup, and reduced flow can affect any faucet spout over time. A straightforward cleaning routine restores smooth water flow and improves faucet aesthetics. This guide explains practical steps for homeowners to tackle mineral deposits, clogs, and aerator buildup safely and effectively.
With the right tools and a calm approach, cleaning a faucet spout becomes a quick maintenance task. The following sections provide a concise, step-by-step method, common issues, and tips to prevent future buildup.
Quick Answer
Detach the aerator, use a specialized faucet aerator cleaning tool or a flexible faucet cleaning wand to loosen mineral deposits, scrub with a narrow nozzle brush, rinse, and reassemble. If stubborn buildup remains, try an aerator removal wrench to access internal passages and recheck flow.
What You’ll Need
- Faucet aerator cleaning tool
- Faucet cleaning brush narrow nozzle
- Faucet aerator removal wrench
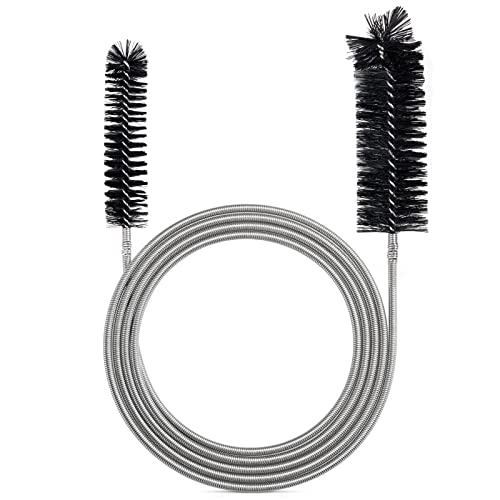
- Flexible faucet cleaning wand
- Slim gap cleaning brush for faucet spout


Before You Start
Safety first: turn off the water supply to the faucet or place the handle in the off position. Place a soft towel or cloth under the sink to catch any drips. If your faucet is lever-controlled, ensure the valve is fully closed. Estimate 15–30 minutes for the complete process, including drying time. Avoid using harsh chemicals or metal tools that could scratch the finish.
Step-By-Step: How To Clean A Faucet Spout
- Loosen the aerator by hand or with the faucet aerator removal wrench until it unscrews from the spout.
- Inspect the aerator for mineral buildup and debris; remove the inner screen if present.
- Soak the aerator components in warm water mixed with a mild descaling solution for 10–15 minutes.
- Use the slim gap cleaning brush for faucet spout to gently clear any residue inside the spout opening.
- Reassemble the aerator parts and reattach to the spout; do not overtighten.
- Attach the faucet aerator cleaning tool and run water to flush the passages; observe flow and spray pattern.
- If flow is still weak, use the flexible faucet cleaning wand to reach the interior of the spout and rinse mineral deposits.
- Repeat soaking and brushing if necessary, focusing on stubborn deposits near the outlet.
- Wipe the exterior with a soft cloth; polish chrome or stainless finishes to restore shine.
- Test the faucet’s full range by turning on both hot and cold controls and checking for even spray.
- If deposits persist beyond basic cleaning, repeat steps with a different brush size or tool to access tight corners.
- Once clean, recheck for leaks around the aerator and ensure a snug seal.
Troubleshooting
| Symptom | Likely Cause | Fix | Prevention |
|---|---|---|---|
| Weak or uneven spray | Aerator clogged or partially blocked | Disassemble, clean components thoroughly, and reassemble | Clean every 1–3 months depending on water hardness |
| Leak at aerator | Improper seal or worn washer | Rethread and reseat; replace washers if needed | Check for wear and replace during routine maintenance |
| Debris inside spout after cleaning | Deposits in internal passages | Use a flexible wand to flush passages; repeat as needed | Limit mineral buildup with routine cleaning |
| Nozzle won’t unscrew | Stuck aerator | Apply gentle penetrating oil and use proper wrench | Prevent by avoiding overtightening during installation |
Common Mistakes
- Using abrasive brushes that scratch the faucet finish
- Over-tightening the aerator during reassembly
- Omitting the interior screen during cleaning
- Rushing the soaking step, reducing cleaning effectiveness
Tips For Best Results
- Soak parts in vinegar if mineral buildup is heavy, but avoid long exposure on bronze finishes.
- Keep a small toolkit handy with the listed tools for quick maintenance.
- Record the date of cleaning to track maintenance intervals.
- Check water hardness in your area; harder water increases mineral deposits.
Call A Professional
Consider contacting a plumber if any of the following occur: persistent leaks after reassembly, damaged threads or spout, or if the faucet is under warranty and disassembly could void it. If there is noticeable corrosion, a professional assessment is recommended to avoid water damage or fixture failure.
FAQ
How often should I clean a faucet spout?
Most homes benefit from a cleaning every 3–6 months, with more frequent maintenance in areas with hard water.
Can I use vinegar to descale the aerator?
Yes, descaling with vinegar is effective for mineral buildup, but rinse thoroughly to remove any vinegar residue.
What tools help with hard-to-reach spouts?
A flexible faucet cleaning wand and a slim gap cleaning brush are designed for tight spaces and long reaches.
Is it safe to dismantle the faucet aerator?
Yes, when you follow manufacturer guidance and turn off the water supply before starting.
What if the aerator won’t detach?
Try a dedicated aerator removal wrench and apply gentle counterclockwise pressure; avoid forcing the parts.
Will cleaning affect water pressure?
Proper cleaning typically improves pressure by removing clogs; over-aggressive disassembly can temporarily affect performance.
Should I replace the aerator after cleaning?
If the screen or seals show wear, replace the aerator to ensure a tight seal and consistent spray.
Buying Guide
When choosing tools to maintain faucet spouts, consider factors such as tool compatibility with your faucet model, ease of use, and material quality. A compact set with a dedicated faucet aerator cleaning tool, a flexible cleaning wand, and a slim gap brush covers most common cleaning tasks. Look for corrosion-resistant handles and ergonomic grips for comfortable use during routine maintenance.
Key buying factors include size and reach to access interior spouts, noise-free operation, and ease of cleaning curved or awkward fixture designs. Energy considerations are generally not a major factor for manual cleaning tools, but choose durable, long-lasting equipment to minimize replacement needs. For placement, ensure storage in a cabinet drawer or near the sink for quick access.
Different tool combinations offer varied advantages: a dedicated aerator cleaning tool accelerates removal and reattachment, while a flexible wand helps access deeper passages. A slim gap brush complements the aerator and internal cleaning by addressing narrow spaces where mineral deposits accumulate. If you frequently deal with stubborn buildup, an aerator removal wrench may save time and reduce frustration.
Ultimately, select a toolkit that fits your faucet type (standard, pull-down, or widespread) and your typical water quality. A well-chosen set supports regular maintenance, preserves faucet aesthetics, and maintains consistent water flow across households. Are you ready to assemble a compact, efficient cleaning kit tailored to your fixtures?