Maintaining clean evaporator coils in split air conditioners helps improve cooling efficiency, extend system life, and improve indoor air quality. This guide provides practical, step-by-step instructions for American households to safely and effectively clean evaporator coils using common tools and readily available coil cleaners.
Quick Answer
Quick method: Power off the system, remove access panels, and apply a foaming evaporator coil cleaner from a spray bottle, letting it dwell before rinsing with a gentle spray or damp cloth. Use a fin comb to straighten any bent coils if needed, then reassemble and run a test cycle.
What You’ll Need
The following tools and materials cover the core items to clean a split AC evaporator coil. Use the list as a baseline and adapt with what you already own.
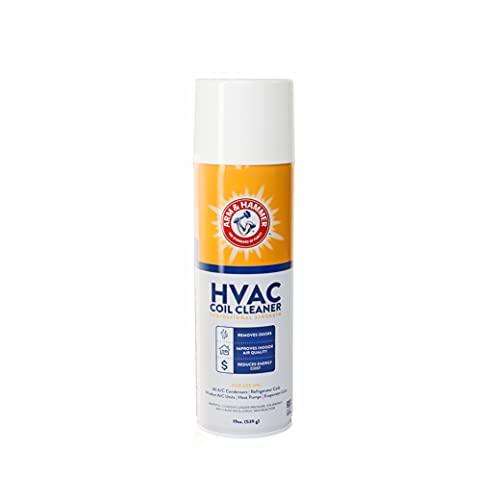
- AC evaporator coil cleaner spray foaming concentrate or foaming evaporator coil cleaner for air conditioner
- Split AC evaporator coil cleaning kit (optional but convenient for tools and instructions)
- HVAC fin comb for evaporator coils to straighten bent fins
- Spray bottle for HVAC coil cleaner or a compatible spray bottle
- Soft brush or small nylon scrub brush
- Microfiber cloths or rags for wiping
- Gloves and safety glasses
- Vacuum with narrow nozzle (optional) for loose debris


Before You Start
Preparation reduces risk and damage to the system. Begin by turning off power at both the indoor unit and the outdoor unit, and disconnect any power supply to the AC. Remove access panels carefully and avoid touching electrical components. Never use high-pressure water on the coil; damp cleaning is preferred to prevent moisture intrusion into electrical parts. If the unit is within a living area, protect floors and nearby electronics from sprays or drips, and work in a well-ventilated space. Expect a cleaning session to take about 30–60 minutes per unit, depending on accessibility.
Step-By-Step: How To Clean Evaporator Coil In Split AC
- Power down and access: Shut off the system at the breaker and the indoor unit. Remove the front panel or access cover to reveal the evaporator coil. Take photos if needed to restore configuration.
- Inspect for debris: Visually inspect the coil for dust, dirt, or mold buildup. Note any visible corrosion or damaged fins that may require extra care.
- Vacuum loose debris: Using a narrow nozzle attachment, gently vacuum the coil surface to remove loose dust and debris. Do not press hard on fins.
- Apply foaming cleaner: Shake the foam cleaner well and apply evenly across the coil, focusing on heavily soiled areas. Allow the foam to dwell for the product’s recommended time to break down buildup.
- Rinse or wipe: If the product label permits rinsing, use a light mist of water to rinse off the foam and loosened dirt; otherwise, wipe with a damp cloth and repeat as needed. Ensure water does not enter the electrical compartment.
- Detail the fins: While the coil is still damp, use an HVAC fin comb for evaporator coils to straighten bent fins. This improves airflow and heat exchange.
- Clean surrounding area: Wipe down the blower housing and nearby components to remove any residue. Check for any signs of moisture intrusion around electronics.
- Reassemble and test: Reattach the access panel securely, restore power, and run a test cycle. Listen for unusual noises and monitor for proper airflow and cooling performance.
Troubleshooting
| Symptom | Likely Cause | Fix | Prevention |
|---|---|---|---|
| Coil remains dirty after cleaning | Inadequate dwell time or insufficient cleaning product | Reapply cleaner, allow dwell time, and re-clean | Schedule periodic cleanings; maintain air filters |
| Reduced airflow after cleaning | Blocked fins or debris near the fins | Reinspect and straighten fins with fin comb; clear debris | Keep area free of dust and pests |
| Moldy odor in heat mode | Moisture exposure and mold growth | Use a mold-safe cleaner or disinfectant per label; dry surfaces | Promptly dry coil and ensure good ventilation |
| Water leakage around indoor unit | Over-flooding cleaner or clogged condensate drain | Fix drainage, wipe excess water, avoid over-wetting | Inspect drain line during maintenance |
Common Mistakes
- Over-wetting or spraying water directly into electrical components.
- Using brushes that bend or bend the delicate cooling fins.
- Applying cleaner too aggressively or not following dwell times.
- Neglecting to dry the coil and surrounding areas completely before reassembly.
- Skipping safety steps or attempting cleaning without power isolation.
Tips For Best Results
- Choose a foaming evaporator coil cleaner formula designed for AC coils and compatible with split systems.
- Work in a shaded, cool area to prevent rapid evaporation of cleaners before dwell time.
- Maintain a regular cleaning schedule, typically every 6–12 months depending on usage and environment.
- Pair coil cleaning with fresh air filter changes to reduce dirt accumulation.
- Label and store cleaning products safely away from children and pets.
Call A Professional
Consult a licensed HVAC tech if there is visible refrigerant leakage, refrigerant smell, unusual noises, or if the system fails to cool after cleaning. Seek professional help immediately if moisture near electrical components is evident or if the unit is under warranty terms that require certified technicians for servicing.
FAQ
Can I clean evaporator coils without removing the unit?
Yes, most residential split systems allow coil cleaning with access panels removed, but follow manufacturer guidance and avoid disassembling sealed parts.
Are there safe cleaners for fiberglass or painted surfaces?
Use cleaners listed as safe for coil materials and follow the product label instructions to protect coatings and plastics.
How often should I clean evaporator coils in a typical home?
Most homes benefit from cleaning every 6–12 months, but high-dust environments may require more frequent attention.
What if I see corrosion on the coil?
Corrosion may indicate aging equipment or water quality issues; contact a pro to assess coil replacement or system repairs.
Is it safe to use a spray bottle for all cleaners?
Use only cleaners and spray bottles recommended by the product manufacturer and ensure proper labeling and compatibility with your unit.
Buying Guide
When choosing cleaning products and tools for evaporator coils, consider size, compatibility, and ease of use. The right kit should include a ready-to-use foaming cleaner, a spray bottle with a narrow nozzle, and a fin comb for precise fin care. Noise level and energy efficiency are unaffected by cleaning tools themselves, but a well-maintained coil improves overall performance, potentially reducing run time. Look for clear instructions, dwell times, and cautions on the label. For placement, store cleaners in a dry cabinet away from sunlight and heat, and ensure that alcohol-based or solvent cleaners are kept away from plastics that may degrade.
Would you like to see comparison options for specific brands or get a recommended shopping list tailored to your HVAC setup and climate zone?