The Dyson V8 corded-free vacuum combines powerful suction with lightweight design, but regular cleaning of its components ensures peak performance. This guide walks through practical steps to clean the V8’s filters, brushes, and casings without damaging parts or voiding warranties.
Following the right routine can extend the life of your vacuum, maintain strong suction, and reduce lingering odors. The process uses common household tools and a few specialized replacements to keep the device running smoothly.
Quick Answer
Disconnect the V8 from any charging dock, remove the bin, and check the filter. Clean or replace filters as needed, wipe the housing, and wash brush components. Use the included cleaning tools or a Dyson V8 filter cleaning and maintenance kit to streamline the process and keep performance consistent.
What You’ll Need
- Dyson V8 filter replacement kit
- Dyson V8 motorized brush head replacement (if worn) or spare brush components
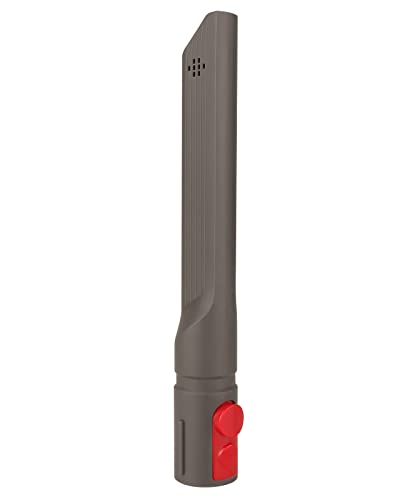
- Dyson V8 crevice tool replacement set
- Dyson V8 cordless vacuum brush roll cleaning tool
- Dyson V8 filter cleaning and maintenance kit


Before You Start
Ensure the vacuum is powered off and disconnected from any charging base. Work in a clean, well-lit area to prevent small parts from escaping. Safety notes: avoid water on the motor or electronic components, and do not submerge the main body. Time estimates vary by maintenance level: basic cleaning about 20 minutes; full disassembly and deep clean up to 45 minutes.
Prepare an organized workspace with a small container for screws and a microfiber cloth for surfaces. If any part seems damaged or overly worn, consider replacing it with a genuine component from the Dyson V8 filter replacement kit or motorized brush head replacement set.
Step-By-Step: How To Clean A Dyson V8 Vacuum
- Power off and detach the cleaner head from the wand. Remove the bin by pressing the release catch and lifting straight out.
- Empty the bin into a trash can and rinse the bin with cold water if it’s visibly dirty. Let it dry completely before reinsertion.
- Inspect the filter(s). If they appear clogged or have become discolored, remove the filter and rinse under cold running water. Do not use detergents; allow to air dry completely for at least 24 hours.
- Clean the cyclone and outer housing with a damp cloth. Use a dry brush to dislodge embedded dust from crevices. Pay special attention to the area around the filter housing.
- Check the motorized brush head and brush roll. Remove hair and fibers wrapped around the bristles with the included brush tool or scissors carefully. Replace the brush head if excessive wear is evident.
- Clean the crevice tool from dust buildup; detach any attachments and rinse if applicable. Dry before reattaching to the wand.
- Reassemble the unit and reinsert the bin. Confirm the latches click into place and that the filter is fully dry before powering on.
- Test suction on a small test area. If suction remains weak, re-check the filter and brush roll for obstructions, and ensure the filter is completely dry before running the vacuum again.
- Optional step: replace worn components with the Dyson V8 motorized brush head replacement or crevice tool replacement set to maintain peak performance.
- Run the vacuum across a few surfaces to confirm proper operation and no unusual noises.
- Schedule routine cleanings every few months, or more often in homes with pets or high dust levels.
Troubleshooting
| Symptom | Likely Cause | Fix | Prevention |
|---|---|---|---|
| Weak suction after cleaning | Clogged filter or bin | Rinse filter(s) and ensure they are dry; empty bin | Regularly check and dry filters thoroughly |
| Brush head not spinning | Debris wrapped around brush roll | Remove hair and string; replace brush head if needed | Clean after heavy-furring days; use a dedicated cleaning tool |
| Strange grinding noise | Obstruction in brush housing or debris in motor area | Clear debris; inspect for loose parts | Inspect components before each use in high-dust areas |
| Filtration odor | Dirty filters without proper drying | Rinse and ensure thorough drying; replace if discolored | Dry filters completely and replace per kit guidelines |
Common Mistakes
- Washing filters with hot water or detergents, which can damage filtration media
- Reassembling before filters are fully dry, causing mold or reduced suction
- Neglecting the motorized brush head, leading to reduced performance
- Using non-genuine parts where required, risking fit and function
Tips For Best Results
- Keep a regular schedule for filter maintenance to preserve suction power
- Always air-dry filters in a well-ventilated area away from direct sunlight
- Use the crevice tool for tight spaces and the motorized brush head for carpets and rugs
- Store attachments neatly to avoid loss of small components
Call A Professional
Seek professional service if the vacuum emits persistent odd noises, loses significant suction after maintenance, or if the battery shows signs of failure, such as rapid discharge or swelling. If the device sustains water exposure or experiences electrical issues, contact an authorized Dyson service center rather than attempting repairs at home.
FAQ
How often should I clean the Dyson V8 filters?
Clean the filters every 1–3 months, or more frequently in homes with pets and high dust levels. Replace filters as recommended by the kit instructions.
Can I wash the brush head and attachments in water?
Yes for most plastic attachments, but avoid submerging the motorized head itself. Let parts dry completely before reassembly.
What if the suction still seems weak after cleaning?
Check for blockages in the wand, bin, and cyclone; verify the filters are dry; and inspect the brush roll for debris.
Do I need to replace parts often?
Parts subject to wear, such as the motorized brush head and seals, should be replaced as needed to maintain performance.
Buying Guide
Choosing the right components for the Dyson V8 involves factors like size, noise, energy efficiency, controls, and placement. Consider whether you want a full replacement kit to refresh multiple parts at once or individual components as wear arises. A comprehensive kit often includes the filter cleaning and maintenance kit, spare filter sets, and attachments, offering a convenient way to keep the unit performing at peak levels. When comparing options, look for compatibility with the Dyson V8 model, durability of materials, and warranty coverage. Placement matters too; store components in a dry area with good airflow to hasten drying and reduce mildew risk. Curious about which kit best fits your home setup? Review the included tools to ensure there is a suitable brush head, crevice tool, and filter replacements for your cleaning routine.