Crayons on walls can be stubborn yet common, especially in homes with young artists. The right approach uses gentle, wall-safe products that lift color without damaging paint or wallpaper. This guide covers practical steps, from quick fixes to more thorough methods, to restore clean walls with minimal scrubbing.
Quick Answer
Choose a mild, wall-safe cleaner first. For most painted walls, a damp cloth with a gentle cleaner or a dedicated eraser can remove crayons quickly. If marks persist, move to paste or gel formulas designed for walls, then finish with a wipe-down using a clean, damp cloth.
What You’ll Need
- Mr. Clean Magic Eraser wall cleaner
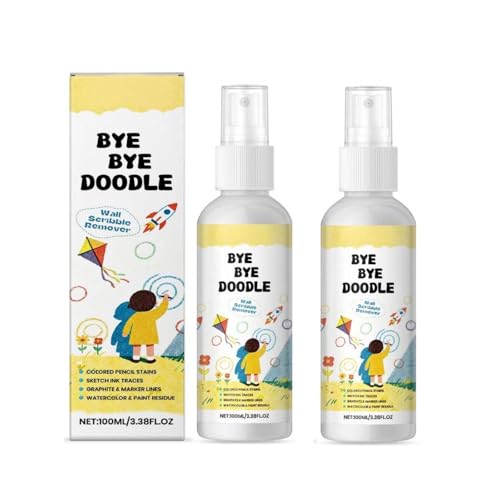
- crayon stain remover spray for walls
- baking soda paste for crayon marks on walls
- wall-safe crayon remover gel
- oil-based crayon stain remover spray for painted walls
- soft microfiber cloths
- warm water
- clean sponge


Before You Start
Test any cleaner on a small, inconspicuous area of the wall to check for discoloration or texture changes. Work in a well-ventilated space and avoid abrasive scrubbing that can remove paint. For textured or specialty finishes, use the gentlest method first and proceed gradually. Time-saving tip: gather all supplies before you begin so you can finish in one pass.
Do not mix cleaners as chemical reactions can damage finishes. If you’re unsure about the wall type (matte, satin, semi-gloss, wallpaper), consult the paint manufacturer’s guidance or test on a hidden spot first.
Step-By-Step: How To Clean Crayon Off Wall
- Begin with a damp microfiber cloth and plain water to remove loose wax from the surface.
- Lightly rub the mark with a Mr. Clean Magic Eraser wall cleaner or a soft sponge using small circular motions.
- If marks persist, apply a small amount of crayon stain remover spray for walls directly to the stain and let it sit for 1–2 minutes.
- Wipe with a clean, damp cloth. For stubborn areas, repeat once, avoiding excessive scrubbing.
- For homemade options, create a baking soda paste for crayon marks on walls (baking soda + water to a paste). Apply gently, then wipe away with a damp cloth.
- When dealing with glossy or painted surfaces, use a oil-based crayon stain remover spray for painted walls with a light touch after testing on a hidden spot.
- Rinse the area with a clean, damp cloth and dry with a soft towel to prevent streaks.
- Inspect under bright light. If any color remains, repeat the preferred method once more, then wipe clean.
- Finish by wiping the entire area with a damp cloth to remove any residue and restore uniform appearance.
- For wallpaper, use the gentlest approach first and avoid saturated applications to prevent wallpaper damage.
- Store cleaners properly and label homemade pastes clearly for safety and future use.
Troubleshooting
| Symptom | Likely Cause | Fix | Prevention |
|---|---|---|---|
| Color remains after initial wipe | Stubborn pigment or thick wax | Apply cleaner, let sit 1–2 minutes, re-wipe | Test spot first; treat gently |
| Finish dulls or swirls appear | Abrasive scrubbing | Switch to a softer method, use only mild cleaners | Avoid harsh powders or excessive pressure |
| Streaks or residue | Residual cleaner | Rinse with plain water and wipe dry | Rinse thoroughly after each cleaning |
| Water spots on matte walls | Over-wetting | Use less water and dry promptly | Use just damp cloths, not soaking wet |
Common Mistakes
- Using harsh solvents on painted or wallpapered walls, which can lift paint.
- Scrubbing too aggressively, causing surface damage or texture changes.
- Rushing steps and not rinsing residue, leaving streaks.
- Testing cleaners only in visible areas; test in hidden spots too.
Tips For Best Results
- Always start with the mildest method and escalate only if needed.
- Use wall-safe crayon remover gel for delicate surfaces and to minimize liquid exposure.
- Apply cleaners in small amounts to avoid spreading color to adjacent areas.
- Keep a damp cloth handy to rinse immediately after cleaning to prevent streaking.
- Regular maintenance can prevent buildup—spot clean marks soon after they appear.
Call A Professional
Contact a professional if stains cover large areas, involve delicate wallpaper, or if cleaning attempts risk damage to the wall finish. Signs to seek help include peeling paint, persistent stains after multiple attempts, or uncertain wall materials. For safety, stop and call a pro when the area is not clearly bounded or if there are suspicious moisture issues behind the stain.
FAQ
Can I use magic erasers on wallpaper?
Yes, but test first and use light pressure to avoid tearing or removing wallpaper texture.
Are sprays better than pastes for crayon removal?
Sprays offer targeted application and quick action; pastes work well for embedded marks and porous surfaces.
Will baking soda damage painted walls?
When used as a mild paste and applied gently, baking soda is safe on most painted surfaces.
What should I do if crayon stains return?
Re-apply the gentlest method, then consider a stronger product only if necessary and avoid over-wetting the area.
Buying Guide
When choosing products to remove crayon from walls, consider several factors to ensure effective results without damage:
- Size and surface type: Painted walls vs. wallpaper may respond differently to cleaners.
- Noise level: Some cleaners produce mild fizzing or air exposure; opt for quiet, low-noise options indoors.
- Energy efficiency: Manual cleaning uses no power; powered tools may speed up stubborn stains but consume energy.
- Controls and dosing: Sprays offer precise application; pastes and gels provide longer contact time without dripping.
- Placement: Keep cleaners away from children and pets; store in a cool, dry place.
- Brand compatibility: Choose products known for wall safety on your specific paint or wallpaper finish.
- Multi-surface use: Some formulas work on drywall, ceramic, and wood trim, saving inventory for future touch-ups.
For households with kids, consider a combination set that includes a gentle eraser, a wall-safe gel, and a spray targeted to tougher stains. If you have multiple finishes or delicate surfaces, opting for a starter kit that includes tester steps is wise. Always review manufacturer instructions and test a hidden area before broad application.