Construction projects often leave fine dust on hard surfaces, especially tile floors. This guide provides practical steps to remove construction dust efficiently while protecting grout lines and reducing cleanup time. The methods center on using tools suited for tile floors and dust-prone environments, with a focus on safety and effectiveness.
Quick Answer
Best overall approach: Start with a HEPA-equipped vacuum to remove settled dust, then finish with a microfiber system or dust mop for a streak-free shine. For stubborn residue, a tile floor scrub brush attachment can help lift dust from grout lines without scratching tiles.
What You’ll Need
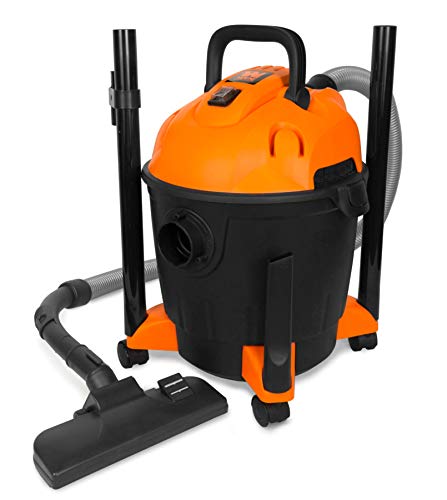
- HEPA shop vacuum for construction dust tile floors
- wet/dry vac with HEPA for construction dust
- microfiber mop system for tile floors dust removal
- dust mop with washable microfiber pads for construction dust
- tile floor scrub brush attachment for cleaning construction dust


Before You Start
Clear the area of furniture or obstacles to create an open workspace. If dust is airborne, ventilate the room by opening doors or windows or using a fan set to blow dust away from the operator. Inspect tile for cracks or loose grout; use a gentle approach to avoid chipping. Wear a dust mask and eye protection to minimize inhalation and eye irritation. Estimate cleaning time as 15–45 minutes depending on room size and dust amount.
Step-By-Step: How To Clean Construction Dust From Tile Floors
- Put on protective gear (dust mask, safety glasses) before handling dust-laden surfaces.
- Remove loose debris with a broom or dust mop to prevent scratching during vacuuming.
- Vacuum thoroughly with a HEPA shop vacuum for construction dust tile floors, focusing on corners and transitions.
- Switch to a wet/dry vac with HEPA for construction dust for damp cleanup if the dust is sticky or wet from recent work.
- Wipe down baseboards and vertical surfaces to prevent re-dispersion of dust onto the floor.
- Use a microfiber mop system for tile floors dust removal to pick up fine dust, mopping in straight lines toward the door.
- For stubborn residue, attach a tile floor scrub brush attachment for cleaning construction dust and scrub grout lines gently.
- Rinse the mop pad frequently and replace it when it becomes saturated to avoid spreading dust.
- Finish with a final dust mop with washable microfiber pads for construction dust to collect remaining fine particles and leave a clean surface.
- Inspect the floor and repeat any high-dust zones if needed, then allow the floor to dry completely before reoccupying the space.
- Dispose of collected debris according to local regulations, especially if dust contains hazardous particulates from specific construction materials.
Troubleshooting
| Symptom | Likely Cause | Fix | Prevention |
|---|---|---|---|
| Dust re-deposits on tile after cleaning | Dust re-aerosolized during movement | Vacuum before mopping; use closed doors to limit airflow | Seal off the work area during cleanup |
| Streaks or dull spots on tile | Dirty mop pads or excessive moisture | Rinse/replace pads; wring mop well | Use light, even pressure and dry-toweling |
| Grout looks dirty after cleaning | Dust remains in grout lines | Scrub grout with a scrub brush attachment | Clean grout areas regularly during dust tasks |
| Vacuum loses suction | Clogged filter or bags | Empty canister, replace or clean filter | Regular maintenance between jobs |
Common Mistakes
- Using a non-HEPA vacuum on fine construction dust can circulate particles back into the air.
- Skipping the prep stage, which leads to dust spreading to other rooms.
- Over-wetting tile floors, which can cause longer dry times and potential slip hazards.
- Neglecting grout lines; fine dust can accumulate in seams and be difficult to remove later.
Tips For Best Results
- Work from the farthest corner toward the exit to minimize walking on cleaned areas.
- Combine vacuuming with microfiber systems for efficient particle pickup and a streak-free finish.
- Use separate pads for dusty tasks to avoid cross-contamination with clean areas.
- Schedule dust cleanup after major sanding or drywall work to reduce workload.
Call A Professional
If dust exposure is persistent or involves hazardous materials (such as asbestos-containing materials or lead paint dust), contact a licensed professional. Seek professional remediation for any unknown contaminants, and avoid DIY handling that could release dangerous particles into living spaces.
FAQ
What vacuum is best for construction dust on tile floors?
Choose a HEPA shop vacuum for construction dust tile floors or a wet/dry vac with HEPA for construction dust for the most effective particulate capture.
Can I use a standard mop on tile floors with construction dust?
A microfiber mop system tailored for dust removal is recommended to prevent spreading fine particles.
How do I clean grout after dusting?
Use a tile floor scrub brush attachment to lift dust from grout lines and rinse with clean water.
Is it safe to vacuum wet dust?
Only if using a wet/dry vac with HEPA for construction dust and following manufacturer instructions for wet cleaning.
How often should I clean tile floors after construction?
Clean daily during intense dust periods and perform a detailed pass at the end of the project to ensure no residues remain.
Buying Guide
When choosing equipment to tackle construction dust on tile floors, consider size and layout of the area, noise tolerance, energy efficiency, and placement options. Look for vacuums with true HEPA filtration to capture fine particles and avoid bypassing contaminants. For ongoing dust tasks, a modular system with a microfiber mop and washable pads provides flexibility in tight corners and grout lines. Compare models based on suction power, filter maintenance, and ease of attachment changes. A tile floor scrub brush attachment can be essential for stubborn dust in grout. Finally, ensure tools are compatible with your existing cleaning workflow and storage space to maximize long-term value.