Maintaining clean car terminals is essential for reliable starting power and long-lasting electrical performance. Proper cleaning helps prevent corrosion, improves conductivity, and reduces the risk of electrical issues. This guide outlines practical steps, recommended tools, and safety tips to get the job done right.
Quick Answer
Use a dedicated terminal cleaning brush, apply a corrosion remover or electrical contact cleaner, and finish with a protective dielectric grease to seal out moisture. Rinse and dry thoroughly, reconnect cables securely, and test the system before driving.
What You’ll Need
- car battery terminal cleaning brush nylon bristles
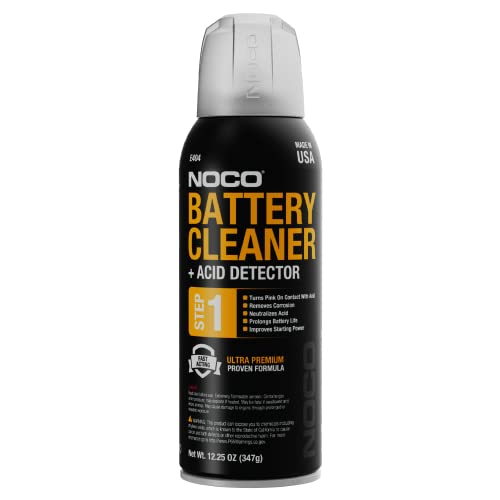
- battery terminal cleaner spray for cars corrosion remover
- car battery terminal cleaning kit brush and grease
- 12V battery terminal protector dielectric grease kit
- electrical contact cleaner spray for automotive terminals


Before You Start
Before beginning, park on a level surface and engage the parking brake. Disconnect the negative battery cable first, then the positive to prevent shorts. Work in a well-ventilated area and wear eye protection and gloves. If the terminal or cable shows deep corrosion, or if you notice signs of damage, stop and reassess the approach. Time to complete: typically 15–30 minutes depending on corrosion level.
Critical cautions: never work with live electrical systems if you’re unsure. Avoid metal tools that can gouge plastic insulation. Keep battery caps in place if present and avoid contact with the battery fluid by following manufacturer instructions.
Step-By-Step: How To Clean Car Terminals
- Shut off the vehicle and remove all jewelry that could accidentally contact terminals. Put on safety glasses and gloves.
- Disconnect the negative (usually black) terminal first, then the positive (+) terminal. Note the order in case you have multiple cables.
- Inspect the terminals for corrosion, white powder, or green buildup. If corrosion is present, proceed with a cleaning agent rather than brute scrubbing.
- Dry brushing: use a nylon bristle brush from the car battery terminal cleaning brush nylon bristles kit to loosen loose corrosion without scratching metal.
- Apply a corrosion remover or electrical contact cleaner spray for automotive terminals. Wait the recommended dwell time, then scrub again to remove residue.
- Rinse or wipe away the cleaner completely with a clean, dry cloth. Ensure all moisture is removed to prevent immediate re-oxidation.
- For persistent corrosion, apply a thin layer of 12V battery terminal protector dielectric grease kit or a similar dielectric grease to both terminals and the inside of the clamp ends.
- Reconnect cables in the reverse order: positive first, then negative. Hand-tighten securely and avoid over-tightening that could damage connections.
- Reconnect any auxiliary cables or clamps and recheck the terminal fit. A loose connection can cause starting issues or intermittent electrical problems.
- Start the vehicle to confirm the system is functioning. If performance is still weak, inspect for damaged cables or corrosion beyond the terminal ends.
- When finished, store cleaners and tools in a dry area and dispose of any waste according to local regulations.
Troubleshooting
| Symptom | Likely Cause | Fix | Prevention |
|---|---|---|---|
| Vehicle slow to start or click sound | Corroded terminals or loose clamps | Clean terminals, reseat clamps firmly | Regular inspection every 3–6 months |
| Battery dies after short drive | Poor connection causing charging system inefficiency | Clean and grease terminals; check alternator belt | Keep terminals dry and protected |
| Visible corrosion on cables | Acid leakage from battery or environmental exposure | Replace damaged cables and clean area | Seal with dielectric grease; avoid moisture exposure |
| Fresh corrosion returns quickly | Inadequate cleaning or ongoing leakage | Thorough cleaning and inspect for leaks | Periodic maintenance schedule |
Common Mistakes
- Using metal tools that can scar terminals or create short circuits
- Rubbing corrosion without applying proper cleaner first
- Overlooking the negative terminal during reassembly
- Skipping the dielectric grease step after cleaning
- Ignoring signs of damaged cables or severe corrosion
Taking a methodical approach reduces the risk of electrical faults and extends terminal life.
Tips For Best Results
- Choose a lubricant designed for electrical contacts to maximize protection against moisture and air exposure.
- Work in a shaded area to prevent cleaners from drying too fast and leaving residue.
- Test the alternator and battery health if terminal cleaning does not resolve charging issues.
- Keep spare dielectric grease on hand for seasonal maintenance and quick touch-ups.
Call A Professional
Seek professional help if terminals show deep corrosion, melted insulation, or if cleaning does not restore proper connection. Stop work and contact an auto technician if there is any sign of physical damage to the battery case, cables, or connectors, or if you are unsure about safely handling high-current components.
FAQ
How often should I clean car terminals?
Inspect and clean terminals whenever you notice corrosion, sluggish starting, or after long exposure to harsh weather. A routine check every 6–12 months is common for many vehicles.
Can I use fish tape or a metal brush on terminals?
Avoid metal tools that can gouge connectors. Use nylon-bristle brushes and approved electrical cleaners for safety.
Will dielectric grease prevent future corrosion?
Yes, dielectric grease helps seal moisture and air, reducing corrosion on metal terminals.
Is it necessary to remove the battery when cleaning terminals?
Generally not, but removing the battery provides more access and reduces the risk of accidental shorts during thorough cleaning.
What if cleaning doesn’t fix starting problems?
There may be underlying battery or alternator issues; have the system tested by a professional.
Buying Guide
When selecting tools and supplies for car terminal maintenance, consider size, compatibility, and durability. A dedicated car battery terminal cleaning kit often includes a nylon-bristle brush and grease, while separate sprays provide corrosion-removal power. Look for durable dielectric grease that resists water and temperature changes, and choose a reliable electrical contact cleaner spray designed for automotive terminals. Consider the kit contents: do you need a full brush-and-grease package, or is a simple spray enough? Ensure tools are made for automotive use and safe near battery terminals. Finally, assess storage options: a compact kit is convenient for emergencies, while a larger kit may be better for regular maintenance in a shop setting.