Brushed aluminum offers a warm, modern look for appliances, trim, and automotive accents. Proper cleaning restores its matte sheen while preventing damage to the surface. This guide provides practical steps, tools, and tips to keep brushed aluminum looking like new without dulling the finish.
Readers will find a clear process, safety notes, and troubleshooting that address common issues such as streaks, water spots, and micro-scratches. The approach emphasizes gentle cleaning with non-abrasive products and equipment designed for aluminum surfaces.
Quick Answer
Best starting method: Use a mild, pH-neutral cleaner followed by a dedicated aluminum polish. For routine maintenance, a soft microfiber cloth with a non-abrasive pad works well. Avoid harsh abrasives and metal scrubs that can scratch the finish.
What You’ll Need
- brushed aluminum cleaner polish kit
- aluminum polish kit with microfiber cloths
- ph-neutral aluminum cleaner spray
- non-abrasive aluminum cleaning pads
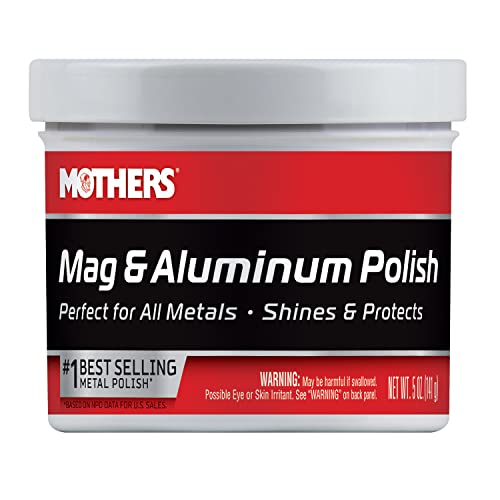
- brushed aluminum restoring polish paste


Before You Start
Prepare the work area by laying down a soft cloth or mat to protect the surface. Test any cleaner on a hidden spot first to ensure no discoloration. Work in a well-ventilated space and wear gloves to protect skin. Time estimate: 20–40 minutes for a typical panel or appliance.
Critical cautions: Avoid abrasive pads on brushed aluminum, which can scratch the finish. Do not use bleach or ammonia-based cleaners on anodized surfaces, and never mix cleaners with strong solvents.
Step-By-Step: How To Clean Brushed Aluminum
- Remove loose dust with a dry microfiber cloth to prevent scratching on contact.
- Apply a ph-neutral aluminum cleaner spray to a damp cloth and wipe in the direction of the grain.
- Rinse with a clean, damp cloth to remove any residue.
- For stubborn spots, apply a small amount of brushed aluminum restoring polish paste and rub gently along the grain with a soft pad.
- Buff with a dry microfiber cloth until the surface looks uniform and satin-like.
- Use the non-abrasive aluminum cleaning pads sparingly for texture restoration, never circularly against the grain.
- For a protective finish, apply a light layer of the brushed aluminum cleaner polish kit or an optional aluminum polish kit with microfiber cloths following the product directions.
- Wipe off any excess polish and inspect for streaks or uneven tone; repeat as needed in small areas.
- Clean surrounding areas to prevent transfer of residue back onto the brushed surface.
- Store products in a cool, dry place away from heat and sunlight to maintain effectiveness.
- Repeat maintenance every few months or as needed to sustain the finish.
- Document any large changes in appearance and adjust the cleaning frequency accordingly.
Troubleshooting
| Symptom | Likely Cause | Fix | Prevention |
|---|---|---|---|
| Streaks or uneven tone | Residual cleaner or improper buffing | Buff with clean microfiber in the direction of the grain | Use a fresh cloth; follow grain direction |
| Scratches visible | Abrasion from pads or excessive pressure | Switch to non-abrasive pads and light pressure | Avoid hard scrubbing or metal tools |
| Cloudy appearance after cleaning | Water spots or mineral residue | Rinse with distilled water and dry completely | Dry immediately after cleaning |
| Residue near edges | Over-application of polish | Wipe thinly and buff each edge | Use small amounts and remove excess promptly |
Common Mistakes
- Using abrasive pads or steel wool on brushed aluminum
- Applying cleaner directly without cloth and proper dilution
- Cleaning in circular motions against the grain
- Neglecting to dry surfaces after rinsing, leading to water spots
Tips For Best Results
- Always clean in the direction of the grain to preserve the brushed texture.
- Test cleaners on an inconspicuous area before full application.
- Use dedicated aluminum products to minimize residues and color changes.
- Regular light cleaning is better than deep scrubs that can wear the finish.
Call A Professional
Stop and seek professional help if the brushed aluminum shows deep scratches, fading, or clear coat damage that cleaning alone cannot fix. Contact a metal refinisher or a specialist if the item is an appliance with warranty implications or valuable decorative pieces.
FAQ
Can I use household cleaners on brushed aluminum?
Household cleaners with harsh chemicals can damage the finish. Use pH-neutral aluminum cleaners or specialized polish kits.
Is it safe to buff brushed aluminum with a microfiber cloth?
Yes, when used gently in the direction of the grain and with moderate pressure.
How often should brushed aluminum be cleaned?
General maintenance every few weeks to months, depending on exposure and use, plus retouches as needed after stains.
What causes dullness on brushed aluminum?
Residue buildup, mineral deposits, or improper cleaning technique can dull the surface; proper buffing and a light protective layer help prevent it.
Buying Guide
When choosing products for brushed aluminum, consider size and coverage, compatibility with the surface, and ease of use. Look for a ph-neutral cleaner to minimize risk to finishes, and select a polish kit with microfiber cloths for gentle buffing. Compare kits based on included pads, pastes, and polishing agents to ensure you have the right tools for routine maintenance and occasional restoration. Consider the space you’ll treat—kitchens, automotive trims, or appliances—and choose products that come with clear instructions and a satisfaction-friendly warranty.
Additional Buying Considerations
Size and storage: Choose products that fit your cleaning cabinet and the scale of the project. Noise level and odor: If using spray cleaners in small spaces, prefer low-odor options. Energy efficiency is less about the cleaner itself and more about reducing repeat cleaning through better protective finishes. Controls: Simple spray bottles and easy-to-use polishes help minimize errors. Placement: Store cleaners away from heat sources and in original packaging to prevent misidentification. For best results, pick a kit that includes microfiber cloths and non-abrasive pads to maintain the brushed texture.