Brick surfaces add timeless charm to homes and outdoor spaces, but keeping them clean requires the right approach. This guide outlines practical, step-by-step methods using common tools to remove dirt, stains, and algae without damaging the brick or mortar. Readers will learn how to choose the right equipment, prep the area, and perform maintenance that extends the life of their brickwork.
Whether you’re refreshing a brick façade, patio, or driveway, understanding the proper cleaning technique helps prevent moisture intrusion and mortar damage. The steps below emphasize safety, effective cleaning methods, and durability, so homeowners can tackle brick cleaning with confidence.
Quick Answer
For most brick cleaning tasks, start with a gentle cleaning solution and a soft-bristle brush. If buildup is stubborn, use a pressure washer at low to moderate psi with a brick cleaning kit, rotating brush, and careful technique to avoid mortar damage. Always test a small area first and rinse thoroughly.
What You’ll Need
- Pressure washer 2000 psi brick cleaning kit
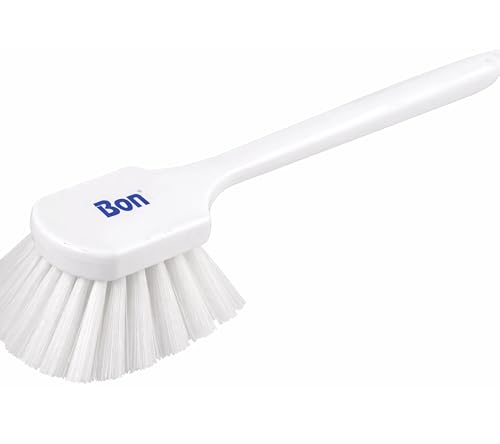
- Masonry brush long handle brick cleaning
- Rotary surface cleaner for brick and pavement
- Brick cleaning scraper tool
- Drill brush attachment masonry brick cleaning


Before You Start
Assess the brick surface for loose or crumbling mortar and cover nearby plants, outlets, and delicate landscaping. Work on dry days with mild temperatures to prevent rapid drying that can leave streaks. Wear eye protection, gloves, and a respirator or mask if dust is present. Never use high-pressure steam on old or painted brick, and avoid bleaching agents on colored bricks. Plan for a multi-stage process: pre-rinse, detergent application, scrubbing, and thorough rinsing. Allow ample time for drying between steps.
Step-By-Step: How To Clean Brick Surfaces
- Rinse the brick surface with a light spray to remove loose dirt and debris, ensuring water does not pool around mortar joints.
- Prepare a cleaning solution suitable for brick (a mild detergent mixed with water or a specialized brick cleaner) and apply evenly using a long-handle masonry brush.
- Let the solution dwell for several minutes, then scrub with the masonry brush in a circular motion to lift embedded grime.
- For stubborn stains, use a brick cleaning scraper tool to gently lift surface encrustations without gouging mortar.
- For larger areas or heavy grout lines, employ a rotary surface cleaner for bricks and pavement with a light, controlled pass to avoid mortar damage.
- Rinse thoroughly from top to bottom to carry away loosened dirt and cleaning solution; repeat scrubbing and rinsing as needed.
- If mineral deposits persist, consider a low-pressure wash (not exceeding 1500 psi) and a specialized cleaner designed for masonry.
- Allow the surface to dry completely before applying any sealant or paint, if planned, to ensure proper adhesion.
Troubleshooting
| Symptom | Likely Cause | Fix | Prevention |
|---|---|---|---|
| Streaks after rinse | Uneven cleaning or inconsistent pressure | Adjust spray pattern and work in sections | Maintain uniform distance and technique |
| Discolored mortar joints | Over-aggressive scrubbing or harsh cleaners | Switch to milder cleaner and softer brushes | Test area before full use |
| Cracked or loose bricks | Excessive pressure or pre-existing damage | Stop and inspect; avoid further pressure | Address mortar and structural issues first |
| Efflorescence returns after cleaning | Residual mineral deposits | Apply mineral-removing treatment and rinse | Reassess sealing needs after full dry |
Common Mistakes
- Using too much pressure or cleaning agents that can erode mortar
- Cleaning painted bricks or sealed surfaces without testing compatibility
- Neglecting thorough rinsing, leaving detergent residues
- Working in direct sunlight or on extremely hot surfaces, causing rapid drying
Tips For Best Results
- Test cleaning methods on a small, inconspicuous area first.
- Use a long-handled brush to maintain control and minimize ladder use.
- Keep a consistent distance from the wall when using a pressure washer—start at a wide arc and adjust as needed.
- Rinse from top to bottom to prevent streaks and dirt re-settling.
- Consider sealing bricks after cleaning to reduce future staining and moisture absorption.
Call A Professional
Seek professional help if the brick shows extensive cracking, mortar deterioration, efflorescence that returns after treatment, or staining from unknown sources. Stop work and consult a masonry specialist if there is any sign of structural damage or if you are unsure about the exact brick type or finish.
FAQ
Is a pressure washer safe for brick?
Yes, when used at low to moderate pressure and with appropriate attachments, but avoid weak mortar and painted surfaces.
What type of cleaner should I use for brick?
Choose a mild detergent or a cleaner specifically designed for brick and masonry surfaces.
Can I seal bricks after cleaning?
Sealing is optional but can help reduce staining and moisture absorption; ensure bricks are completely dry before sealing.
How long does brick take to dry after cleaning?
Drying time depends on weather, but typically 24 to 48 hours in moderate conditions.
Buying Guide
When selecting equipment for brick cleaning, consider the following factors to balance effectiveness with care for the masonry.
- Size and surface area: For large patios, a rotary surface cleaner speeds up cleaning and reduces edge wear. For detailed façades, a standard spray wand with a long brush may be preferable.
- Pressure level and control: Look for adjustable pressure and a pressure washer kit designed for masonry to prevent damage to mortar joints.
- Brushes and attachments: A long-handle masonry brush enables safer scrubbing from ground level; drill brush attachments can help reach crevices without leaning on the wall.
- Setup and ease of use: Tools with quick-connect fittings and lightweight design reduce fatigue during extended cleaning sessions.
- <bNoise, energy use, and running costs: Consider models with efficient motors and short operation cycles to minimize noise and energy draw while delivering consistent cleaning.
- <bPlacement and storage: Plan for stable ladder placement and secure storage of cleaning solutions away from children and pets.
- <bMaintenance needs: Check for replacement brush heads and cleaning solution compatibility with brick finishes you own.
- <bWarranty and safety features: A reputable warranty and built-in safety shutoffs provide peace of mind for regular use.
Choosing the right combination of tools helps ensure thorough cleaning without damaging brickwork. If unsure, start with milder methods and gradually increase intensity only after confirming the brick type and condition. Would you like help matching a specific kit to your project size and brick type?