Brass adds a warm, decorative touch to kitchens, hardware, and collectibles. Proper cleaning restores shine without damaging the metal or finishes. This guide walks through a practical, step-by-step method that combines gentle cleaning, polishing, and protection to keep brass looking bright for years.
Quick Answer
For most brass items, start with a mild cleaner and warm water, then dry thoroughly. Use a brass polishing cloth set for final shine, and avoid abrasive brushes on delicate surfaces. If tarnish is heavy, apply a brass tarnish remover kit with buffing compound, then finish with a polishing wheel or felt buff to restore luster.
What You’ll Need
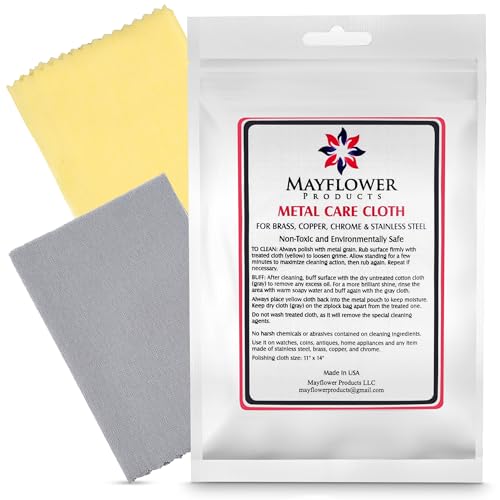
- Brass polishing cloth set microfiber 12×12
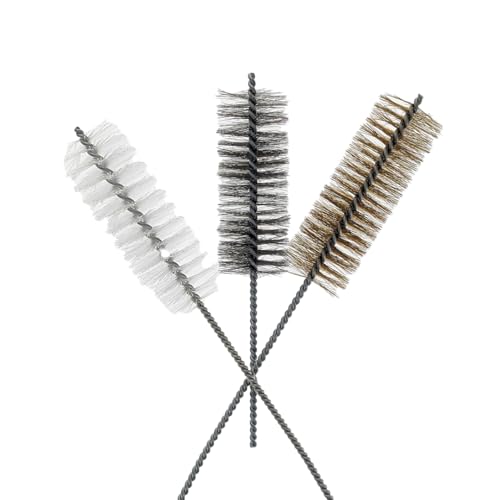
- Brass cleaning brush nylon bristle 1.5 inch
- Brass tarnish remover kit with buffing compound
- Brass polishing wheel buffing wheel felt 3 inch
- Dremel brass polishing kit rotary tool accessories

Before You Start
Before cleaning, inspect the piece for active patinas that are intentional, or protective lacquers that should not be removed. Wear safety glasses and gloves if using chemical tarnish removers. Work on a stable, non-slip surface, and protect nearby finishes to prevent accidental damage. Time estimate for a typical piece: 20–60 minutes depending on tarnish level. Avoid harsh abrasives on soft or engraved brass and never mix cleaners unless the product instructions specify compatibility.
Step-By-Step: How To Clean Brass
- Remove any loose dirt with a soft cloth to reduce scratching during cleaning.
- Mix a mild cleaning solution with warm water, or use a dedicated brass cleaner following the product instructions.
- Gently scrub intricate areas with the nylon bristle brush to lift dirt from crevices without scratching the metal surface.
- Rinse with clean water and dry completely to prevent water spots and oxidation.
- Assess tarnish level. For light tarnish, rub with a brass polishing cloth set microfiber 12×12 to lift oxidation and restore luster.
- For heavier tarnish, apply a brass tarnish remover kit with buffing compound. Let it sit as directed, then buff with a clean cloth until shine returns.
- Switch to a brass polishing wheel buffing wheel felt 3 inch for a final, uniform sheen on flat surfaces. Gentle, even pressure works best.
- For tools or decorative hardware, use the Dremel brass polishing kit rotary tool accessories with a light touch to avoid removing the patina or engraving details.
- Wipe away any residue with a clean cloth and inspect for dull spots. Repeat as needed, but avoid overpolishing to preserve detail.
- Apply a light protective coating or lacquer if the item is exposed to humidity or outdoor elements to extend the clean look.
- Store cleaned items in a dry area and periodically re-polish to maintain brightness over time.
Troubleshooting
| Symptom | Likely Cause | Fix | Prevention |
|---|---|---|---|
| Dull or uneven shine | Uneven polishing or residual tarnish | Reapply tarnish remover or buff with polishing wheel; ensure even pressure | Polish in small, consistent passes |
| Scratches appear after cleaning | Abrasive contact or harsh cleaner | Switch to non-abrasive cloths and gentler cleaners | Test on inconspicuous area first |
| White residue after cleaning | Water mineral deposits or chemical residue | Rinse thoroughly and dry with a lint-free cloth | Rinse with distilled water on hard water areas |
| Brass darkens quickly after cleaning | Exposure to moisture or air oxidation | Apply light protective coating | Store in low-humidity environment |
Common Mistakes
- Using abrasive pads or steel wool on brass with delicate engravings
- Overpolishing, which can alter the metal’s finish or reveal base metal
- Applying cleaners directly to lacquered brass and removing the protective coating
- Neglecting to thoroughly dry items after cleaning, inviting quick tarnish return
Tips For Best Results
- Test any cleaner on a hidden area first to ensure compatibility with the finish.
- Work in a well-ventilated area when using chemical tarnish removers; follow label directions.
- Use microfiber cloths for polishing to trap dirt rather than spreading it.
- For heavily engraved brass, consider a two-step approach: gentle cleaning, then targeted polishing only on raised surfaces.
- Store cleaned brass away from humidity; consider silica gel or a dry cabinet for long-term preservation.
Call A Professional
Contact a professional if brass items are antique, highly valuable, or have extensive patination that you wish to preserve while restoring brightness. Stop cleaning and consult a pro if the piece has historical coatings, seals, or wax finishes that could be compromised by chemical cleaners.
FAQ
How often should I clean brass?
Clean brass as needed, typically every few months for high-use items and less often for decorative pieces.
Can I use vinegar or lemon juice on brass?
Acidic cleaners can remove protective coatings and patina; use them only if the item is known to tolerate it or as a last resort with care.
Is it safe to use a Dremel for polishing brass?
Yes, but use a low speed and soft buffing attachments to avoid gouging or overheating the metal.
Should I remove lacquer before cleaning?
If lacquer is present and intact, avoid removing it unless you plan to re-lacquer afterward. If removal is necessary, seek professional guidance.
Buying Guide
When selecting brass cleaning tools and accessories, consider size, material compatibility, and the finish you’re restoring. Ask yourself: Will you be cleaning small knobs or large fixtures? Do you need precise control for engraved surfaces? The right kit should balance gentle cleaners with effective polishing power to achieve a bright, durable finish without damage.
Key Buying Factors
- Size and scope: Choose tools that fit your project scale—compact for details, larger for bulk areas.
- Noise and vibration: For quiet environments, select low-noise buffers and fiber wheels with protective backing.
- Cleaning vs. polishing balance: Some kits emphasize chemical tarnish removal, others focus on mechanical polishing; consider a combination set for versatility.
- Material compatibility: Ensure nylon bristles and microfiber cloths are safe for your brass finish, especially if lacquered.
- Ease of use: Look for step-by-step instructions and color-coded components to minimize mistakes.
- Storage and organization: A complete set with a case helps keep tools protected and ready for future use.
- Placement considerations: If cleaning items that live outdoors or in damp areas, choose products with corrosion protection or sealants.
Armed with the right tools like a brass polishing cloth set microfiber 12×12, a brass cleaning brush nylon bristle 1.5 inch, a brass tarnish remover kit with buffing compound, a brass polishing wheel buffing wheel felt 3 inch, and a Dremel brass polishing kit rotary tool accessories, readers can tackle most brass cleaning tasks efficiently. Following these steps helps preserve the beauty and value of brass items while minimizing risk to delicate finishes.