Bathroom exhaust fans help maintain air quality by removing moisture and odors. Regular cleaning prevents mold buildup, reduces noise, and extends the life of the fan. This guide provides a practical approach using common tools and a few specific cleaning products designed for bathroom vent maintenance. Each step focuses on safety, efficiency, and thorough dirt removal.
Quick Answer
Quick overview: Power off the bathroom circuit, remove the vent cover, and wipe away dust with a microfiber cloth. Use an extendable brush or cleaning kit to reach deep into the duct, vacuum loose debris, and reassemble. Repeat every 3–6 months, or more often in humid climates.
What You’ll Need
- Extendable cleaning brush for bathroom exhaust fan
- Bathroom vent cleaning kit with brush
- Duct vent cleaning brush set
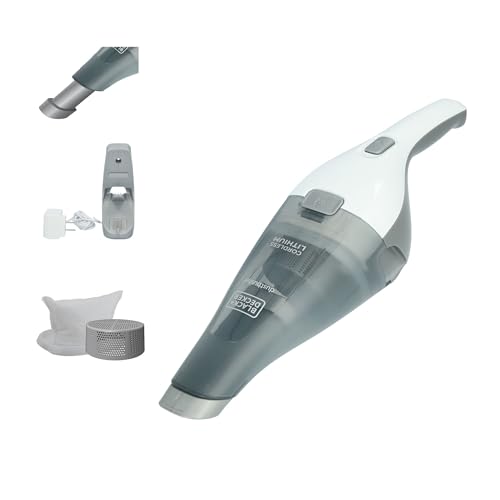
- Electric handheld vacuum for bathroom exhaust fan dust
- Microfiber cloths duster kit for exhaust fan cleaning
- Spray bottle with warm water and mild detergent
- Soft brush or sponge
- Safety gear: gloves and eye protection


Before You Start
Prepare the area by laying towels to catch falling dust. Turn off the bathroom light and the electrical circuit feeding the fan to prevent accidental startup. If the fan is connected to a ceiling fixture, wait a few minutes after turning off power to ensure the blades stop completely. If you notice persistent mold, consider replacing the cover with a washable, mold-resistant model. Important: Do not operate the fan with the cover removed for extended periods, and never dislodge wiring or components beyond the cover area.
Estimated time: 20–45 minutes for a typical ceiling fan; longer for homes with extensive duct runs. If you smell burning or hear grinding, stop and seek professional help.
Step-By-Step: How To Clean A Bathroom Exhaust Fan
- Power off and access: Turn off the circuit, remove the vent cover from the ceiling, and gently set it aside.
- Initial wipe: Use a microfiber cloth to wipe loose dust from the cover and surrounding area.
- Dust inside the housing: Reach into the housing with an extendable brush to dislodge dust and lint from the fan housing and blades.
- Deep cleaning with a kit: Use a bathroom vent cleaning kit with brush or duct vent cleaning brush set to scrub clogs and buildup along the duct path. Gently rotate the brush to sweep debris inward toward the opening.
- Vacuum debris: With an electric handheld vacuum for bathroom exhaust fan dust, remove loosened dust from the vent, housing, and ducts. Use a narrow attachment for tight spots.
- Cover and grate cleaning: Soak a microfiber cloth in warm, mild detergent and wipe both sides of the vent cover. Rinse with clean water and dry completely before reinstallation.
- Reassembly and test: Reattach the vent cover, restore power, and run the fan on low for a minute to ensure air is flowing freely and without unusual noise.
- Routine maintenance: Schedule cleaning every 3–6 months, more often in high-humidity bathrooms or if you notice reduced airflow.
Troubleshooting
| Symptom | Likely Cause | Fix | Prevention |
|---|---|---|---|
| Reduced airflow | Blockage in duct or dirty blades | Clean ducts and blades with brush sets and vacuum | Regular maintenance; use a humidity-controlled bathroom vent |
| Grating noise | Loose cover or worn bearings | Secure cover; lubricate or replace bearings if needed | Inspect annually; replace worn parts promptly |
| Foul smell | Mold or mildew buildup | Deep clean and consider mold-resistant cover | Improve bathroom ventilation and keep area dry |
| Fan won’t start | Electrical issue or blown fuse | Check breaker; consult an electrician if needed | Regular safety checks; replace damaged wiring |
Common Mistakes
- Using harsh chemicals that can corrode fan components or vent seals
- Forcing the brush into tight bends, risking damage to ducts
- Neglecting to dry the vent cover completely, which promotes mold growth
- Overlooking safety: never service while power is on or without proper eye protection
Tips For Best Results
- Choose an extendable brush designed for bathrooms to reach deep into ducts without disassembly
- Combine dry brushing with a light mist of water-detergent solution to loosen grime without soaking electrical components
- Keep microfiber cloths on hand for quick, lint-free cleaning of blades and covers
- Label and store screws and covers to simplify reassembly
Call A Professional
Consider professional help if there is visible mold spread, persistent electrical concerns, unusual noises after cleaning, or if ducts are difficult to access. Stop work and contact a licensed technician if any of the following occur: loud grinding, burning smell, loose electrical connections, or water intrusion into the ceiling or walls.
FAQ
How often should I clean a bathroom exhaust fan?
Most households benefit from cleaning every 3–6 months, or more often in humid climates or after heavy use.
Can I use bleach to clean the vent cover?
Bleach can degrade plastics over time. Use a mild detergent or a vinegar solution and rinse thoroughly.
What if the fan still doesn’t work after cleaning?
Check the circuit breaker and wiring. If the problem persists, consult a licensed electrician or HVAC technician.
Are there vent covers that resist mold?
Yes, look for washable, mold-resistant covers and keep them dry between cleanings.
Should I disassemble the motor for cleaning?
No. Clean the accessible parts (cover, housing, and duct) and avoid touching internal motor components unless you are trained.
Buying Guide
When selecting tools and kits for bathroom exhaust fan cleaning, consider these factors to optimize results and value.
- Size and reach: Choose extendable brushes and duct brushes that reach through typical ceiling heights and duct diameters.
- Noise and power: For handheld vacuums, look for models with adjustable suction and low noise levels to avoid disturbing household rest.
- Energy efficiency: Energy-efficient vacuums consume less power during routine cleanings without sacrificing suction.
- Controls: Simple, intuitive controls and attachments improve cleaning efficiency and reduce setup time.
- Placement and storage: Compact storage solutions help keep cleaning tools organized for quick maintenance.
Interested in a complete kit? Compare options that bundle a brush set, duct brushes, microfiber cloths, and a compatible handheld vacuum, ensuring the components are designed for bathroom vent systems. The best choice maximizes reach, reduces cleanup time, and minimizes clutter in the cleaning toolbox.