Preparing baseboards before painting ensures a smooth, lasting finish. A clean surface helps paint adhere evenly and reduces the risk of peeling or staining later. This guide provides practical steps and the right tools to tackle dust, dirt, and grease along baseboards efficiently.
Whether updating a single room or a whole house, proper cleaning saves time during the painting process and yields a professional-looking result. Follow these steps to remove grime, test for paint compatibility, and set the stage for flawless coverage.
Quick Answer
Best approach: Use a combination of dry dusting, damp wiping, and a gentle scrub where needed, then dry thoroughly before painting. Start with the least invasive method and escalate only if grime remains.
What You’ll Need
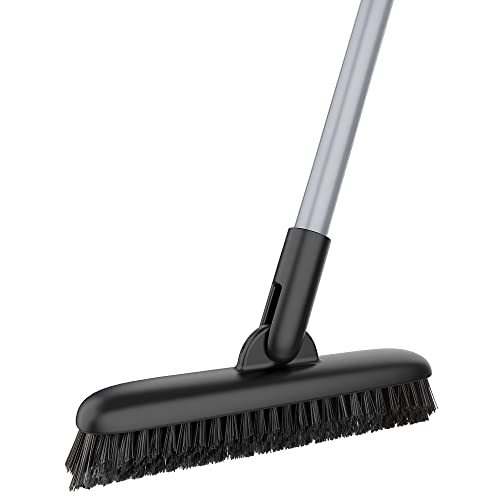
- Angled bristle baseboard scrub brush for tight corners and grout lines
- Microfiber baseboard cleaning cloths for dust and quick wipe-downs
- Nylon corner scrub brush for baseboards to reach crevices
- Extension pole for baseboard cleaning tools to reach high or long runs without ladders
- Paint prep scraper for baseboards and trim to gently lift stubborn grime or peeling paint


Before You Start
Clear the area and protect the floor with drop cloths or old newspapers. Ventilate the room well and wear gloves to protect hands from cleaning solutions. Test cleaners on a small, inconspicuous section of the baseboard to ensure they won’t damage the finish. Time estimate: 30–60 minutes per area, depending on grime and baseboard length.
Step-By-Step: How To Clean Baseboards Before Painting
- Remove loose dust with a dry microfiber cloth, working from top to bottom to prevent dust from resettling.
- Use the Angled bristle baseboard scrub brush to scrub along the edge where the wall meets the baseboard, dislodging dirt in crevices.
- For tall runs, attach the Extension pole for baseboard cleaning tools to reach the full length without a ladder; continue dusting.
- Wipe down with a damp microfiber cloth, rinsing the cloth frequently to avoid redistributing dirt.
- Apply a light cleaning solution if grease or scuff marks persist; avoid overly soapy mixtures that require long drying.
- For stubborn spots, use the Paint prep scraper for baseboards and trim gently to lift grime without scratching the surface.
- Rinse the area with a clean, damp cloth to remove residue, then dry with a fresh microfiber cloth.
- Inspect for remaining stains or rough patches; repeat the appropriate steps if needed.
- Dust the baseboards again after drying to ensure a clean, dry surface before priming and painting.
- Mask adjacent walls and floors with painter’s tape and drop cloths to prepare for primer and paint.
- Ventilate the room and allow baseboards to dry fully before applying primer or paint.
Troubleshooting
| Symptom | Likely Cause | Fix | Prevention |
|---|---|---|---|
| Dirt continues to smudge after wiping | Grease or wax residues | Use a mild degreasing solution; rinse well | Spot-clean with degreaser during prep |
| Scratches appear after scrubbing | Too aggressive scrubbing | Switch to softer brushes; avoid metal scrapers | Test on a small area first |
| Paint finish peels later | Baseboard not fully cleaned or dry | Re-clean, dry thoroughly, and prime | Allow ample drying time between steps |
| Persistent chalkiness after wipe | Residual dust or old finish | Repeat cleaning with fresh cloths | Perform a final dust wipe before priming |
Common Mistakes
- Using harsh cleaners that discolor or dull the baseboard finish
- Over-wetting or soaking baseboards, leading to water damage or paint adhesion issues
- Skipping the dry time between cleaning and priming
- Neglecting corners and crevices where grime accumulates
Tips For Best Results
- Work in sections to maintain a consistent cleaning rhythm and keep track of progress.
- Always test a small area first to verify that cleaners won’t affect finish.
- Use a microfiber cloth on the final wipe to capture fine dust and lint.
- Prepare a dedicated cleaning kit with the brushes and cloths to minimize rework.
- Prime the baseboards after cleaning for a uniform paint finish and better adhesion.
Call A Professional
Consider a pro if baseboards run behind heavy furniture, have extensive water damage, or require removal and reinstall of trim. Stop signs include persistent staining that resists cleaning, significant paint compatibility concerns, or structural issues with baseboards. A contractor can ensure proper protection and finish quality while speeding up the project.
FAQ
Can I use water to clean baseboards before painting?
Yes, a damp cloth works for most surfaces; avoid soaking the baseboards and ensure thorough drying before priming.
Is a scrub brush necessary for every baseboard?
Scrub brushes help with stubborn grime and crevices; lighter cleaning with microfiber cloths is sufficient for light dust.
What’s the best order for cleaning before painting?
Dust, wipe with a damp cloth, scrub where needed, rinse, dry, and then prime to maximize paint adhesion.
Should I remove baseboards before painting?
Removing baseboards is optional for small rooms but simplifies cleaning and priming; otherwise, protect walls and use long-handled tools.
How long should baseboards dry after cleaning?
Allow at least 1–2 hours for air-drying in a well-ventilated room before priming, or longer in humid conditions.
Do I need to repaint the entire wall after cleaning the baseboard?
Not usually; focus on baseboard prep. If the wall area is already clean, repainting only the baseboard or trimmed edge may suffice.
Buying Guide
When selecting tools for cleaning baseboards before painting, consider size, reach, and surface compatibility. For long runs, an extension pole can dramatically reduce ladder use. Keep fibers soft and lint-free with microfiber cloths to prevent residue on fresh paint. Choose brushes with angled bristles for tight corners and smooth baseboard faces. A paint prep scraper is a gentle option for stubborn spots without scratching.
Buying Factors To Consider
- <bSize and Reach: Choose tools that cover long baseboard runs without excessive bending or climbing.
- <bNoise and Comfort: Look for ergonomic handles and low-noise brushes for comfortable use in occupied homes.
- <bMaterial Compatibility: Microfiber materials reduce lint; avoid abrasive scrapers on delicate finishes.
- <bControls and Setup: Easy attachment options for extension poles and modular brushes speed up prep.
- <bPlacement Considerations: For high walls or recessed areas, combine angled brushes with poles to reach corners safely.