Cleaning the back of a refrigerator helps improve airflow, energy efficiency, and overall performance. This guide walks through safe steps, the right tools, and practical tips for American homes. Readers will learn how to access condenser coils, remove dust, and prevent future buildup without damaging the appliance.
Regular maintenance can extend the life of a fridge and reduce noise or overheating. The process is straightforward, but it requires careful handling of power sources and delicate parts. The following sections provide a clear, step-by-step approach with practical safety notes and suggested tools.
Quick Answer
What you’ll do: disconnect power, locate the condenser coils at the back, remove dust with a dedicated coil brush or vacuum, clean the area with a spray designed for condensers, and wipe with a microfiber cloth. Reconnect power and monitor performance over the next week.
What You’ll Need
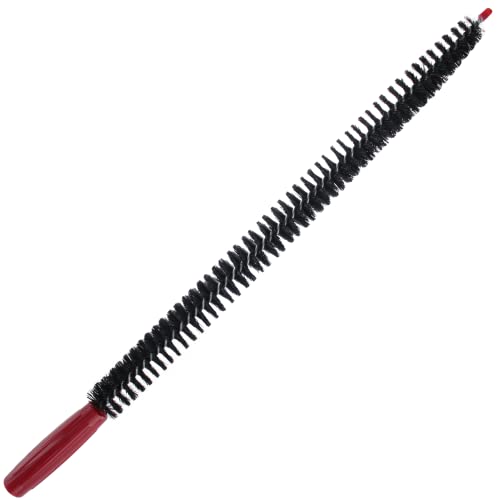
- Refrigerator condenser coil cleaning brush 12-inch
- Appliance coil cleaning spray for refrigerator condenser
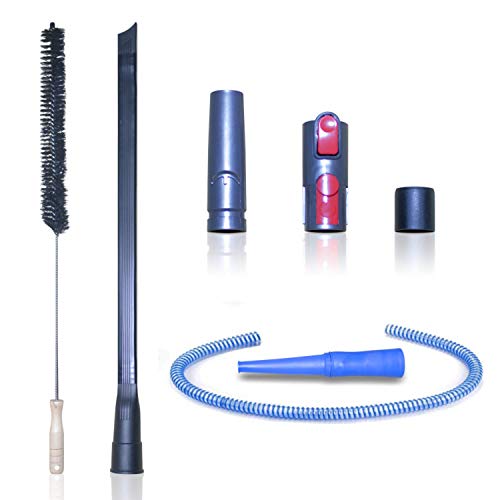
- Refrigerator condenser coil cleaning tool kit
- Refrigerator back vent cleaning brush
- Microfiber dusting cloth for appliance coils

Before You Start
Ensure the fridge is unplugged and you have clear access to the back panel. Move items away and place a protective drop cloth if you’re concerned about dust or debris. Expect the job to take 20–40 minutes. Safety note: never operate the appliance while the back panel is removed and avoid touching electrical components. Have a flashlight handy to inspect the coils and surrounding area.
Step-By-Step: How To Clean The Back Of The Refrigerator
- Unplug the refrigerator and pull it away from the wall to access the back panel.
- Unscrew the back access panel or vent cover to reveal the condenser coils.
- Use the 12-inch coil cleaning brush to gently loosen dust along the coil fins, working from top to bottom.
- Switch to a vacuum with a narrow nozzle to remove loosened dust and debris from between the coils.
- Lightly mist the coils with the appliance coil cleaning spray, keeping the nozzle at a distance to avoid over-wetting. Let it sit for a minute.
- Wipe any remaining residue with the microfiber dusting cloth, ensuring flat, even contact across the coil surface.
- Recheck for stubborn dust; repeat brushing and wiping if needed until the coils look clean and shiny.
- Replace the back vent or access panel and secure it with screws.
- Carefully slide the fridge back into place and reconnect the power cord.
- Plug in, then listen for normal operation and monitor the compressor noise over the next 24–72 hours.
- Schedule routine checks every 6–12 months or when you notice reduced cooling efficiency.
Troubleshooting
| Symptom | Likely Cause | Fix | Prevention |
|---|---|---|---|
| Fridge running loudly | Dusty coils overworking the compressor | Clean coils as described | Annual or biannual maintenance |
| Back panel warm to touch | Obstructed airflow after cleaning | Recheck vents, ensure panel sits flush | Keep area around fridge clear |
| Poor cooling after cleaning | Moisture on coils or wiring | Dry area thoroughly before powering | Avoid over-wetting and let components dry |
| Coils look corroded or damaged | Physical wear or damage during cleaning | Stop and call a technician if uncertain | Use proper tools and gentle technique |
Common Mistakes
- Over-wetting coils or electrical components during cleaning
- Using abrasive brushes that bend coil fins
- Forgetting to unplug the unit before starting
- Removing screws or panels beyond recommended access
Sticking to the right tools and steady, gentle motions helps avoid damaging fins or wiring while achieving an effective clean.
Tips For Best Results
- Schedule cleaning for a cool, dry day to minimize moisture and condensation.
- Inspect the back vent and ensure it’s free from lint and pet hair to maintain airflow.
- Keep a small canister vacuum nearby for quick, mess-free dust removal.
- Label and store screws safely if you disassemble any panels for the first time.
Call A Professional
Call a professional if you notice any of the following: signs of refrigerant leaks, damaged wiring, ice buildup beyond the condenser area, or if the back panel cannot be securely reattached. Do not attempt to reassemble components that feel loose or unsafe.
FAQ
Is it safe to clean refrigerator condenser coils while the appliance is plugged in?
No. Always unplug the unit before cleaning to avoid shock or damage.
How often should condenser coils be cleaned?
Typically every 6–12 months, or whenever you notice reduced cooling efficiency.
What tools are essential for cleaning back-of-fridge coils?
A dedicated 12-inch coil brush, appliance coil cleaning spray, a microfiber cloth, and a vacuum are recommended.
Will cleaning the coils save energy?
Yes, cleaner coils improve airflow and cooling efficiency, which can reduce energy usage.
Buying Guide
Choosing the right accessories for back-of-fridge cleaning involves considering size, compatibility with your fridge model, and ease of use. Key factors include:
- <bSize and reach: Ensure the cleaning brush and tool kit can access tight coil spaces on your model.
- <bEffectiveness: Look for products designed for refrigerator condensers, with non-abrasive bristles to protect fins.
- <bSpray compatibility: Use a spray labeled safe for appliance condensers; avoid corrosive cleaners.
- <bCleaning frequency: A kit that encourages routine maintenance makes the task more manageable.
- <bPlacement and storage: Keep tools organized near the kitchen for quick access during routine maintenance.
Consider whether you prefer a dedicated kit or individual tools. A bundle that includes a 12-inch coil brush, a condenser-friendly spray, and a microfiber cloth typically covers most standard back-of-fridge cleaning scenarios. When in doubt, verify compatibility with your appliance’s model and read product reviews from fellow homeowners.