Aluminum surfaces are prized for their light weight and corrosion resistance, but they can dull without proper care. This guide walks American homeowners and DIYers through safe, effective methods to restore shine and extend the life of aluminum items, from cookware to patio furniture.
Whether you’re dealing with everyday grime or oxidation, the steps below use common tools and specifically chosen products to deliver reliable results without scratching or damage.
Quick Answer
Start with a gentle cleaners and soft cloths, then progressively tackle tougher stains with a non-scratch brush and a polishing compound kit. For stubborn oxidation, an aluminum oxidation remover gel can finish the job. Always rinse thoroughly and dry to prevent water spots.
What You’ll Need
- aluminum cleaner spray 12 oz
- non-scratch aluminum scrub brush
- aluminum polishing compound kit
- microfiber cloths for aluminum polishing
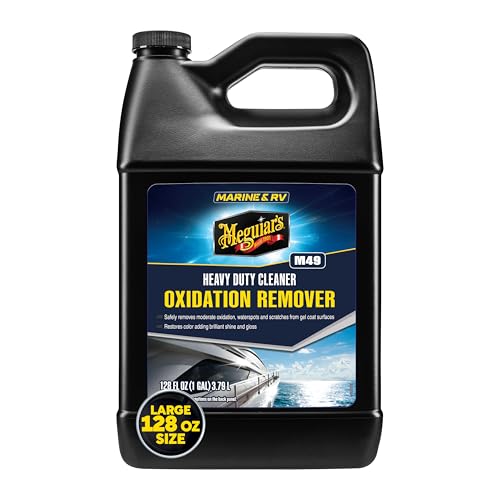
- aluminum oxidation remover gel


Before You Start
Prepare a clean workspace in a well-ventilated area. Test any cleaner on a small, inconspicuous spot first to ensure no discoloration.
time estimate: 20–60 minutes depending on the surface and level of buildup. Caution: avoid acidic or abrasive cleaners on polished or anodized aluminum, as these can etch the surface. Wear gloves to protect hands and rinse thoroughly after each cleaning stage.
Step-By-Step: How To Clean Aluminum
- Wipe away loose dirt with a soft, dry cloth to prevent scratching during cleaning.
- Spray a light layer of aluminum cleaner spray 12 oz onto a microfiber cloth and wipe the surface in a circular motion to loosen grime.
- For stubborn spots, use the non-scratch aluminum scrub brush with gentle pressure, avoiding edges or corners where the finish is thinner.
- Rinse the area with clean water and dry with a fresh microfiber cloth to prevent water spots.
- Apply the aluminum polishing compound kit according to the manufacturer’s instructions to restore shine and remove minor scratches.
- Buff the surface with clean microfiber cloths until a uniform sheen appears.
- If oxidation remains, apply the aluminum oxidation remover gel following the product directions, then rinse and dry.
- Inspect and repeat as needed on heavily tarnished sections, then seal with a protective coating if recommended by the product line.
Troubleshooting
| Symptom | Likely Cause | Fix | Prevention |
|---|---|---|---|
| Dull finish persists after cleaning | Surface oxidation or deep scratches | Apply polishing compound kit and repeat as needed | Regular cleaning and gentle handling |
| Water spots after drying | Hard water or insufficient drying | Dry with a microfiber cloth; consider a rinse with distilled water | Dry promptly after cleaning |
| Rubbing shows discoloration | Using an abrasive tool or wrong cleaner | Switch to non-scratch brush and confirm cleaner suitability | Always test on a hidden area first |
| Streaks after polishing | Uneven buffing | Buff with clean, dry cloth in a consistent motion | Keep cloths clean and free of residue |
Common Mistakes
- Using abrasive pads on polished or anodized aluminum
- Over-wetting surfaces or leaving cleaner to dry
- Neglecting to dry thoroughly, which invites water spots or corrosion over time
- Skipping a test patch and applying cleaners directly to delicate areas
Tips For Best Results
- Work in a shaded area to prevent cleaners from drying too quickly and leaving streaks.
- Use multiple clean microfiber cloths from start to finish to avoid transferring grime back to the surface.
- For aluminum cookware, avoid aggressive scrubbing that can scratch the interior over time.
- Follow product directions precisely, especially for oxidation remover gel and polishing kit steps.
- Consider a light, periodic application of a protective coating if the manufacturer approves it for your aluminum item.
Call A Professional
Seek professional help if aluminum shows deep pitting, severe oxidation that resists standard products, or structural damage such as bent or bent edges on structural components. If uncertain about applying coatings or polishing compounds to aeronautic-grade or specialized aluminum parts, consulting a pro is advised.
FAQ
Is aluminum safe to clean with everyday household cleaners?
Most mild cleaners are safe when used as directed, but avoid strong acids or alkalis on delicate finishes.
Can I skip the polishing kit and just wash aluminum surfaces?
Washing removes surface grime, but polishing helps restore shine and reduce small scratches.
What’s the best way to treat embossed or textured aluminum surfaces?
Use a soft brush and a gentle polish designed for textured finishes to avoid flattening texture.
How often should I clean outdoor aluminum furniture?
Seasonal cleaning with a light wipe-down and annual polish usually keeps surfaces looking new.
Are there eco-friendly options for cleaning aluminum?
Yes, look for biodegradable cleaners and reusable microfiber cloths to minimize waste.
Can I use the oxidation remover gel on all aluminum items?
Only if the product label indicates compatibility with your specific aluminum type and finish.
Will polishing prevent future oxidation?
Polishing can reduce the appearance of oxidation and protect against future tarnish when followed by appropriate coatings.
Buying Guide
When choosing products to clean and restore aluminum, consider size, noise level, energy efficiency, controls, and placement of the cleaning kit and tools. For most home projects, a balanced setup includes a spray cleaner, a non-scratch brush, a polishing kit, microfiber cloths, and an oxidation remover gel, all selected for compatibility with common aluminum finishes.
Size matters for workspace and storage. Smaller household items benefit from compact cleaners, while larger projects may require larger spray bottles and more cloths. Noise level is generally not a concern for cleaning, but powered tools or turbines used in polishing may introduce some sound; choose tools with comfortable operation if the area is indoors or near occupied spaces.
Energy efficiency is less of a factor for manual cleaning, but if you use any powered polisher, look for energy-efficient models with variable speeds. Controls should be intuitive, allowing straightforward adjustment of spray, brush pressure, and polishing intensity. Placement of tools should create a clean workflow: cleaners and cloths within easy reach, brushes sorted by stiffness, and a ready rinse station nearby.
In choosing between the provided product keywords, prioritize compatibility with your aluminum finish and intended use. For example, aluminum cleaner spray works well for routine dirt, while the oxidation remover gel targets heavy tarnish. The non-scratch brush protects delicate surfaces, and microfiber cloths ensure a lint-free finish. The aluminum polishing compound kit completes the restoration, giving a bright, uniform shine. Consider layering products as needed rather than relying on a single step.