Mold remediation can restore a safer living environment, but proper post-remediation cleaning is essential to prevent regrowth and ensure surfaces stay sanitary. This guide outlines a practical, step-by-step approach using common tools and techniques suitable for American homes.
Quick Answer
After mold remediation, seal off the treated area, ventilate, use an industrial HEPA vacuum and HEPA air scrubber for ongoing air filtration, dry all surfaces thoroughly with a dehumidifier, and disinfect with EPA registered antimicrobial spray. Regular moisture monitoring helps prevent relapse.
What You’ll Need
- HEPA air scrubber for mold remediation
- Industrial HEPA vacuum for mold cleanup
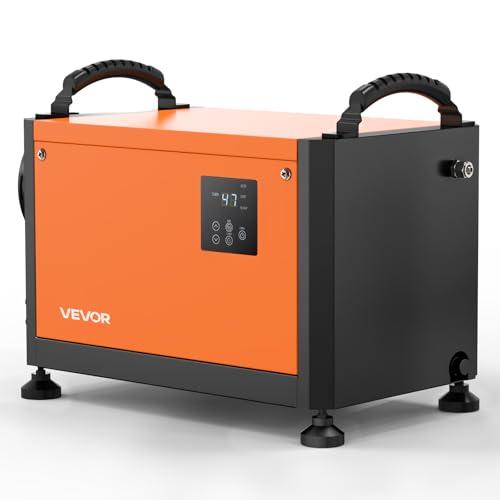
- 70 pint dehumidifier for mold remediation basement
- Infrared moisture meter for mold detection
- EPA registered antimicrobial mold remediation spray


Before You Start
Prepare the space by sealing doors and vents to prevent dust from infiltrating other areas. Ensure the area is well-ventilated, and wear appropriate PPE such as N95 respirators, gloves, and eye protection. Plan for adequate dry-out time; a typical post-remediation cleaning may take several hours to a few days depending on space size and moisture levels. Critical cautions include never introducing moisture back into the area and avoiding abrasive surface cleaning that could spread spores.
Surface readiness matters. Remove loose debris carefully, and identify damp zones with an infrared moisture meter to guide drying and cleaning priorities. If the space includes insulation or hidden moisture pockets, consider professional input for thorough drying and reconfirmation of moisture levels.
Step-By-Step: How To Clean After Mold Remediation
- Set up the air filtration system: Place the HEPA air scrubber in the remediation area to continuously filter airborne spores while cleaning proceeds.
- Contain the space: Keep doors closed and use plastic sheeting to maintain positive isolation, preventing cross-contamination with adjacent rooms.
- Vacuum surfaces with a HEPA vacuum: Gently vacuum walls, baseboards, and other hard surfaces to remove settled spores and dust before damp cleaning.
- Dry all surfaces: Run the 70 pint dehumidifier in the area to bring relative humidity down to a safe range (typically below 50–60%), monitoring with an infrared moisture meter for hotspots.
- Wipe and disinfect: Apply EPA registered antimicrobial mold remediation spray to cleaned surfaces, following label directions for contact time and coverage. Wear PPE and avoid over-saturation on porous materials.
- Address porous materials: If porous materials (carpet, drywall, insulation) show lingering moisture or odor, remove and dispose of damaged sections as needed or treat per professional guidance.
- Re-check moisture levels: Use the infrared moisture meter to confirm that all previously damp areas have returned to baseline moisture levels before finalizing the cleanup.
- Air out the space: Run the air scrubber and open enough windows or doors to promote cross-ventilation after cleaning concludes.
- Inspect for odors: If lingering musty smells persist, schedule a follow-up moisture check and, if necessary, repeat cleaning steps in affected zones.
- Document results: Record moisture readings, cleaning methods used, and products applied for future reference or property records.
- Plan ongoing prevention: Maintain humidity control and monitor for new signs of moisture intrusion to prevent relapse.
Troubleshooting
| Symptom | Likely Cause | Fix | Prevention |
|---|---|---|---|
| Musty odor persists after cleaning | Hidden moisture pockets | Reassess with infrared moisture meter; re-dry suspected areas | Ensure continuous dehumidification during first weeks after remediation |
| Visible mold returns on surfaces | Recontamination or incomplete removal | Re-clean with EPA spray; replace severely affected materials | Address moisture sources and improve airflow |
| Air scrubber seems to lose suction | Filter or intake restrictions | Replace or clean filters; ensure proper placement | Maintain filters and routine system checks |
| Relative humidity stays high | Insufficient drying or running time | Increase dehumidifier run time; add another unit if needed | Close monitoring with a hygrometer |
Common Mistakes To Avoid
- Rushing the drying phase; moisture masks ongoing mold growth.
- Over-wetting porous materials during cleaning, which can spread spores.
- Skipping PPE or improper filter maintenance for air filtration devices.
- Ignoring hidden moisture behind walls or insulation.
Awareness of these pitfalls helps sustain a mold-free environment after remediation.
Tips For Best Results
- Coordinate cleaning with humidity control: Keep indoor RH below 50–60% as the baseline target.
- Use higher-efficiency filtration: Run an industrial HEPA vacuum for heavy-duty debris pickup on hard surfaces.
- Document moisture baselines: Record initial moisture readings to track progress over time.
- Sequence matters: Clean and dry before applying antimicrobial sprays to reduce the amount of product needed.
- Color-match where possible: If repainting, select mold-resistant paints and finishes to enhance long-term protection.
Call A Professional
Seek professional help if any of these occur: extensive water intrusion, hidden mold behind walls, structural damage, or persistent health symptoms attributable to mold exposure. Stop cleaning and contact a licensed mold remediation contractor when there is uncertainty about moisture sources, structural integrity, or safety concerns.
FAQ
What is the best order of operations after mold remediation?
Ventilate, filter air with a HEPA system, dry thoroughly, then clean and disinfect surfaces, followed by a final moisture check.
How long should drying take after remediation?
Drying typically ranges from 24 to 72 hours, depending on space, climate, and dehumidification strength.
Can I reuse cured porous materials after cleaning?
Porous materials with visible mold damage often require replacement to prevent recurrence.
What should I do if mold returns after cleaning?
Reassess moisture sources, re-dry, re-clean, and consider professional assessment for hidden moisture or damage.
Buying Guide
When selecting equipment for post-remediation cleaning, consider size, noise, energy use, controls, and placement to optimize effectiveness and comfort in American homes.
- Size and capacity: Choose dehumidifiers with sufficient pint capacity for the space; larger basements may need multiple units.
- Air filtration: Industrial HEPA vacuums and HEPA air scrubbers are essential for capturing fine spores and particles.
- Energy efficiency: Look for units with energy-saving modes and automatic shutoffs when the target RH is reached.
- Controls and ease of use: Simple digital controls, timers, and clear maintenance indicators help sustain performance.
- Placement and noise: Consider unit footprint, noise levels, and mounting or placement options that minimize disruption.
Additionally, verify compatibility with existing cleaners and disinfectants and ensure products are EPA-registered for mold remediation use. If there are questions about keeping spaces safe and dry, consulting a professional can provide tailored guidance and peace of mind.