Acrylic night guards require careful cleaning to prevent bacteria buildup and maintain clarity. This guide walks through practical steps using common tools and products to keep a night guard hygienic, comfortable, and long-lasting.
Readers will find a straightforward approach that combines everyday cleanliness with specialized cleaners designed for dental appliances. The goal is to remove plaque, odors, and deposits without damaging the acrylic material or fit.
Quick Answer
Rinse the night guard after each use, soak in a mild cleaner, and gently brush with a soft toothbrush. For tougher buildup, use an ultrasonic cleaner or a dedicated mouth guard cleaning kit, then rinse thoroughly and air-dry before storage.
What You’ll Need
- Ultrasonic cleaner for night guard
- Denture cleaning brush set
- Mouth guard cleaning kit
- Night guard sanitizer device
- Antibacterial mouth guard cleaning spray


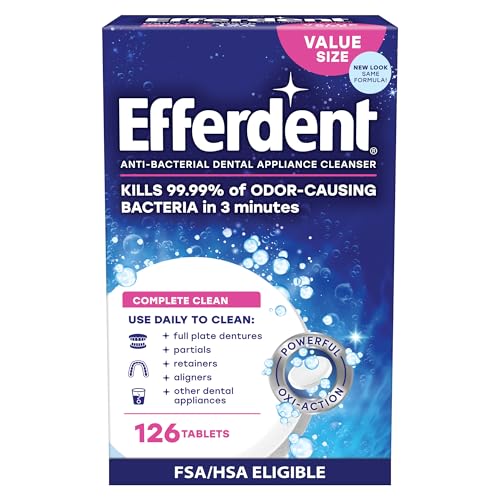
Before You Start
Before cleaning, remove the night guard using clean hands and avoid hot water, which can warp the acrylic. Inspect the guard for cracks or irregularities, and avoid aggressive scrubbing that could scratch the surface. Plan for a cleaning routine that fits daily wear and storage needs, typically taking 5–10 minutes per session.
Cautions: Do not boil or expose the guard to high heat. If the guard has visible damage or persistent odors despite cleaning, consult a dentist before using or re-fitting.
Step-By-Step: How To Clean Acrylic Night Guard
- Rinse the night guard under cool running water to remove loose debris.
- Gently brush the exterior and interior surfaces with a soft toothbrush to dislodge plaque.
- Apply a mild, non-abrasive cleaner or a dedicated antibacterial spray and let it sit briefly according to product directions.
- Place the guard in an ultrasonic cleaner if available, following the device’s manufacturer instructions for duration and settings.
- Rinse thoroughly with cool water after cleaning to remove any cleaner residues.
- Shake off excess water and pat dry with a clean towel, then air-dry completely before storage.
- Store in a ventilated, clean case to prevent moisture buildup and odors.
- Schedule a deeper clean weekly with a mouth guard cleaning kit or sanitizer device, as needed based on use.
Troubleshooting
| Symptom | Likely Cause | Fix | Prevention |
|---|---|---|---|
| Persistent odor after cleaning | Built-up biofilm | Soak in a dedicated mouth guard cleaner overnight or use an ultrasonic cleaner | Regular cleaning after each use |
| Staining on acrylic | Colored beverages or food dyes | Use a gentle cleaner and consider professional whitening options advised by a dentist | Avoid staining foods during wear |
| Creasing or warping | Hot water or improper storage | Rinse with cool water and store in a breathable case | Keep away from heat sources |
| Surface roughness after brushing | Abrasive brushes or cleaners | Switch to a soft-bristled brush and non-abrasive cleaner | Gentle cleaning routine |
Common Mistakes
- Using hot water or boiling liquids, which can deform acrylic.
- Overly aggressive brushing that scratches the surface.
- Skipping drying, which encourages microbial growth and odor.
- Not following product directions for cleaners or devices.
Tips For Best Results
- Clean immediately after removing the night guard to prevent drying of deposits.
- Use a soft toothbrush and non-abrasive cleaner to maintain clarity of the acrylic.
- Incorporate a weekly deep clean with an ultrasonic cleaner or mouth guard cleaning kit for stubborn buildup.
- Keep the storage case clean and dry; wipe it regularly to prevent mold.
Call A Professional
Seek dental advice if the night guard shows any cracks, warping, persistent odors, or if fit changes. Do not attempt to adjust the appliance yourself, as improper modification can affect protection and alignment.
FAQ
How often should I clean an acrylic night guard?
Clean it daily after use and perform a deeper clean weekly, depending on wear and odor.
Can I use bleach to disinfect my night guard?
Bleach is generally not recommended for acrylic appliances; use manufacturer-approved cleaners to avoid damage.
Is an ultrasonic cleaner necessary?
Not essential, but highly effective for removing buildup and sanitizing without scrubbing.
What if my night guard still smells after cleaning?
Try a longer soak in a dedicated cleaner or a veterinary-grade mouth guard cleaner approved for dental appliances, and consult a dentist if odor persists.
Buying Guide
When choosing products to support cleaning an acrylic night guard, consider size, compatibility, and ease of use. A quick overview of factors helps compare options:
- Size and fit: Ensure cleaners and devices accommodate your specific night guard size and material thickness.
- Noise level: Ultrasonic cleaners and sanitizers vary in sound; look for quiet operation if shared living spaces are a concern.
- Energy efficiency: Choose energy-saving devices with automatic shutoff after cleaning cycles.
- Controls and indicators: Simple timers and clear status lights reduce guesswork during cycles.
- Placement: Consider countertop or cabinet placement; some devices are compact for small spaces.
- Cleaning compatibility: Verify that products are designed for acrylic and safe for dental appliances.
- Maintenance: Look for easy-to-clean parts and readily available replacement brushes or cleaners.
In practice, a combination of a dedicated mouth guard cleaning kit and an optional night guard sanitizer device provides a balanced approach to hygiene, convenience, and appliance longevity. If uncertain, consult a dentist for recommendations tailored to the specific acrylic night guard model.