Sponges are a daily tool in American kitchens, but they can harbor bacteria and odors if not cleaned regularly. This guide provides practical steps to refresh and extend the life of your sponge using common kitchen tools and safe methods.
By following a consistent cleaning routine, you’ll reduce buildup on sponges and keep your dishes and surfaces looking polished. The methods here work for standard kitchen sponges as well as specialty scrubbers, with tips tailored to different materials and uses.
Quick Answer
Quick Method: Rinse sponge, microwaving or boiling for sanitization, then air-dry completely. For durable scrubs, consider replacing every 1–2 weeks or when signs of wear appear.
What You’ll Need
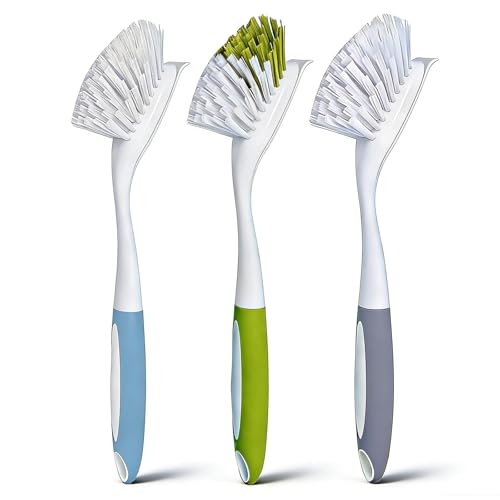
- Dish sponge scrub brush with handle
- Kitchen sink cleaning brush set
- Non-scratch sponge scrubber
- Stiff bristle pot and pan brush
- Dish wand sponge cleaner


Before You Start
Choose a cleaning method based on sponge material. Avoid harsh chemicals on non-scratch scrubbers to prevent surface damage. Ensure the sink area is dry and unobstructed for drying between uses. Typical cleaning time: 5–15 minutes per session, depending on method and sponge condition. Safety note: Do not use sponges that are moldy, severely degraded, or smell ammonia-like, as they can transfer contaminants to dishes.
Step-By-Step: How To Clean A Sponge
- Rinse the sponge under running water to remove loose debris and food particles.
- Assess the sponge for wear. If the sponge has torn fibers or persistent odor, consider replacing it.
- For general cleaning, saturate the sponge with hot water and apply a small amount of dish soap; rinse until suds vanish.
- Sanitize using a microwave method: place the damp sponge on a plate and microwave on high for 1–2 minutes. Let it cool before handling.
- Alternative sanitize method: simmer the sponge in a pot of boiling water for 3–5 minutes, then remove and dry thoroughly.
- Deep clean stubborn odors with a household disinfectant allowed for porous surfaces, or a vinegar soak (1:1 vinegar and water) for 15–20 minutes, then rinse well.
- For scrubbing tools like a non-scratch scrubber or stiff bristle brush, rinse, scrub with hot soapy water, and rinse again to remove residue.
- Rinse each item thoroughly, then squeeze out excess water and shake to remove trapped air before drying.
- Air-dry all tools in a well-ventilated area, standing brushes with bristles down or on a rack to allow complete drying.
- Store sponges and scrubbers away from the sink edge to reduce splash exposure and contamination risk.
- Set a regular replacement schedule—rotate sponges weekly or biweekly and discard any showing wear or persistent odor.
- If mold appears, discard the sponge immediately and disinfect the storage area to prevent recurrence.
Troubleshooting
| Symptom | Likely Cause | Fix | Prevention |
|---|---|---|---|
| Bad odor after cleaning | Residual moisture; absorbed food particles | Re-sanitize and ensure complete drying | Dry fully between uses; replace when odor recurs |
| Persistent odor despite cleaning | Mold growth | Discard and sanitize area; consider a replaceable option | Better storage and regular replacement |
| Tough stains remain | Built-up grease | Soak in vinegar solution or baking soda paste before rinsing | Immediate rinse after heavy use |
| Scrubber fibers fraying | Overuse or aggressive scrubbing | Switch to a softer tool or replace | Use appropriate tool for the task |
Common Mistakes
- Not drying sponges properly, which promotes bacterial growth
- Using the same sponge for raw meat cleanup or dairy without sanitizing
- Overlooking wear and tear; continuing to use degraded sponges
- Ignoring odor indicators and postponing replacement
Tips For Best Results
- Label sponges by purpose (dishes, counters, cookware) to prevent cross-contamination.
- Rotate tools weekly; keep a dedicated container for clean sponges separated from dirty ones.
- Prefer heat-based sanitization (microwave or boil) for efficiency, but avoid microwaving non-squeezable metals or damaged sponges.
- Rinse and wring thoroughly after use; store in a dry, ventilated area to promote quick drying.
- Consider pairing with a dish wand sponge cleaner for hard-to-reach areas like bottle rims and pan interiors.
Call A Professional
If mold or persistent mildew is present beyond simple cleaning, or if skin exposure to cleaning agents causes irritation, consult a professional cleaner or replace the entire set of cleaning tools. Seek medical advice if skin irritation persists after contact with cleaning products.
FAQ
How often should I replace my sponge?
Replace sponges every 1–2 weeks with frequent use, or sooner if they show odor, wear, or mold.
Can I sanitize sponges in the dishwasher?
Most sponges can be cleaned in a dishwasher on a heated dry cycle; check product packaging for compatibility.
What’s the safest way to sanitize a sponge?
Microwave or boil sanitization is effective for most sponges, though non-scratch scrubbers may require soaking in vinegar or disinfectant recommended for porous materials.
How do I prevent sponges from smelling?
Rinse after every use, wring out well, dry completely, and rotate or replace regularly to reduce odor buildup.
Is it safe to use a sponge on non-stick cookware?
Yes, but use non-scratch scrubbers to avoid coating damage and extend the life of cookware finishes.
Can I wash sponges with other dishes?
Avoid cross-contamination by dedicating sponges to specific tasks and sanitizing them between uses.
Buying Guide
Choosing the right cleaning tools depends on three core factors: sponge material, scrubbing power, and ease of maintenance. For households with hard water or heavy grease, a robust set that includes both a non-scratch sponge scrubber and a stiff bristle pot and pan brush can handle diverse tasks. Look for dishwasher-safe components and tools with ergonomic handles for comfortable, prolonged use.
Key buying factors include size and shape of sponges, noise level when scrubbing, energy efficiency of any electric cleaning options, and ease of placement in the kitchen. A compact dish wand sponge cleaner can reach tight crevices in bottles or cookware, while a kitchen sink cleaning brush set provides versatile, durable cleaning power. Consider how often you clean, the types of messes you encounter, and whether you prefer disposable versus reusable tools.
For a balanced kit, aim to combine a dish sponge scrub brush with handle for general purpose cleaning, a non-scratch sponge scrubber for delicate surfaces, and a stiff bristle pot and pan brush for stubborn grime. Think about storage: a drying rack or caddy near the sink keeps tools dry and ready. By evaluating these factors, you can assemble a practical, long-lasting cleaning setup tailored to American kitchens.