Burnt-on residue can ruin the texture of a meal and the look of a pot. This guide explains a practical, kitchen-friendly method using baking soda to restore cookware without harsh chemicals. The steps are suitable for common household pots and pans used in American kitchens.
Quick Answer
Baking soda with hot water creates a gentle, abrasive cleaning action that lifts burnt residue. Soak, scrub with the right tools, rinse, and repeat if needed. For stubborn spots, add a bit of dish soap and use a non-scratch pad to avoid scratching.
What You’ll Need
- baking soda pot cleaning kit scrub brush set
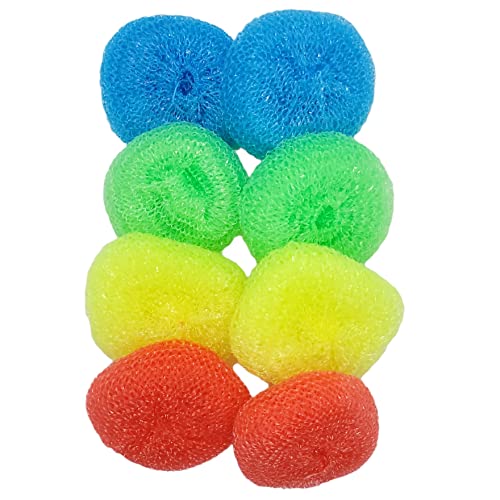
- non-scratch nylon scrub pad for burnt pots
- long-handled dish scrub brush for burnt pots
- abrasive scrub sponge for burnt-on pot residue
- stainless steel cookware scouring pad for burnt pots


Before You Start
Inspect the pot for any damage or loose handles before cleaning. Ensure the pot is cool to touch to avoid steam burns. Gather supplies in advance to minimize repeated trips to the pantry. Time estimates vary: light residue cleans in 10–20 minutes, heavy burns may take 30–60 minutes.
Safety cautions: avoid abrasive powders on nonstick coatings, which can wear away protective layers. If the pot is aluminum with a thin coating, test a small area first. Keep children and pets away from the cleaning area.
Step-By-Step: How To Clean A Burnt Pot With Baking Soda
- Remove any loose debris from the pot and rinse with warm water to loosen burnt bits.
- Fill the pot with hot water, enough to cover the burnt area, and add baking soda liberally. For very stubborn burns, start with 1/4 cup baking soda per quart of water.
- Let the mixture soak for 15–30 minutes to soften the burnt residue. For extreme cases, cover the surface with a paste of baking soda and water and let sit longer.
- Use the long-handled dish scrub brush or the non-scratch nylon scrub pad to scrub the interior in circular motions. Apply steady pressure but avoid scrubbing too hard on nonstick surfaces.
- Dip the abrasive scrub sponge in the bath and target especially stubborn areas. Alternate with a gentler pad to prevent scratching.
- If residue persists, bring the pot to a gentle boil with the baking soda solution for 5–10 minutes, then turn off heat and scrub again while warm.
- Rinse thoroughly with warm water. Check for remaining marks; repeat soaking and scrubbing if needed.
- For exterior staining, apply a small amount of baking soda paste and scrub with a stainless steel cookware scouring pad, then rinse completely.
- Dry the pot completely to prevent water spots or rust on metal surfaces.
- Store clean and dry; consider applying a thin oil layer to cast iron or carbon steel pots to prevent rust.
- Repeat as necessary for particularly stubborn pots, cycling through soaking and scrubbing as needed.
- Finish with a final rinse and a quick wipe with a clean cloth to restore shine.
Troubleshooting
| Symptom | Likely Cause | Fix | Prevention |
|---|---|---|---|
| Burnt residue remains after soaking | Residue carbonized beyond initial soak | Boil with baking soda solution again and scrub with abrasive pad | Pre-soak longer in future; avoid vigorous heat |
| Scratches appear on nonstick | Using abrasive pads on nonstick | Switch to non-scratch nylon scrub pad; use gentle motions | Use pads rated for nonstick cookware |
| Pot develops odor | Residual oils or food particles | Rewash with baking soda paste; rinse well | Rinse promptly after cooking and avoid burning foods |
| Rusted marks on metal | Moisture exposure on unseasoned metal | Dry thoroughly; apply light oil if appropriate | Dry promptly after washing |
Common Mistakes
- Using harsh metal scrubbers on nonstick coatings
- Overlooking soaking time for very burnt pots
- Mixing bleach with baking soda, which can cause unwanted reactions
- Neglecting to dry pots completely after cleaning
Tips For Best Results
- Warm water speeds up the cleaning process versus cold water
- Consistency matters: repeating gentle scrubs prevents deeper scratches
- Keep a routine: clean pots after light burning to prevent stubborn buildup
- Choose the right tool for the surface to avoid damage
Call A Professional
Seek professional help if pots have deep pitting, warping, or structural damage that could compromise safety. If nonstick coatings appear peeling or flaking, replace the cookware rather than attempting extensive scrubbing.
FAQ
Can baking soda damage stainless steel pots?
Baking soda is gentle for stainless steel when used with non-abrasive pads and moderate pressure.
Is it safe to boil baking soda in a pot?
Yes, a mild baking soda solution can help lift burnt residues without harming most cookware.
How long should I soak burnt pots?
Soaking ranges from 15 to 60 minutes depending on burn severity; longer soaks for heavy residue are common.
What if my pot is nonstick?
Use non-scratch nylon scrub pads and avoid metal scouring pads or harsh abrasives.
Can I reuse the baking soda paste?
Fresh paste is best for each cleaning session to maximize effectiveness and avoid spreading residue.
Should I use dish soap with baking soda?
A small amount can help lift grease; avoid aggressive mixtures that could require additional rinsing.
Do I need to scrub the exterior as well?
Only if the exterior has burnt-on residue or staining; use a mild cleaner and a non-scratch pad.
Buying Guide
When choosing cleaning tools for burnt pots, consider the following factors to maximize effectiveness and protect cookware.
- Size and coverage: Larger brushes can speed up cleanup for bigger pots; smaller pads reach corners more easily.
- Material compatibility: Non-scratch nylon pads protect nonstick coatings; stainless steel pads scrub metal surfaces effectively but may scratch softer metals.
- Hardness and abrasiveness: A mix of abrasive and non-abrasive tools offers versatility for different burn levels.
- Handle design: Long-handled tools reduce reaching and reduce risk of splashes, especially when pots are hot.
- Durability and cleaning ease: Reusable kits save money and reduce waste; choose tools that are easy to rinse and dry.
- Storage and organization: A compact kit with a tray or bag helps keep tools together and ready for use.
- Compatibility with cookware types: If the kitchen uses a lot of nonstick or ceramic coatings, prioritize non-scratch options.
Users may compare kits with diverse tool combinations, such as a dedicated baking soda kit, nylon scrub pads, long-handled brushes, and multiple sponges. Practical decisions balance the typical pot sizes in the home, frequency of cleaning, and the level of baked-on residue encountered during cooking. For households with a mix of stainless steel and nonstick cookware, a combination approach often yields the best results, enabling safe, effective cleaning without damaging finishes.