Keeping a bird bath clean is essential for the health of visiting birds and the surrounding environment. This guide provides practical steps, safe cleaning methods, and product recommendations suitable for American yards and climates.
Regular maintenance helps prevent algae buildup, slime, and unpleasant odors. With the right tools and a simple routine, you can keep your bird bath a welcoming refuge for feathered visitors while protecting the water from contamination.
Quick Answer
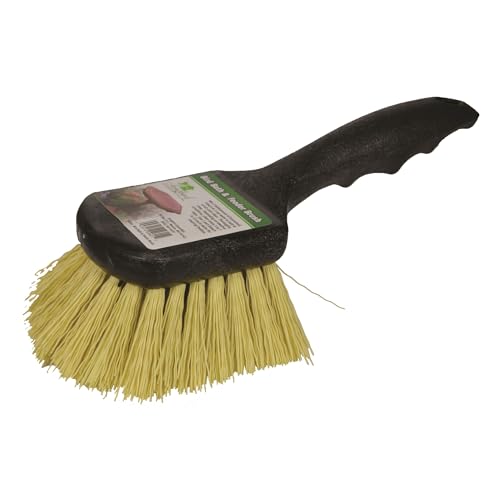
For a fast, effective clean: drain the bath, scrub away grime with a soft- or stiff-bristle brush depending on buildup, rinse thoroughly, and refill with fresh water. Use a mild, bird-safe cleaner or a diluted vinegar solution for tough spots, rinse again, and air-dry before refilling.
What You’ll Need
- Stiff nylon bird bath cleaning brush non-scratch
- Long-handled outdoor bird bath scrubber
- Soft bristle brush for bird bath interior cleaning
- Bird bath algae cleaning brush head
- Replaceable head bird bath cleaning brush set


Before You Start
Choose a cool, shaded time for cleaning to minimize stress to visiting birds. Move the bath away from high-traffic areas if possible and place on a stable surface. Wear gloves and eye protection to prevent splashes. Ensure the water source is turned off or drained before you begin. Never use toxic cleaners or bleach directly in bird baths; opt for safe cleaners or a diluted vinegar solution (1 part vinegar to 9 parts water) for safer rinsing.
Step-By-Step: How To Clean A Bird Bath
- Drain all water from the bath and remove any debris such as leaves or twigs.
- Rinse the basin with clean water to loosen surface grime.
- Choose an appropriate brush: use a soft bristle brush for delicate interiors and a stiff nylon brush for tougher buildup.
- Scrub the interior and rim with circular motions, focusing on algae and mineral deposits.
- For stubborn algae, apply a mild, bird-safe cleaner or the diluted vinegar solution and let it sit briefly before scrubbing again.
- Rinse thoroughly with clean water until no cleaner residue remains.
- Inspect the drain holes and any corners of the bowl; remove any remaining residue with a narrow brush if needed.
- Rinse again and tilt the bath to remove excess water; allow it to air-dry completely.
- Refill with fresh water and reintroduce to the birds only after the surface is dry to the touch.
- Schedule regular cleanings, such as weekly during warm months and biweekly in cooler periods, to prevent buildup.
- Store brushes and replacement heads in a dry area so they stay effective for future uses.
- Disinfect tools separately after cleaning if you notice persistent slime or biofilm between washes.
Troubleshooting
| Symptom | Likely Cause | Fix | Prevention |
|---|---|---|---|
| Green slime on surfaces | Algae growth | Scrub with stiff nylon brush; use bird-safe cleaner or vinegar solution | Regular cleaning; shaded location |
| Odor after cleaning | Residual organic matter | Rinse thoroughly; ensure complete drying before refilling | Drain and scrub weekly during warm months |
| Rings or mineral deposits | Hard water minerals | Scrub with a soft brush; apply vinegar solution to break deposits | Use filtered water when possible |
| Birds avoid bath after cleaning | Streaks or residue | Rinse until crystal clear; allow drying | Clean during cooler parts of the day |
| Brush head wears quickly | Rough surfaces or improper use | Switch to replaceable head set; use softer brush for delicate interiors | Store properly and avoid harsh scrubbing |
Common Mistakes
- Using strong household cleaners or bleach directly in bird baths
- Not rinsing sufficiently, leaving chemical residues
- Cleaning in direct sunlight or heat, which stresses birds and can dry residues quickly
- Neglecting to empty or dry the bath between cleanings, promoting biofilm formation
Tips For Best Results
- Pre-soak stubborn algae with a brief vinegar solution before brushing
- Rotate brush heads to reduce wear and extend tool life
- Keep a dedicated towel or rag for drying performance surfaces
- Consider a removable, easy-to-clean bath liner to simplify maintenance
- Place a shallow stone or smooth ramp to help birds access the bath without slipping
Call A Professional
Experts are useful if you notice persistent slimy films, mold growth, or if the bath is leaking around seams. Seek professional help when structures show cracks, cracks in seals, or if you are unsure about the material safety of your bath and cleaning products. If there is any sign of disease in birds visiting the bath, contact local wildlife authorities for guidance.
FAQ
How often should I clean a bird bath?
Clean weekly during hot months and biweekly in cooler periods, adjusting for local bird activity and rainfall.
Can I use vinegar to clean my bird bath?
Yes, a diluted vinegar solution works for mineral deposits and algae; rinse thoroughly before refilling.
What brushes are best for interior cleaning?
A soft bristle brush is ideal for interiors, with a stiff nylon brush for tougher buildup on exterior surfaces.
Should I dry the bath before refilling?
Yes, allow the bath to dry completely to minimize microbial growth before adding fresh water.
What if birds avoid the bath after cleaning?
Rinse to remove residues and clean during cooler parts of the day; ensure the surface is dry and inviting.
Can I use a pressure washer?
Generally not recommended; pressure can crack or erode some bird baths. Use gentler scrubbing and rinsing methods.
Is there a difference between plastic and stone baths?
Material affects cleaning tools and methods; follow manufacturer guidelines and use non-scratch brushes for plastics.
Buying Guide
When selecting a bird bath and cleaning setup, consider size, material, and maintenance needs. A shallow, wide bowl is easiest for birds to access and simplifies cleaning. Look for durable materials that resist heat and UV exposure in outdoor environments. Noise is not a factor for baths, but stability matters to prevent tipping. Energy efficiency relates to powered features like fountains; choose simple, low-maintenance designs if you want minimal upkeep. Controls should be straightforward, with accessible filler and drain points. Placement should balance sun exposure, shelter from wind, and ease of cleaning access. Compare options based on cleaning compatibility, included brushes, and whether replaceable heads are available to extend tool life.