Sugar soap is a powerful, versatile cleaner commonly used to prep walls before painting or after minor DIY projects. It helps remove grease, fingerprints, dust, and chalky residues without overly stripping surfaces. This guide explains a safe, effective approach for American homes, including what to use, how to apply it, and how to handle tricky finishes.
Whether you’re preparing a room for repainting, tidying up high-traffic areas, or refreshing a baby’s nursery, sugar soap can simplify wall cleaning. The focus here is on common wall surfaces like painted drywall, plaster, and light-textured finishes. Always test in an inconspicuous spot first to confirm compatibility with your paint or wallpaper.
Quick Answer
Best method: Mix a sugar soap solution per label instructions, wipe walls from top to bottom with a damp microfiber cloth, rinse with a clean cloth, and let dry before painting or applying new finishes.
What You’ll Need
Gather these tools and products to clean walls efficiently. The list emphasizes sugar soap and compatible accessories for safe, thorough results.
- sugar soap wall cleaner concentrate 1 liter
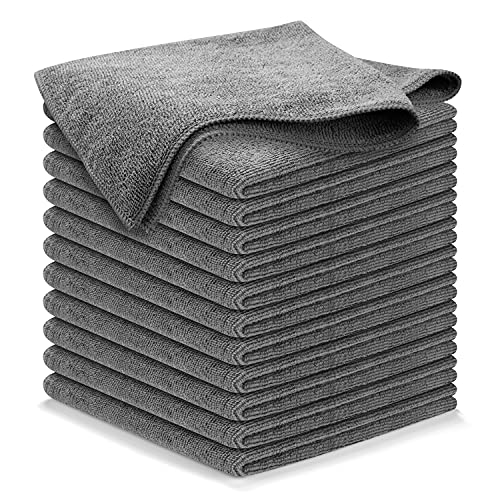
- microfiber wall cleaning cloth non-scratch
- soft bristle wall scrub brush 2 inch
- paint prep sponge for cleaning walls
- wall cleaning kit bucket microfiber cloths

Before You Start
Prepare the area and protective steps to prevent damage or mess. Move furniture, lay down drop cloths, and cover floors. Use gloves to protect hands in case of prolonged contact with cleaner. Open windows or increase ventilation to avoid fumes. Let surfaces dry completely between steps if you’re applying fresh paint later. Safety note: never mix sugar soap with bleach or ammonia, and avoid highly caustic cleaners on soft wallpaper or delicate finishes.
Step-By-Step: How To Clean Walls With Sugar Soap
- Read the label on your sugar soap concentrate and prepare the suggested dilution in a bucket of warm water.
- Dip a microfiber wall cleaning cloth non-scratch into the solution and wring until damp, not dripping.
- Begin at a high corner and wipe a 2–3 foot section in smooth, even strokes to lift dirt and oily residues.
- For stubborn spots, use a soft bristle wall scrub brush 2 inch or a damp sponge to gently target the area. Don’t press hard on flat painted surfaces.
- Rinse the cloth frequently in clean water, then wipe the wall with a fresh damp cloth to remove any soap residue.
- Work methodically downward in sections, ensuring you don’t miss any areas like around switch plates or baseboards.
- Inspect for remaining stains. If needed, repeat on small patches rather than over-wetting the entire wall.
- Allow walls to air-dry completely before repainting or applying new finishes. If the room is humid, use a fan to speed up drying.
Troubleshooting
| Symptom | Likely Cause | Fix | Prevention |
|---|---|---|---|
| streaks after wiping | excess soap or improper rinsing | wipe with fresh water and a clean cloth, repeat as needed | rinse frequently, avoid over-wetting |
| paint lifted or peeled | overly aggressive scrubbing or moisture on delicate paint | test in a hidden spot; use gentler motions and less moisture | dry surfaces between cleanings, follow paint manufacturer guidance |
| sticky residue | soap film left behind | perform an extra rinse with clean water | use minimal soap concentration |
| discoloration or water spots | uneven drying or high mineral content in water | wipe with distilled water and ensure thorough drying | work in a well-ventilated area |
Common Mistakes
- Using too strong a solution or scrubbing vigorously on delicate finishes
- Skipping a rinse step, leaving soap film on walls
- Cleaning waxed or glossy surfaces with abrasive tools
- Not testing a small area before full-wall cleaning
Tips For Best Results
- Always start at the top and work downward to prevent dirty drips on cleaned sections.
- Use a clean, non-scratch microfiber cloth for best lint-free results.
- Rinse cloths frequently to avoid spreading dirt around the wall.
- For textured walls, a soft brush helps dislodge embedded grime without damaging the texture.
- If walls are freshly painted, wait at least 24–48 hours before cleaning to avoid softening paint.
Call A Professional
Consider a professional painter or cleaner if you encounter:
- large areas of peeling paint or wallpaper damage
- extensive mold, mildew, or water damage
- unusual indoor coatings or lead-based paint in older homes
- repeated cleaning without satisfactory results
FAQ
Is sugar soap safe on painted walls?
Yes, when diluted and used as directed, sugar soap is generally safe for most painted surfaces. Always test a small, inconspicuous area first.
Can sugar soap remove stains from fabric or wallpaper?
Sugar soap is designed for walls and hard surfaces; test on wallpaper or fabrics, and avoid saturating delicate materials.
Should I rinse after using sugar soap?
Yes. Rinsing removes soap residue that could attract more dirt or leave a film on walls.
How long should walls dry after cleaning?
Drying times vary with humidity and ventilation; typically 1–4 hours, longer in damp conditions.
Can I use sugar soap on glossy surfaces?
Light cleaning is usually safe, but avoid aggressive scrubbing on highly glossy finishes to prevent micro-scratches.
What if stains return after cleaning?
Stubborn stains may require a repeat cleaning or a professional assessment, especially if they are oil-based or embedded in the paint.
Buying Guide
When selecting sugar soap products and accessories for wall cleaning, consider size, versatility, and compatibility with your surfaces. A concentrated sugar soap can be diluted to fit various cleaning tasks, while a ready-to-use spray may provide quick touch-ups around the home. Noise level and energy efficiency are less relevant for manual cleaning, but choose tools with comfortable handles and durable bristles for long sessions. Look for a complete kit with microfiber cloths and a pair of brushes, plus a sturdy bucket or caddy for efficient workflow. Ensure tools are non-scratch and suitable for painted finishes. Consider storage space and ease of substitution with similar cleaners when needed.