Grease buildup on a stove top is a common kitchen issue that can affect cooking performance and overall cleanliness. This guide provides practical steps using common household tools and targeted cleaning products to restore shine and keep a stove top looking new. The approach works for stainless steel, glass, and ceramic surfaces with careful technique and the right supplies.
Quick Answer
Begin with a warm, damp microfiber cloth to loosen grime, then apply a degreaser spray, followed by a non-scratch scrub for stubborn spots. For glass and ceramic surfaces, finish with a melamine sponge to lift residue without scratching. Wipe dry and polish with a clean cloth for a streak-free finish.
What You’ll Need
Gather the following tools and products to tackle grease effectively:
- Stovetop degreaser spray 24 oz
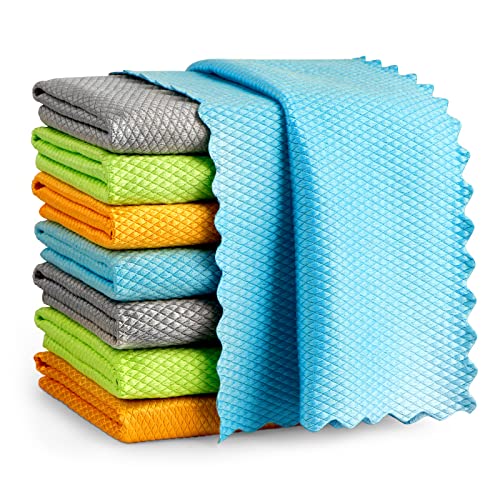
- Stainless steel stove top cleaner microfiber cloth 12×12
- Stovetop scraper blade and replacement blades
- Melamine sponge stovetop cleaner 2 pack
- Non-scratch nylon scrub brush for glass stovetop


Before You Start
Safety first: ensure the stove is cool before cleaning. Remove burner caps, grates, and any detachable components and set them aside in warm water if needed. Work in a well-ventilated area or open a window to minimize fumes from cleaners. For coated surfaces, test a small, inconspicuous spot first. Time estimate: 15–30 minutes for a standard cleanup after heavy cooking.
Critical cautions: avoid abrasive pads on delicate finishes, never use metal tools on glass surfaces, and keep cleaners away from open flames or electrical components.
Step-By-Step: How To Clean A Greasy Stove Top
- Turn off the range and remove all removable parts, including grates and burner caps. Place them in warm, soapy water.
- Wipe the surface with a warm, damp microfiber cloth to loosen loose grease and food particles.
- Spray a generous amount of the stovetop degreaser spray over greasy areas. Let it sit for 30–60 seconds to break down fat.
- Use the non-scratch nylon scrub brush on glass surfaces to gently work in circular motions, then switch to the melamine sponge for stubborn spots.
- For stainless steel, buff in the direction of the grain with the stainless steel stove top cleaner microfiber cloth to avoid streaks.
- Use the stovetop scraper blade to carefully lift baked-on residue from burners and edges, replacing blades as needed.
- Rinse the cloth and wipe away all cleaner residue. Reapply a light layer of degreaser if needed and wipe again.
- Dry the surface with a clean, dry microfiber cloth to prevent water spots and streaks.
- Reassemble burner components and return items to position once the surface is fully dry.
- Inspect for remaining spots; repeat targeted cleaning on any stubborn patches.
- Finish with a quick wipe-down to ensure a uniformly clean finish across all areas.
Troubleshooting
| Symptom | Likely Cause | Fix | Prevention |
|---|---|---|---|
| Streaks on stainless steel | Residual cleaner or water spots | Wipe with dry microfiber cloth in the grain direction | Dry completely after cleaning |
| Scratches on glass surface | Using abrasive tools | Switch to non-scratch nylon brush and melamine sponge | Avoid metal scraper on glass |
| Grease reappears quickly | Residue left behind or insufficient degreaser contact | Reapply degreaser and allow longer dwell time | Clean regularly to prevent buildup |
| Discoloration near burners | Overheating or harsh chemicals | Rinse thoroughly and use gentle cleaner | Test cleaners in a small area first |
Common Mistakes
- Using abrasive pads on glass or ceramic surfaces, which can scratch or dull the finish.
- Over-wetting the surface, causing cleaner to seep into control panels or wiring areas.
- Skipping the rinse step, leaving residue that attracts more grease.
- Neglecting to remove burner grates and caps before cleaning, which can hide grime and cause uneven results.
Tips For Best Results
- Warm up the surface slightly with a dry cloth before applying cleaner to help soften grease.
- Apply cleaner in small sections to avoid drying and streaking before you wipe.
- For stubborn baked-on grease, let the degreaser dwell longer or reapply and gently re-scrub before rinsing.
- Keep a dedicated microfiber cloth for stainless steel to maintain a consistent finish and avoid cross-contamination with other surfaces.
- Regular maintenance—wipe after spills and weekly light cleaning—prevents heavy buildup.
Call A Professional
Consider professional help if the stove top has deep stains that do not respond to standard cleaning, if you notice peeling finishes, or if there are signs of damage to electrical components, gas fittings, or the cooktop seal. Do not attempt repairs yourself if components appear compromised or flooded with cleaning agents.
FAQ
Can I use a standard kitchen degreaser on a glass stovetop?
Yes, but choose a non-abrasive formula and test in a small area first to avoid scratching.
What should I do if my stovetop is extremely dirty?
Apply degreaser, let it dwell longer, and use a melamine sponge for tough spots, followed by a thorough rinse and dry.
Are there safe substitutes for the scraper blade?
Plastic or silicone scrapers designed for glass stovetops are safer alternatives to metal blades.
How often should I clean my stove top?
Wipe down after each use and perform a deeper clean weekly or after heavy cooking to prevent buildup.
Buying Guide
When choosing products to keep a greasy stove top clean, consider size, compatibility with surfaces, and convenience. Key buying factors include:
- Size and coverage: A 24 oz degreaser offers ample coverage for regular kitchen use; larger households may prefer bigger bottles for fewer refills.
- Surface compatibility: Choose cleaners labeled for stainless steel, glass, and ceramic to protect finishes.
- Scrubbing tools: A non-scratch nylon brush and a soft microfiber cloth prevent scratches while delivering a streak-free finish.
- Abrasive alternatives: Melamine sponges provide effective cleaning without abrasive damage, useful for baked-on grime.
- Replacement blades: Keep spare blades for the stovetop scraper to maintain cleaning efficiency.
- Ease of use: Assembled cleaning kits reduce the number of steps and ensure you have all needed tools in one package.
How should you balance these factors? Consider your stove surface type, typical cleaning frequency, and whether you prefer lightweight spray cleaners or deeper-duty scrubbing tools. Do you cook frequently on a glass or ceramic top, and would you benefit from a dedicated microfiber cloth set? Think through these questions to tailor a kit that keeps grease under control with minimal effort.