Buffing pads are essential for achieving a smooth, polished finish on automotive surfaces and other projects. Proper cleaning extends the life of pads and maintains optimal performance. This guide explains simple, safe methods to clean buffing pads, using common tools and products.
Quick Answer
Rinse with warm water, use a dedicated pad cleaning solution, gently scrub with a soft brush, rinse thoroughly, and air-dry away from direct heat. For stubborn residues, repeat the process or use a specialized pad washer as needed.
What You’ll Need
- buffing pad cleaning brush or soft-bristle brush
- pad washer for polishing pads (optional for heavy use)
- foam buffing pad cleaner solution or mild detergent
- microfiber polishing pad cleaning kit (optional for delicate fibers
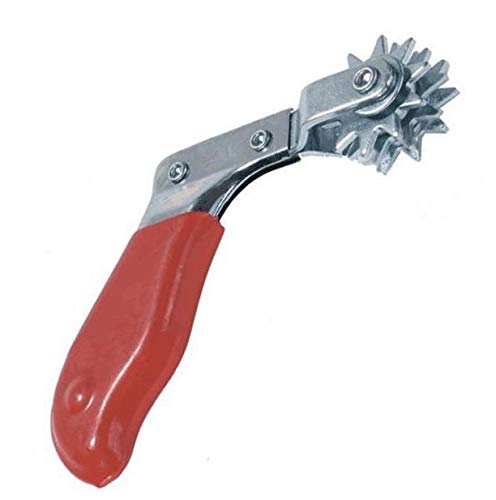
- polishing pad cleaning and detailing brush set for edge cleaning


Before You Start
Set up in a well-ventilated area and wear gloves to protect the hands from cleaners. Check pad type and follow any manufacturer guidance to avoid damaging foam or microfiber. Prepare a basin with warm water and have a dry, clean surface for air-drying. Time estimate: 15–30 minutes per pad in typical use; heavier soils may take longer. Important: never use hot water or harsh solvents that could degrade padding fibers.
Step-By-Step: How To Clean Buffing Pads
- Detach the pad from the backing plate if applicable and inspect for wear or damage.
- Rinse the pad under lukewarm running water to loosen surface residues.
- Apply a small amount of foam buffing pad cleaner solution or mild detergent and work it into the fibers with the cleaning brush.
- Gently scrub in circular motions, paying attention to creases and edges where residue collects.
- Rinse thoroughly until the water runs clear and no suds remain.
- If built-up oils persist, use a pad washer for polishing pads or repeat the cleaning steps with a bit more cleaner.
- Press out excess water with a clean towel and reshape the pad.
- Air-dry completely on a clean surface away from direct heat or sunlight before reusing.
- Store pads in a clean, dry container or bag to prevent contamination.
- For heavy use, repeat cleaning after each job to maintain performance and prevent cross-contamination.
- Regularly inspect pads for tears or glazing and replace when necessary to avoid subpar results.
- Label pads by type (foam, microfiber) to ensure correct usage with future projects.
Troubleshooting
| Symptom | Likely Cause | Fix | Prevention |
|---|---|---|---|
| Residue remains after cleaning | Oil buildup or incompatible cleaner | Switch to foam buffing pad cleaner solution and scrub longer | Use the recommended cleaner for pad material |
| Foam pads feel stiff after dry | Over-drying or improper air flow | Re-wet slightly and air-dry with better air circulation | Store in breathable containers |
| Discoloration or dye bleed | Harsh chemicals or cross-contamination | Rinse thoroughly and use dedicated cleaners per pad type | Keep microfiber and foam pads separate |
| Pads shed fibers during polishing | Wear or degraded foam | Replace pad; avoid using worn pads | Inspect pads before each use |
Common Mistakes
- Using hot water or strong solvents that weaken foam
- Rushing the drying process and storing damp pads
- Using the same brush on both foam and microfiber pads
- Neglecting to rinse thoroughly, leaving cleaner residues
- Not inspecting pads for wear before reuse
Tips For Best Results
- Clean pads immediately after use to prevent set-in residues.
- Keep a dedicated cleaning kit for each pad type to avoid cross-contamination.
- Rotate pads to distribute wear evenly and extend lifespan.
- Air-dry pads flat, not stacked, to prevent moisture entrapment.
- Label and organize pads by job type (polishing, finishing) for efficiency.
Call A Professional
Consider professional help if pads show persistent glazing, broken fibers, or signs of chemical damage that affect performance. Seek a detailing professional or pad supplier if you’re unsure about pad compatibility with specific compounds or polishes.
FAQ
Can I wash buffing pads in a washing machine?
Machine washing is generally not recommended, as agitation can damage fibers. Hand washing with a mild cleaner is safer and more controllable.
How often should I replace buffing pads?
Replacement depends on usage and condition; look for cracking, excessive shedding, or poor performance as signs to replace.
Are microfiber pads harder to clean than foam pads?
Microfiber can trap more residue and may require a specialized cleaning kit, but proper brushing and rinsing will restore most fibers.
Is it okay to use the same cleaner for all pad types?
Use cleaners appropriate for each pad material to prevent damage and achieve best results.
Buying Guide
Choosing the right cleaning setup for buffing pads depends on several factors. Size matters: larger pads cover more surface area but may require bigger cleaners or a pad washer. Noise level is a consideration for home garages with proximity to living spaces, especially when using a pad washer. Energy efficiency and maintenance costs matter for frequent use, so select tools with durable motors and easy-to-replace parts. Controls should be simple and straightforward, with clear on/off and speed settings. Placement should allow for safe drying and storage, ideally in a clean, dry cabinet or bin away from direct sunlight. When comparing kits, consider the included buffing pad cleaning brush, pad washer for polishing pads, and polishing pad cleaning and detailing brush set to ensure comprehensive coverage. If you polish different materials, a microfiber polishing pad cleaning kit can help maintain pad performance and longevity. Look for compatibility with your pads’ materials and a cleaning routine that fits your workflow. Would you benefit from a dedicated, all-in-one cleaning solution or modular tools you can mix and match? Prioritize reliability and ease of use to keep pads in peak condition for consistent results.